
No Naked Envelopes! Why would you want a naked envelope when you can decorate it with stamps, ink and of course designer paper? If you’ve gone to all of the trouble to create a gorgeous card you may as well create a fancy envelope to go with it!
It makes sense to use the same stamps and inks that you used on your cards on your envelope but how do you fancy up your envelope with designer paper? Think envelope liner. We’ve all received those fancy cards with the foil-lined envelope. So how do you do that yourself? Try Stampin’ Up!’s Envelope Dies.
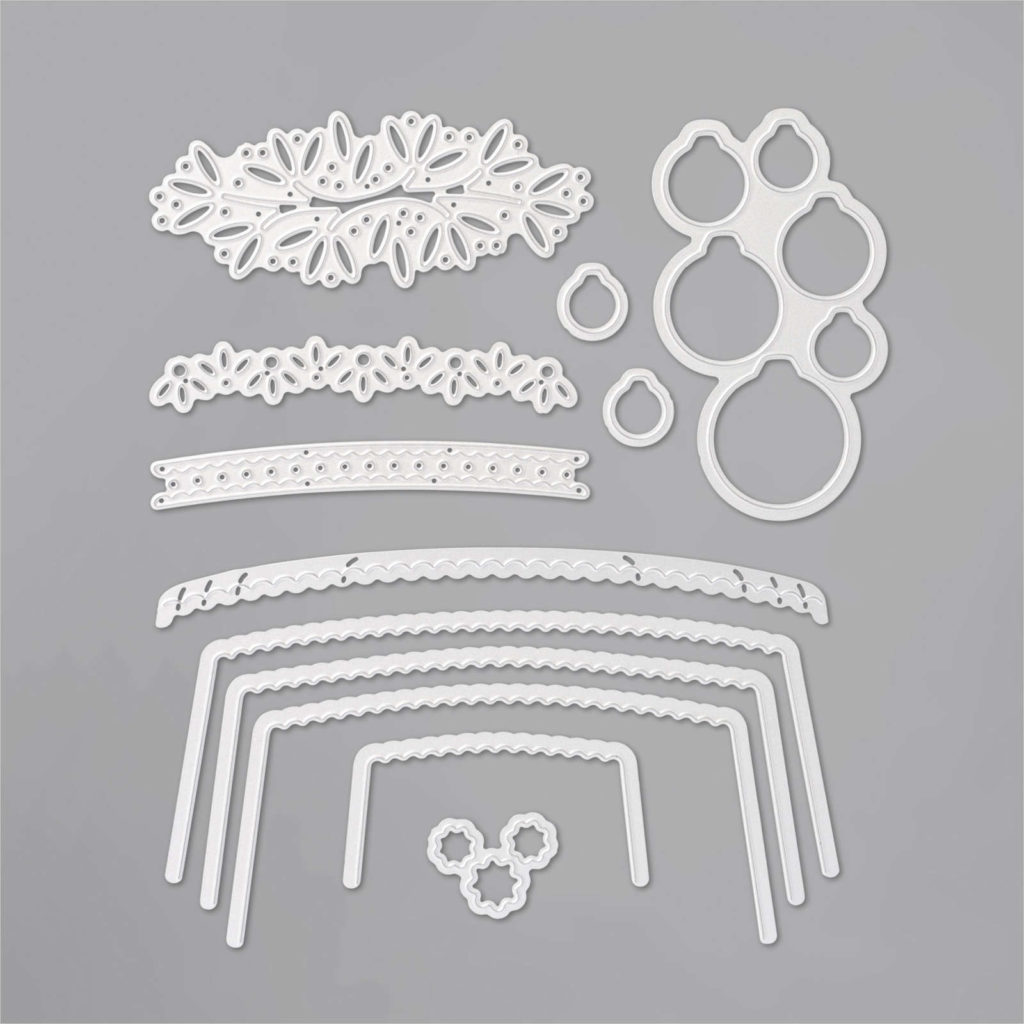
Oh, my gosh! There are 12 dies in this die set. You can easily make envelope liners for four different size envelopes! That’s not all. There are other decorative dies for your envelopes as well as dies that coordinate with the Ornamental Envelopes Stamp set.
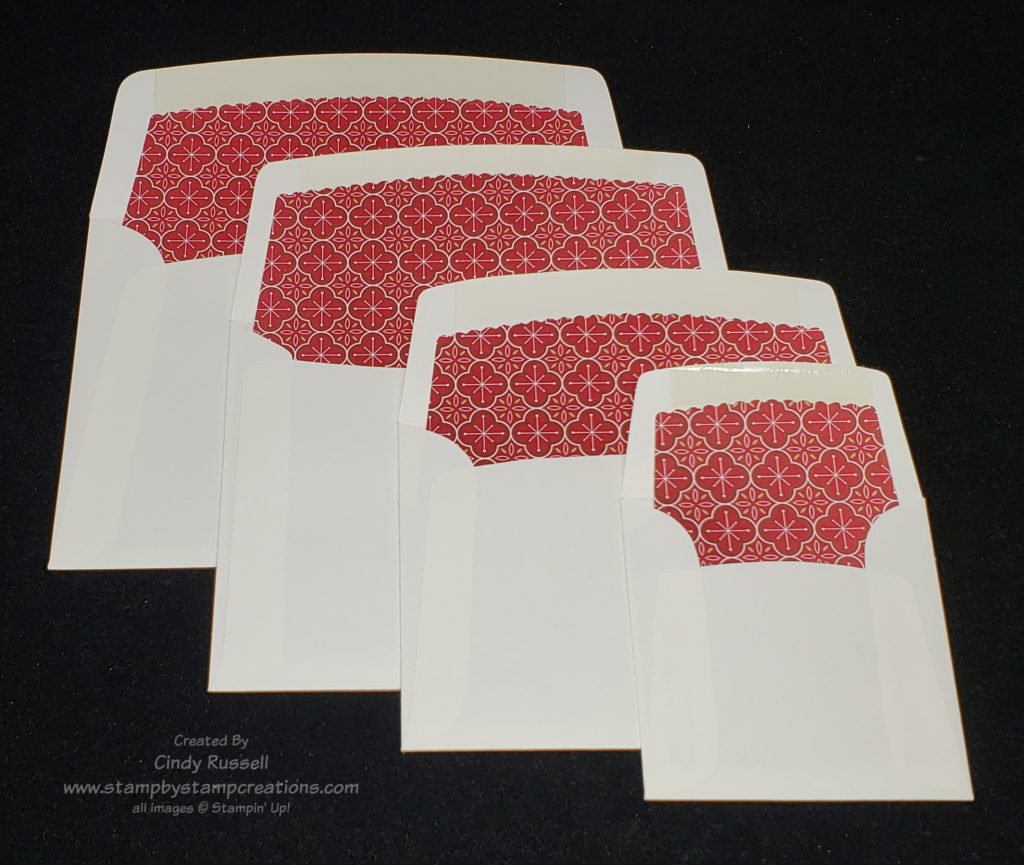
Envelope liners really can make your envelope special. As you can see in the above photo, the dies for the liners only cut the top portion. How do you figure out what size piece of designer paper to use?
The first thing you need to decide is whether or not you want the liner to cover the entire inside of the envelope. At a minimum you want your designer paper to be about an inch below the lowest portion of the back of the envelope. You also need to decide how wide you want your liner to be. You can have the width of the liner just slightly narrower than the width of the envelope or you can make the liner the width of the die. Below you can see a little chart to help you decide what size liner you want.
| Envelope Size | Maximum Liner Size | Minimum Liner SIze | |
| Small | 3-1/8” x 3-1/8” | 3” x 4” | 2 ½” x 2 ½” |
| Medium (Notecard) | 5-1/16”x 3-5/8” | 5” x 4-7/8” | 4 ¾” x 2-5/8” |
| Regular (A2) | 5 ¾” x 4 3/8” | 5-5/8” x 6” | 5 ¼” x 3 ¼” |
| Large | 6 ½” x 4 ½” | 6-3/8” x 6-1/8” | 5-7/8” x 3-1/8” |
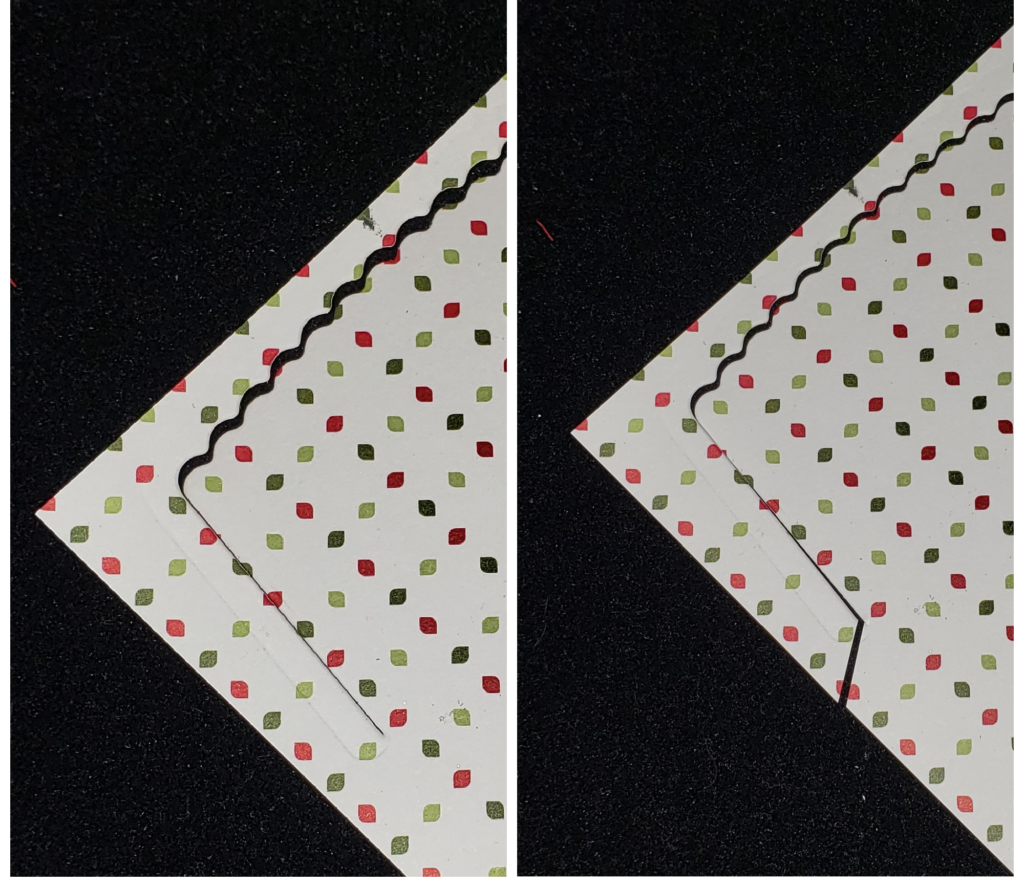
To make sure that I have my die centered, I’ve marked the center of my die and I lightly mark the center of the top edge of the paper with a pencil.
If you are using my dimensions for the maximum liner size you will want to note that you will have to do a little trimming with your scissors after you die cut the liner. I just make a small angle cut to where the die ends.
Once you’ve die cut your envelope liner you want to slip it into the envelope to make sure it fits as you want it to. Leaving your liner in the envelope, only place adhesive on the flap of the envelope in the area under the envelope glue and the fold of the flap. Line up the scalloped edge of the liner with the lower edge of the envelope glue on the flap and center the liner with the sides of the envelope.
Now you need to make a crease in the liner where the fold of the envelope flap is. One method of doing this is to carefully fold the flap of the envelope down to a closed position and crease well. The second way would be to line of the fold of the envelope in the cutting/scoring track of your Stampin’ Trimmer and score carefully then fold along score line. Both methods work well. If you are using the Stampin’ Trimmer method just be sure to use the scoring blade, not the cutting blade. Ha!
Creating envelope liners isn’t the only thing the Envelopes Dies does. Check back on Thursday for some other fun ideas that you can do with these dies. Remember….No Naked Envelopes!