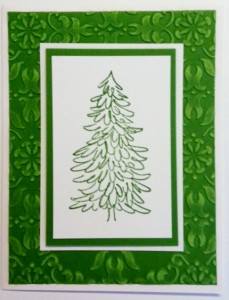
Open House Evergreen

Good morning!  There’s a little bit of snow on the ground this morning and it made me think of Christmas.  So, when I’m thinking of Christmas, I naturally think of Christmas cards!  Therefore….I have a Christmas card for you today!  😀

We made this card at my Open House way back in August!  It’s a fairly simple card with tons of layers.  I wanted to showcase the new color, Gumball Green, as well as the Core’dinations card stock.

I used the Vintage Wallpaper Embossing Folder on the Gumball Green Core’dinations card stock at my Open House because I didn’t have my new favorite embossing folder, Lacy Brocade.  It looks great with both backgrounds but the Lacy Brocade has a lighter feel to it.  After I embossed the Core’dinations card stock I used the new Stampin’ Up! Sanding Block to distress it.  What a great look!  Just stamp the tree and add some layers and your card is done!  This would make a great and easy card to mass-produce!

Have a great day!  Take care and Happy Stamping!

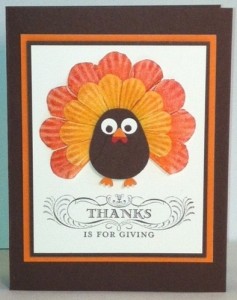
Paper Daisy Turkey

Stamp Set: Seasonal Sayings
Card Stock: Chocolate Chip, PUmpkin Pie, Very Vanilla, Riding Hood Red
Ink: Chocolate Chip, Daffodil Delight, Pumpkin Pie, Riding Hood Red
Accessories: Paper Daisies, Stampin’ Dimensionals
Tools: Owl Builder Punch, 1/8″ Circle Punch, Stampin’  Sponge

Hello!  Thanksgiving is coming up FAST!  I need to get decorations up so I can enjoy them for awhile.  Today’s card is an adorable card for Thanksgiving.  You gotta love that darn owl punch!  It’s so versatile!  🙂

I used a Stampin’ Sponge to sponge two different colored inks on each daisy.  I used Daffodil Delight and Pumpkin Pie on the small daisy and Pumpkin Pie and Riding Hood Red on the large daisy.  So easy!  The little turkey beak is the heart fromthe same punch!  TSC…too stinkin’ cute!

Only one more card to cut for next week’s Stamp-a-Stack.  Now I need to start planning my class for the week after Thanksgiving.  I would really like to be ahead of the game.  It’s a great aspiration….let’s see if I can get it done!

Have a great day!  Take care and Happy Stamping!
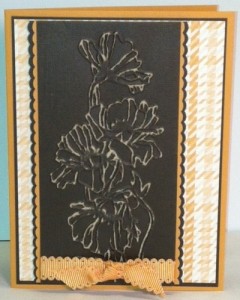
Fall Flowers

Card Stock: Early Espresso, More Mustard, Very Vanilla
Specialty Paper: Early Espresso Core’dinations Card Stock, Howlstooth & Scaringbone Designer Paper
Accesories: More Mustard Scallop Dot Ribbon, Stampin’ Dimensionals
Tools: Big Shot, Flower Garden Embossing Folder, Sanding Block, Dotted Scallop Ribbon Border Punch

Hello!  I’m catching up on things and hopefully I’ll be able to stay up-to-date on my blog posts!  Sheesh!

Today’s card was one we made a few weeks ago and I  CASEd it from a card we made at a Shoebox Swap with the team.  It’s a pretty simple card.  I really like the new Core’dinations card stock.  It really adds a new dimension to your projects, especially when you use the sanding blocks with it.

Today I need to start cutting card stock for next week’s Christmas Card Stamp-a-Stack.  There’s still some space left.  Let me know if you’d like to join us!

Have a great day!  Take care and Happy Stamping!
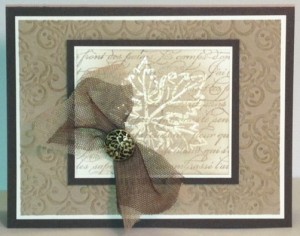
Gently Falling Emboss Resist

Stamp Sets: Gently Falling, En Francais
Card Stock: Early Espresso, Very Vanilla, Crumb Cake
Ink: Crumb Cake, Versamark
Accessories: Crumb Cake & Early Espresso Tulle, Antique Brads, Stampin’ Dimensionals, Clear Embossing Powder
Tools: Big Shot, Lacy Brocade Embossing Folder, Stampin’ Sponge, Paper Piercing Tools, Heat Tool

I really haven’t forgotten you….I just have to stop leaving town for long periods of time because I get too far behind on everything!  Yikes!  Busy, busy, busy!  Class last week, class this week and Stamp Camp on Saturday.   I may have time for a quick breath starting Sunday but then it’s time to get ready for my Christmas Card Stamp-a-Stack classes.  Good thing I love what I do!

I need to catch you up on all of the great projects we’ve done in the last few weeks.  This card is probably my favorite of the ones we made in our Fall/Thanksgiving class.  I CASEd it from my sister stamper, Gina.  Thanks Gina!  Of course I changed it up just a bit but I love the look of this card.  I used the Emboss Resist Technique on the leaf.  First I stamped the small piece of Very Vanilla card stock with the En Francais Background stamp with the Crumb Cake Ink.  Then I stamped the leaf in Versamark and embossed it with clear embossing powder.  The next step was to rub the Crumb Cake ink gently over the embossed leaf to bring out the design.  Isn’t it gorgeous?

I need to go start working on all of those final details for Stamp Camp.  Have a great day!  Take care and Happy Stamping!
Home, Sweet Home

Hello Denver!  I’m home!  My trip didn’t seem quite so long while I was away but when I got home and saw all of the mail and packages on the kitchen table I realized just how long it had been!  2 1/2 weeks is a long time to be gone.  Glad to be home but now I have to tackle unpacking, laundry and of course the trip to the grocery store that will probably take hours since we have no food in the house!  It should be a very busy day but then I get to watch the Denver Broncos play the Sand Diego Chargers tonight!  Woo Hoo!


Stamp Set: Toxic Treats
Card Stock: Basic Black, Basic Gray, Very Vanilla
Designer Paper: Howlstooth and Scaringbone
Ink: Basic Black, Basic Gray
Tools: Decorative Label Punch
Accessories: Basic Black Taffeta Ribbon

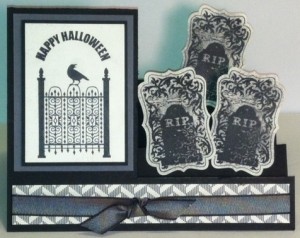
Today’s card is a Halloween card that I CASEd.  I received the original in a swap.  Don’t you love it?  I love the side- step idea.  Doesn’t it work perfect for the grave stones?  I used the Toxic Treat Stamp Set from the Holiday Catalog on this card.  Pretty spooky, huh?!

Well, I should get to work on the millions of things that need to get done.  Have a great day!  Take care and Happy Stamping!
French Foliage Collage

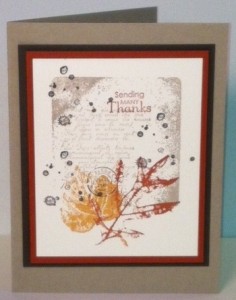
Hello again!  Two days in a row!  Aren’t you thrilled?  Ha!  Today’s card is another one we will be making at my sister’s class this week.  It’s a nice and simple fall card.  I actually used it as a thank you note for some of my customers recently.

The first step in making this card is to ink up your clear block with Crumb Cake ink and then stamp it on your card stock.  This is such a cool technique!   I love how you get a different look each time you ink the block.   After that I just stamped all the other images.  Simple!  I did have to add a few layers of card stock though.  Simple is one thing….no layers is another!  🙂

Have a great day!  Take care and Happy Stamping!
Floral District Circles

Hello!  No, I did not fall off the face of the earth.  I’m in the Minnesota Homeland, just returned from the wilds of Canada where hubby and I spent the long weekend cutting, chopping and stacking wood with his parents.  The weather was horrible but we had a good time.  We got TONS of wood cut for the rest of the fall and winter to heat the cabin.

Now that I’m back to civilization with internet I can finally add a post or two to my blog.  I apologize for falling so far behind.   Thursday night this week I’m doing a mini Stamp-a-Stack class for my sister and some of her friends.  Needless to say, that was what I was doing right before our trip….I had to choose the cards as well as cut the card stock and pack up everything I would possibly need for the class.

Stamp Set: Friendly Phrases
Ink: Rich Razzleberry
Card Stock: Whisper White, Rich Razzleberry
Designer Paper: Floral District
Accessories: Basic Rhinestone Jewels, Stampin’ Dimensionals
Tools: 1 3/4″, 1″ and 3/4″ Circle Punches, Small Heart Punch

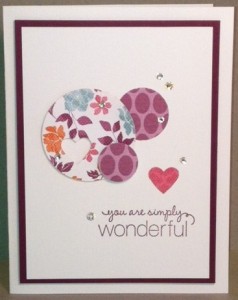
Today’s card is one of the cards for the class.  I CASEd it from my upline Tara.  She has such great ideas that are simple.  I still have a hard time coming up with simple but I’m getting better.  The circles are cut from the Floral District Designer Paper pack.  Isn’t this a great idea?  Just punch out circles from beautiful designer paper and layer them on your card!  I LOVE it!  Simplicity at it’s best.  Add a layer of colored card stock,  some rhinestone jewels and a sentiment and you have a beautiful card!  Don’t be surprised if you see this card at a future class!  😀

It’s time to get ready to head to the mall with my mom.  Have a great day!  Take care and Happy Stamping!

Sweet Tea Cups

Stamp set: Tea Shoppe
Card Stock: Perfect Plum, Pink Pirouette
Ink: Perfect Plum, Pink Pirouette
Accessories: Note cards, Perfect Plum and Pink Pirouette 3/8″ Taffeta Ribbon, Stampin’ Dimensionals
Tools: Big Shot, Finishing Touches Edgelits

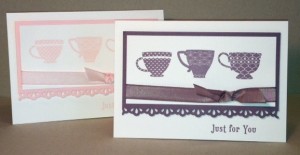
Hello!  Today’s project is a set of tea cup cards that I made.  Every year our church holds an Oktoberfest and there is a basket auction as a fundraiser.  Our book club decided on a High Tea theme.  We’ll purchase tea for two at the Brown Palace in downtown Denver which serves a fancy tea.  We are also including a teapot and a few tea cups.  I’m donating a set of four of these sweet little tea cup note cards.  It should be a great basket and hopefully there will be a lot of tickets purchased for it.

I’m also putting together a basket of all-occasion cards for this event.  There’s a reason I always cut extra cards for classes!  😀  Now I just need to put it together!

Have a great day and Happy Stamping!

Wonderfall Leaves

Stamp Set: Wonderfall
Card Stock: More Mustard, Raspberry Ripple, Cajun Craze, Early Espresso Core’dinations
Designer Paper: Orchard Harvest
Accessories: Brushed Bronze Designer Buttons, 1/8″ Early Espresso Taffeta Ribbon, Stampin Dimensionals, Mini Glue Dots
Tools: Big Shot, Autumn Accents Die, Woodgrain Embossing Folder, Dotted Scallop Ribbon Border Punch

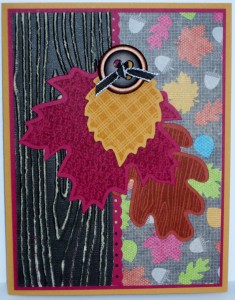
Don’t you just love fall.  It’s definitely my favorite season.  Here’s a card made with the Wonderfall Stamp Set and the coordinating Autumn Accents Die.  I have to admit that I’m a bit confused as to why Stampin’ Up! made a die for the leaves instead of framelits.  As it is now when you use these two products together you die cut the leaves first and then you ink up your coordinating stamp and lay the die cut leaf on the ink stamp to get your image.  It’s not too hard to get it lined up right but using a framelit after you’ve stamped the image would have been SO much easier.  I love leaves though so these two items were some of the first items from the fabulous Holiday Catalog that I had to get!

Have you worked with the new Core’dinations Card Stock yet?  It’s really fun.  It’s  got an inner core to it so when you sand it you get this really neat weathered look.  It’s really fun!  I love using it with the Woodgrain Embossing Folder.  You get this fabulous weathered look.  Don’t you love it?!  You should definitely try it sometime!

I had to use that fun new designer paper, Orchard Harvest, on this card again.  It’s just so…well, FUN!  Have a great day!  Take care and Happy Stamping!
Perfectly Preserved

Stamp Set: Perfectly Preserved
Card Stock: Cajun Craze, More Mustard, Lucky Limeade, Very Vanilla
Designer Paper: Orchard Harvest
Accessories: Stampin’ Dimensionals
Tools: Big Shot, Woodgrain Embossing Folder, Perfect Pennants Die, Cannery Set Framelits, Bitty Banners Framelits

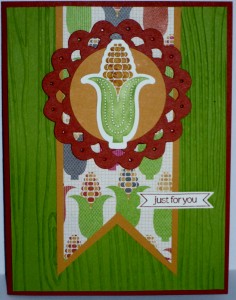
Here’s another one of those darn stamp sets that I didn’t have to have when I first saw it.  Then, all of these darn, talented people start making cards with it and I can’t resist it.  What’s with that?  Now I can’t get enough of that cute little jar and all of those pieces of fruit and veggies!

This card is CASEd from the talented Michelle Theriault.  Thanks Michelle!  That little cob of corn is SO darn cute and then when you put it with the adorable paper….YIKES!

Don’t you just love the new Woodgrain Embossing Folder?  It adds so much dimension.  I rubbed Lucky Limeade ink over it to give it even more texture.  Wow!

Have a great day!  Take care and Happy Stamping!
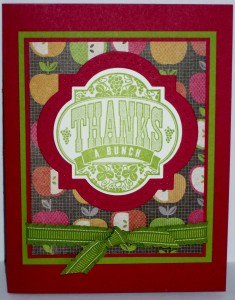
Day of Gratitude

Stamp Set: Day of Gratitude
Card Stock: Cherry Cobbler, Sahara Sand, Very Vanilla
Ink: Sahara Sand, Cherry Cobbler
Accessories: Cherry Cobbler Seam Binding, Stampin’ Dimensionals

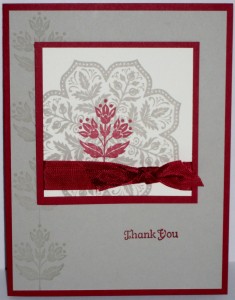
Good morning!  It’s a good day for gratitude.  The sun is shining, there’s a cool breeze and it rained the other day!  We haven’t had rain in a LONG time so that was a good thing!

This is another one of those simple, yet elegant cards that I seem to be gravitating towards lately.  Just a few stamped images, some ribbon and of course, dimensionals!  That’s it!

Have a great day!  Take care and Happy Stamping!
Friendship Preserves

Stamp Set: Friendship Preserves
Card Stock: Raspberry Ripple, Lucky Limeade, Very Vanilla
Designer Paper: Orchard Harvest
Ink: Lucky Limeade
Accessories: Lucky Limeade Ruffled Ribbon
Tools: Window Frames Collection Framelits, Paper Piercing Tools, Festive Paper Piercing pack, Big Shot

Hello!  I know I’m starting to slack on my posts again….sorry about that.  Time just seems to escape me!  We made this card in class this week.  Simple, but fun!  The more I play with the Orchard Harvest Designer paper the more I love all the colors in it.  It’s so fun!

Don’t you just LOVE all the new framelits that Stampin’ Up! is coming out with?  They make cutting out a stamped image SO easy!  At Stampin’ Up!’s regional event here in Denver last weekend we learned such an easy tip to use with these framelits….not sure why I couldn’t have thought of it myself….to keep your framelit centered around your stamped image just stick a post-it sticky note over it!   Wow!  Such an easy trick!  How come I can never think of these things?!

It’s hard to tell in the picture but on the Raspberry Ripple window frame I paper pierced around the edge using the the Festive Paper Piercing Pack.  Another wonderful item from SU!

Have a great day!  Take care and Happy Stamping!
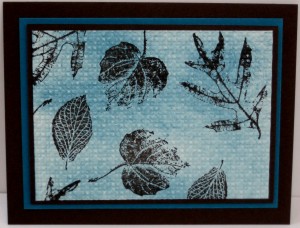
French Foliage Swap

Stamp Set: French Foliage
Card Stock: Early Espresso, Island Indigo, Very Vanilla
Ink: Early Espresso, Island Indigo
Tools: Big Shot, Square Lattice Embossing Folder, Stampin’ Sponge

Hello!  Saturday I attended Stampin’ Up!’s Regional Event in downtown Denver.  It was FABULOUS!  I LOVE Stampin’ Up! events.  I always come home motivated and full of fabulous ideas that I can share with you!

This was my swap card for the event.  Isn’t it pretty?  I love this color combination of Early Espresso and Island Indigo.  The card definitely looks better in person.  Can you see from the picture that the stamped image is embossed with the Big Shot?  I first stamped the leaves and then I rubbed the Island Indigo ink over the stamped image with the Stampin’ Sponge.   Then I ran the card stock through the Big Shot.  This gave a total different look than you would get if you ran the card stock through the Big Shot before rubbing the ink on it.  Give it a try!  It’s pretty easy.

My team had a meeting yesterday to plan our Holiday Stamp Camp.  We have some great projects in store for you.  I hope you can join us on November 3rd if you’re in Denver area!  Have a great day and Happy Stamping!

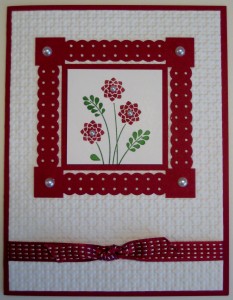
Framed Embellished Events

Stamp Set: Embellished Events
Card Stock: Whisper White, Raspberry Ripple
Markers: Raspberry Ripple, Gumball Green
Accessories: Raspberry Ribble Striped Satin Ribbon, Basic Pearls, Stampin’ Dimensionals, Mini Glue Dots
Tools: Big Shot, Square Lattice Embossing Folder, Dotted Scallop Ribbon Border Punch

Hello!  Happy Anniversary to me and my DH.  We’ve been married 31 years!  Yikes!  That’s over half of my life time!  Luckily he’s a keeper.  Today’s card is a lovely one that could be used for an anniversary or any other occasion.

My favorite part of this card is the “frame”.  Here’s another one of those things someone did with a punch that I would never have thought of!  It was SO easy to make this little frame.  You need to start with a 3″ x 3″ square of card stock.  Then you simply center the punch on each side of the square and punch!  The secret is to make sure the punch is centered.  That’s it!  Then of course you need to add the pearls to make it really pop!  What a great idea!  The Dotted Scallop Ribbon Border Punch isn’t just for borders!  😀

Have a great day!  Take care and Happy Stamping!
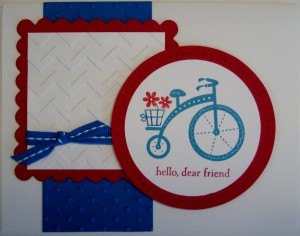
Moving Forward

Stamp Set: Moving Forward
Card Stock: Whisper White, Real Red, Pacific Point
Markers: Real Red, Pacific Point, Gumball Green
Accessories: Stampin’ Dimensionals, Pacific Point Striped Grosgrain Ribbon
Tools: Big Shot, Scallp Squares Duo Die, Chevron Embossing Folder, Circles #2 Die, Perfect Polka Dots Embossing Folder, 3″ Circle Die, Paper Piercing Essentials Pack, Paper Piercer

This adorable “Moving Forward” stamp set is the Ronald McDonald stamp set this year.  Every year Stampin’ Up! designs a stamp set that supports the Ronald McDonald House Charities.  For each of these stamp sets sold Stampin’ Up! contributes $3 to the charity.  I think this year’s set is exceptionally cute.  It’s another set we received free at convention.  (Yes, we get lots of stuff and convention and it’s so much fun!  Don’t you want to join us next year?  Contact me today to find out how you can easily sign up to be a demonstrator! ….how was that for a blatant plug!)

Isn’t this card cute?  Don’t think I’m the creative one….I CASEd this one.  Why go to all the work when someone else has come up with a fabulous idea?!  I just thank all my sister (and brother) stampers for all their creative work!  I love all the different textures and shapes on this card.  It makes it so FUN!

Don’t forget to add this stamp set to your next order and support Ronald McDonald Charities!  Have a great day!  Take care and Happy Stamping!