Sunshine Sayings Hope

IMG_8524Did you survive the 4th of July and all of the festivities?  Our 4th was low-key and that was just fine with us.  I did make the mistake of going to the grocery store in the morning….along with everyone else in my town.  Sheesh!  They couldn’t keep the carts stocked by the front doors.  I lucked out on that account though.  Patience was definitely the key word.  🙂

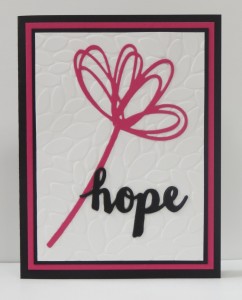
Simple, yet elegant.  Those are the words this card brings to my mind.  I designed a card for my next class using the heart from Sunshine Wishes Thinlits and decided I wanted to make a card with the flower too.  This is what I came up with.  The embossed background (Petals Embossing Folder) and the many layers really make the focal point pop.  You know me, I love layers (and Melon Mambo!).

I actually die-cut two of the word “hope” and adhered them together.  It really made the word stand out a bit more.  I’m definitely going to try that little tip again sometime.

I really like the new Petals Embossing Folder.  Even though it’s a busy design it’s subtle which makes it perfect for all types of cards.

Have a great day!  Take care and Happy Stamping!

Stars & Stripes

Patriotic.0716Happy 4th of July!  I love everything 4th of July.  Stars & stripes, red, white and blue, picnics….I like it!  We don’t usually have big plans on the fourth but I still enjoy it.

What are your big plans for day?

When I saw this card I knew I had to CASE it.  I’m just glad I had the time to whip it up the other day so I could share it with you.

I LOVE the Swirly Scribbles Thinlits!  They are so much fun!  I can’t seem to get enough of them.  I’m just glad I’m home the entire month of July so that I can play with them!

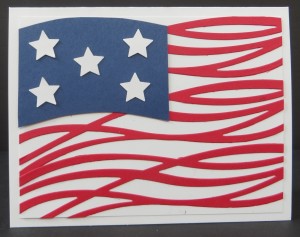
I’ve seen a number of cards similar to this one on Pinterest.  I really like how the blue follows the curve of the red stripes.  I did have to use a retired punch for the stars but that’s why I don’t get rid of anything.  I have two drawers of retired punches….ones I just couldn’t get rid of because I might want to use them someday.  I really need to get over this mindset although it did come in handy in this situation!  🙂

Have a great day and God Bless America!

Papillon Potpourri

Papillon Potpourri.0616Another Oldie But Goodie.  I can’t remember the last time I used Papillon Potpourri but it was just sitting on my shelf calling out to me saying “use me! use me!”  so I did.  🙂

The background designs are both made with the Timeless Textures stamp set that was in this past Spring’s Occasions Catalog and is now in the current main catalog.  These background stamps are fun to use and add so much to a card.

I stamped the butterfly on Shimmery White card stock so I could watercolor it.  Then when it was dry I used my Gold Wink of Stella Glitter Pen to color the outer areas of the wings.  It really looks nice in person.

The nice thing about this card is that it can be used for practically any occasion.  Just whip up a stash of them and add the sentiment as you need it!

I’m slowly catching up on things after being away.  There’s still a ton to do but one step at a time!  🙂

Have a great day!  Take care and Happy Stamping!
Flower Shop Birthday

Flower Shop.0616Once again I have been AWOL.  I just returned yesterday from another trip to the MN homeland.  This time I drove all by myself to hang out with my family.  My husband can make the drive from Denver to Minneapolis in one day but I can’t sit in the car that long.  I took two days each way and it was just fine.  I listened to “Harry Potter and the Half-Blood Prince”.  It made the time fly.  I’m glad to be back and excited that I will be at home for the entire month of July!  Woo Hoo!  I will miss heading to convention around my birthday now that Stampin’ Up! has changed the timing of it’s events.  Oh, well.

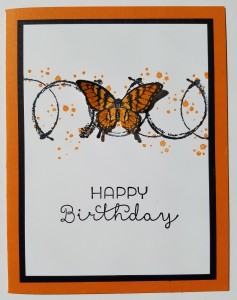
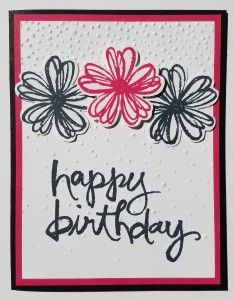
Today’s card is another from my “Oldie But Goodie” class.  The flowers are from Flower Shop that has been around for awhile and the sentiment is from Watercolor Words which was new in the last year or so.  Simple but fun.  The important part is to remember that you need to stamp the sentiment BEFORE you run the Whisper White card stock through the Big Shot with the embossing folder.

It’s hard to tell from the picture but the centers of the flowers are colored with the Clear Wink of Stella Brush.  The thing to remember when covering a large area with your Wink of Stella is that it can cause the colors to run so be sure to color carefully and clean off the brush before changing colors.

It’s time to dig back into my creating.  I have three different events that I need to plan for this month so I better get moving!  Have a great day!  Take care and Happy Stamping!
Wink of Stella Trick

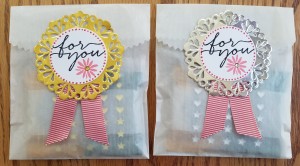
Blooms & Wishes.launch0616Hello!  As I mentioned yesterday, I had my New Catalog Launch Party on Saturday.  In hopes of getting people to RSVP farther in advance than they usually do I offered a gift to the first 15 people who sent their RSVP.  These are the little gifts that I gave them.

The gift is one of the new, decorated Glassine Gift Bags.  Inside are a couple of Ghirardelli candies along with a sheet of the new Metallic Enamel Shapes.  The bags with the gold doily on them have a sheet of the gold shapes and the bag with the silver doily has the silver shapes!  🙂

The little decoration on the front was pretty easy to make.  I first stamped the dotted circle from the Perfectly Wrapped stamp set.  Then I stamped the sentiment and the flower from the Blooms & Wishes stamp set.  The ribbon is the fun, new Watermelon Wonder 5/8″ Mini Striped Ribbon.

Wink of Stella Rhinestone.0616You’re wondering where the Wink of Stella Trick comes in now aren’t you?  🙂

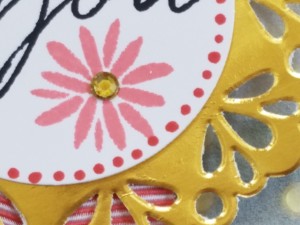
I put a rhinestone in the center of the little flowers but I wasn’t real keen on the way the clear/silver rhinestone looked with the gold doily.  So I’m thinking “How can I make this gold?  Hmm…”.  I looked at my stash of toys and first tried the gold pen Stampin’ Up! carried a few years back but that had more of a matte finish.  I finally came across my gold Wink of Stella Glitter Pen and thought I’d give it a try.  I wasn’t sure it would “stick” to the rhinestone but lucky me! It did!  So there’s your trick….You can color the Stampin’ Up! rhinestones with your gold Wink of Stella Glitter Pen!  Woo Hoo!  It will probably work on the pearls too but I haven’t tried that one yet.  Let me know if you try it.  I’d love to know.

Have a great day!  Take care and Happy Stamping!
Pop of Paradise!

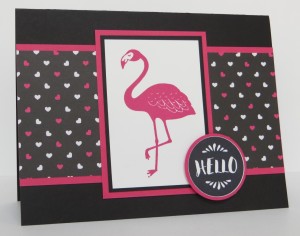
Pop of Paradise.0616I LOVE Flamingos!  I have no clue why they appeal to me other than they’re PINK! Ha!  I knew this would be the very first stamp set that I purchased from the 2016-2017 Catalog and it was!

Did you know that there is a whole suite of products that COORDINATE with this stamp set?  Yep.  There’s the Pop of Pink Designer Series Paper (used on this card) and the Pop of Pink Designer Washi Tape along with Baker’s Twine in both Melon Mambo and Basic Black.  So many great products and they come in my favorite color Melon Mambo!

This was one of the cards that we made at my Catalog Launch Open House this weekend.  People could come make four cards for free and check out many of the new products first hand.  Everyone had a good time and they loved the cards we made.  #6monthstampingoals

My birthday is in about a month and I’m throwing myself a Flamingo Bingo Birthday Bash!  Sounds like fun doesn’t it?  We’ll be playing Bingo for Stampin’ Up! prizes!  Now I just need to find all sorts of flamingo things to decorate with!

Have a great day!  Take care and Happy Stamping!
Sprinkles of Life Silver Lining

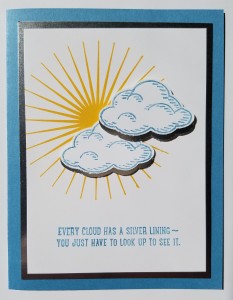
Sprinkles of Life.0616How often have you heard the saying “Every cloud has a silver lining”?  I’m sure it’s a lot.  The fun Sprinkles of Life stamp set takes it one step further.

Did you know that Sprinkles of Life was last year’s Ronald McDonald House Charities (RMHC) stamp set for Stampin’ Up!?  That meant that for every one of these stamp sets they sold Stampin’ Up! donated $3 to RMHC!

I’m going to go out on a limb and say that this stamp set is one of the best RMHC stamp sets they’ve had…oh, except for my absolute favorite, Flamingo Lingo, since that had a flamingo in it! Ha!  Sprinkles of Life is so versatile and there are so many pieces….best of all there is a COORDINATING punch!  Woo Hoo!  Coordination!

It’s hard to tell from the picture but my clouds really do have a silver lining.  I punched out silver foil clouds and off-set them behind the white clouds.  Unfortunately they just look like shadows in the picture.  The layer between the blue card and the white stamped layer is also silver foil.  I guess I need to work on my photography skills.

So today I’m heading to the top of Pike’s Peak with my company.  Maybe I’ll share some pictures with you tomorrow.  🙂

Have a great day.  Take care and Happy Stamping!

Awesomely Artistic!

Awesomely Artistic.0616I love the name of this stamp set.  Awesomely Artistic.  It reminds me of all that I can do with stamps, ink and paper.  We can all be “Awesomely Artistic” in our craft.

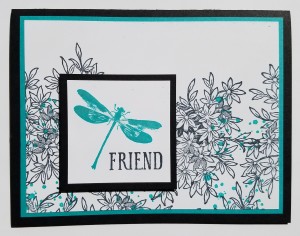
This stamp set is another “oldie but goodie”.  It’s a carry-over from the last catalog.  Don’t you just love the dragonfly.  The flowers are pretty too.

This is a pretty simple design.  Many layers and a little Stella Glitter Brush on the dragonfly wings to make it complete.

This week I’m working on my New Catalog Launch Open House.  I have the projects designed that we’ll be making but now I have to figure out displays and such.   I also want to get started designing my July classes so I can stay ahead of the game.  Hmmm….we’ll see how that goes.  🙂

I did play with a few of my new products yesterday.  I think that’s what I’ll do today too.  It’s definitely more fun than housework and computer work!  🙂

Have a great day!  Take care and Happy Stamping!
Oldies But Goodies: Lovely as a Tree

Lovely as a Tree.0616I know.  I know!  Where have I been?  This has been one crazy week.  I had three events on Monday.  A class with 11 people attending on Tuesday morning, book club Tuesday night, a class Wednesday morning, another class on Wednesday evening and a going away party last night.  Filter into that trying to get my house clean for out of town guests arriving today.  Yikes!  I’ve finally realized that my house doesn’t have to be perfectly clean.  It is what it is.  Oh….I’m also trying to plan my New Catalog Launch Party that’s happening next Saturday!  Luckily I already have the projects designed for that.  Phew!

This past week I had classes but I didn’t want to use all new products only because I wanted to save most of them for my Launch Party.  I did use a new products on some of the projects.  I decided the name Oldies But Goodies was a good name for the class because I used stamp sets that have been in the old catalog but carried over to the new one.

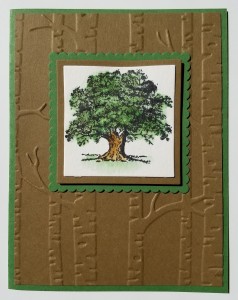
The classic Oldie But Goodie stamp set is Lovely as a Tree.  I’m not sure Stampin’ Up! will ever retire that one!  It’s a classic!  The Woodland Embossing folder is back.  It retired after last fall’s Holiday Catalog but there was such an outcry from demonstrators that they brought it back in this new catalog.  As for brand new products I used the Layering Squares Framelits on this card.  All three of the squares (scalloped one included) can be found in this framelit set.  There are 19 different squares in the set!

Well, it’s time to get back to reality and finish getting ready for the company.  I have beds to make and a casserole to put together for dinner.  Have a great day!  Take care and Happy Stamping!
One Day Deal: Paper Pumpkin for Only $5!


Wow!  Paper Pumpkin is having a One Day Deal! Starting on Thursday, June 9th at 5 pm MT you can sign up for Paper Pumpkin and get your first month for only $5!  Only $5!  Holy cow!  The deal ends Friday, June 10th at 11:50 pm MT.  This is the perfect time to give Paper Pumpkin a try!  This deal is only for new subscribers.

Paper Pumpkin is a fully designed project kit that arrives at your door each month with stamps, ink, and paper—everything cut and ready to go.  They’ll surprise you with fun projects like cards, gift packaging, home décor, and more for just $19.95 USD/$24.95 CAD a month (shipping included).  These kits are fun and easy.  I look forward to getting mine each month and I know you will too.

So how do you sign up?

  1.   Click here to go to the Paper Pumpkin website.  (www.paperpumpkin.com/?demoid=78166)
  2.   Click on “subscribe” at the top of the page.
  3.   Enter the promo code ONEDAYDEAL
  4.   Fill out your personal information and credit card information
  5.   You then might be asked who your demonstrator is although the above link should take you to a page linked to me.  If you are asked, please list me as your demonstrator.  Cindy Russell, Highlands Ranch, CO.  Thanks!

That should be it!  The process is pretty painless.  Somewhere during the process I think you will be asked to provide a password.  You will need this to put a hold on your subscription or cancel it.  Remember that your subscription will go up to the regular price of $19.95 per month starting with your second month.  Be sure to contact me if you have any questions.

I hope you will give Paper Pumpkin a try.  I think you’ll enjoy it!

Have a great day!  Take care and Happy Stamping!
Layering Love

IMG_8457Well, today is “The Sale” and New Catalog Pick-Up.  I’m having an open house to sell all of my retired items and while people are here they can pick up a copy of Stampin’ Up!’s new catalog.

Do you have your copy of the new catalog?  You’re going to want to check it out!  If you’d like a copy be sure to let me know.

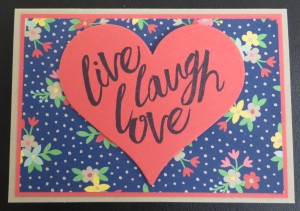
Now, you can’t have a Stampin’ Up! event without stamping so I designed an easy little card for people to make.  Can you spot the new items I’ve used on it?  Yep.  The designer paper, the heart framelit and the stamp set.  Pretty cute don’t you think?  🙂

The Affectionately Yours Specialty Designer Series Paper is bright and fun.  Ten of the sheets in the pack are regular double-sided designs and the other two sheets have copper embossing on them.  Very pretty.  Apparently copper is the new big thing this year.  There is copper embossed paper, copper embossing powder and copper metallic thread.  I’m anxious to try them all out!

If you recall, the squares, circles and oval framelits all retired but don’t fret!  There are new sets call “Layering” squares, circles and ovals.  It’s kind of fun because there are both plain shapes and scalloped shapes all in the same set sized perfectly for…..layering!  There is all a fun framelit set of different sized hearts called “Sweet & Sassy“.  The hearts won’t layer as nicely as the other shapes but you get 15 different sized and shaped hearts in the set.  These are the framelits I used on this card.  You may think this heart is huge but the card is actually made using the Crumb Cake Note Cards & Envelopes.

What better way to make use of these fun layering framelits than with a stamp set made just to fit them.  Layering Love is that set and the one I used on this card.  Live, Laugh, Love is kind of my motto in life.  If you can’t laugh, even at yourself, what more is there?

Have a great day!  Live, Laugh & Love!!!!

Guy Greetings: An All-Occasion Card

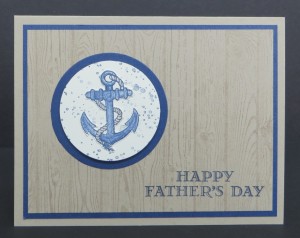
IMG_8411Yep!  Another guy card.  You can’t go wrong using Guy Greetings to make a guy card can you?!  Ha!

This is the last of the 5 guy cards we made in May.  This one is quite versatile and can be used for pretty much any occasion.  I chose to use it for Father’s Day since I sent the adorable bear card to my dad for his birthday.

Nice and simple.  My kind of card….although when I made it I actually stamped the anchor on a piece of scrap paper and then cut it out and adhered it to the Very Vanilla circle.  Why?  I’m not sure.  I guess I didn’t want speckles on my anchor.  Sheesh!  The card would have been even simpler had I just stamped it on the punched circle.  Of course, to each his own.  It works either way.  That’s the beauty of card making….you really can’t do things wrong….you just do them differently!  🙂

Here’s a little trick on making this card.  Do you notice that the woodgrain is going up and down on this horizontal card?   Well, the woodgrain stamp doesn’t quite fit across…..all I did was line it up as best I could by eyeing it and stamped a second time.  It’s woodgrain….it shouldn’t be perfect.  Ha!

Take care and Happy Stamping!
Bear Hugs for Dad

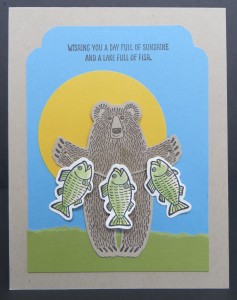
IMG_8415Yesterday was Dad’s birthday.  We made this fun card in our May class and I knew it would be perfect for him.  Mom and Dad have a cabin on a lake in Wisconsin so the sentiment is right on!  🙂

I am so glad that this stamp set carried over into the new catalog.  I LOVE it!  How can you not love this adorable bear and the cute little fishies?!  Best of all…..COORDINATING framelits!  Woo Hoo!

I completely CASEd this card from Pinterest.  I’m not ashamed to admit it.   Why not borrow someone else’s beautiful work?  I know you’re surprised that I didn’t change anything from the original….so am I.  I usually add another layer or some ribbon or something but I liked this one just the way it was!

Have you had a chance to check out the new catalog yet?  You’re going to want to check it out!

Have a great day!  Take care and Happy Stamping!
Tips & Tricks Tuesday: Baby Bear

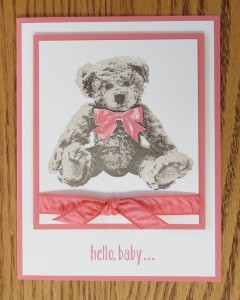
IMG_8470Saturday I shared with you a post about a first birthday party that I went to.   It was Miss Bella’s birthday and I was trying to come up with the perfect card for her.  On my first attempts I used the brand new Baby Bear stamp set.  OK…it won’t be new for you until tomorrow but I figured you needed a sneak peek!

Isn’t this bear adorable?  Doesn’t it look just like a real teddy bear?  I won this stamp set at the On Stage event last month.  So fun!

I am going to be honest with you….I had a hard time stamping this cute little bear.  It’s three-step stamping which means it takes three different stamps to stamp IMG_8467the bear.  Stampin’ Up! has labeled the three different stamps (1, 2, 3) so you know which order to stamp in.

HOWEVER…and here’s my tip/trick for the day…..I found it much easier to stamp if I stamped 3, then 2, then 1.  I would definitely give this a try.  I just couldn’t get things lined up perfectly when I went 1, 2, 3.  It could just be me but try it yourself.

If you’re wondering what colors I used on the bear for the shading here it is….I used Crumb Cake for 1.  Chocolate Chip stamped off for 2 and Chocolate Chip full strength for 3.

Do you love the pink color on this card?  It’s the new Flirty Flamingo!  So pretty!  What about that ribbon?  I LOVE it!

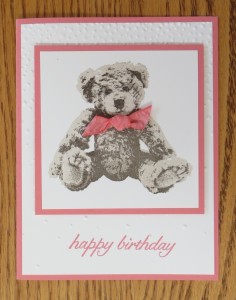
Now here is a question I need answered….Which of these two cards do you like better?  The baby card or the birthday card?  Please leave me a comment and let me know.

Have a great day!  Take care and Happy Stamping!
P.S.  Don’t forget that today is the last day to order out of the 2015-2016 Catalog!


Happy Memorial Day!

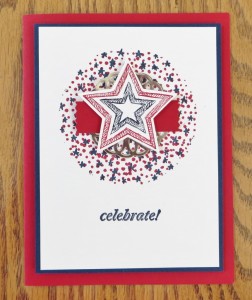
4thJust like the Fourth of July, Memorial Day brings to mind Red, White & Blue as well as stars (and stripes).  I originally posted this card last July.  I wanted to share it with you again today because most of the items used on this card are retiring.  🙁

The fun backgrounds are from the Sweet Li’l One  stamp set, the stars are from the Be the Star stamp set and the sentiment is from the And Many More stamp set.  I’m sad to see them all go but I’m really bummed to see the And Many More stamp set go because it was my go-to stamp set for sentiments along with A Dozen Thoughts stamp set which is also retiring.  I don’t know what I’m going to do…..

If you like this card and want to recreate it, tomorrow is the last day to order these stamp sets.  After that they’re gone for good.  Don’t miss out!

This card design has seen a lot of mileage.  The Military Ministry group at church sends out birthday cards to current and former military personnel from our church and this was the design my card group used.  We did leave off the doily and the label punch to make it a bit simpler.  They ask for the same design whenever they run out.  I guess they liked it.  🙂

I hope you have a safe and blessed holiday today.  Thank you to any and all of you who are in or who have served in our country’s military.  And most of all, let’s remember all those who gave their lives for our freedom.

Take care and Happy Stamping!