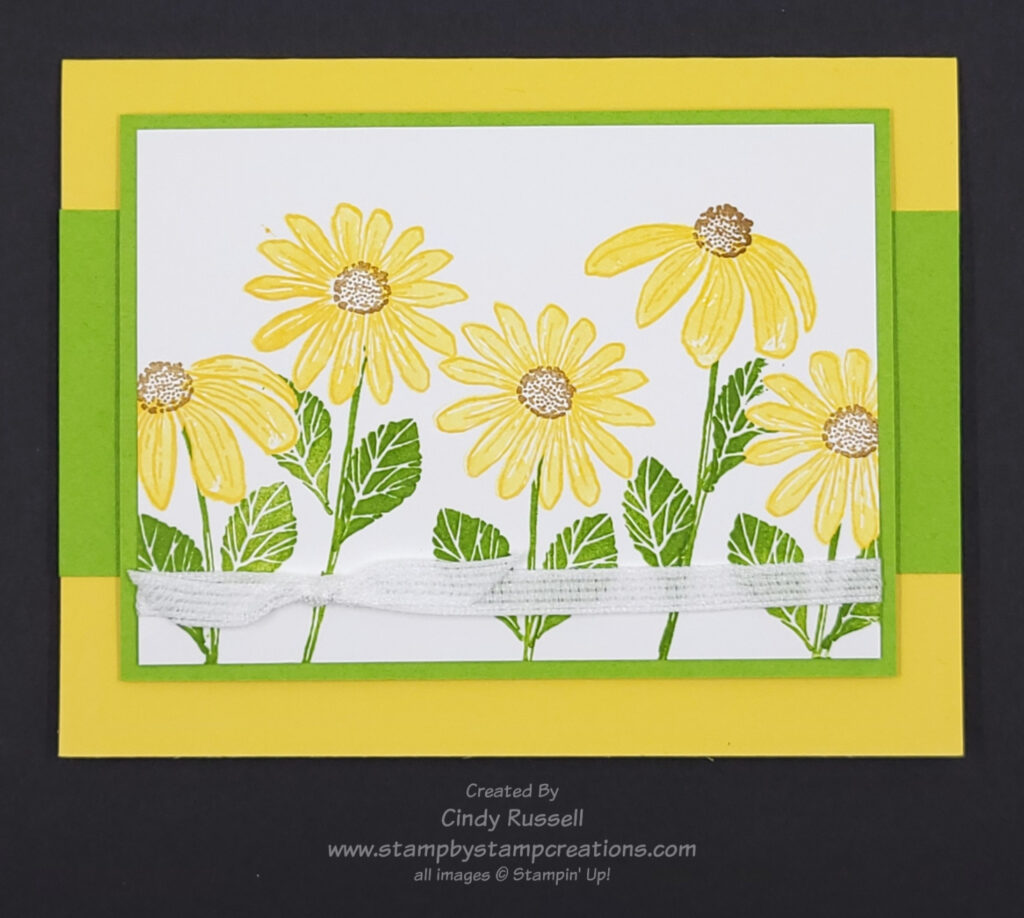
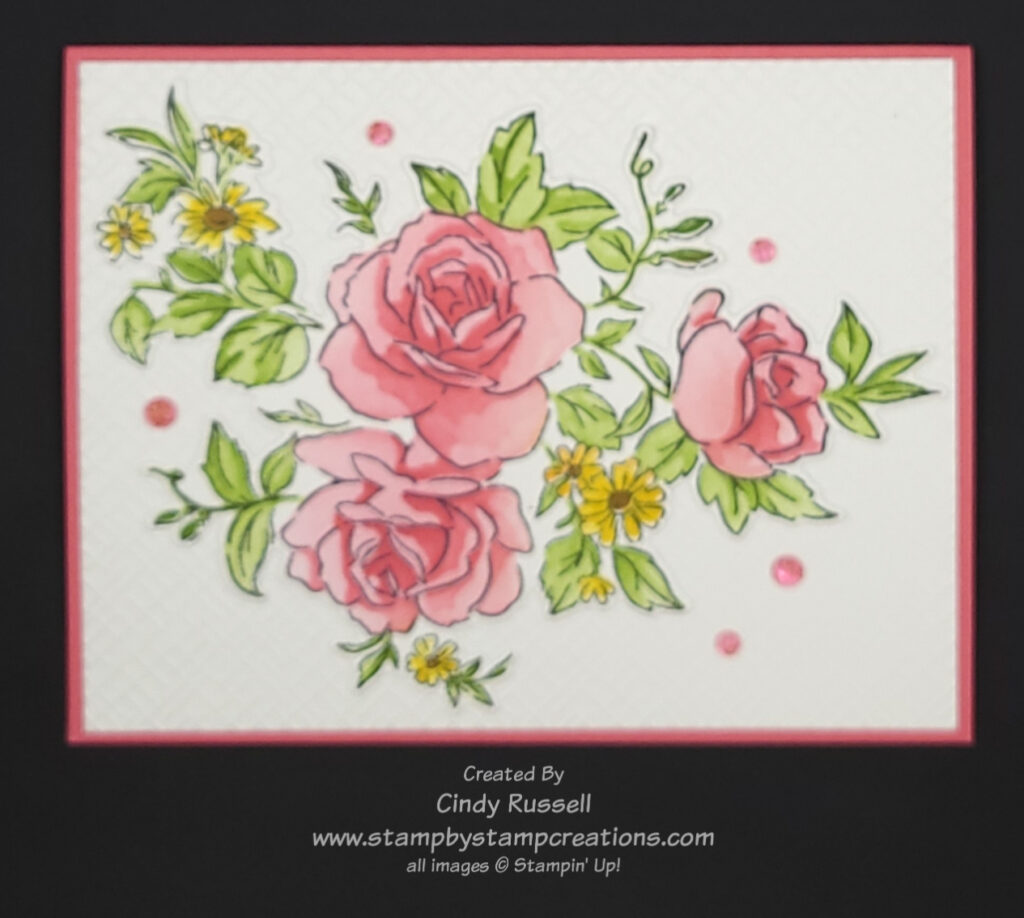
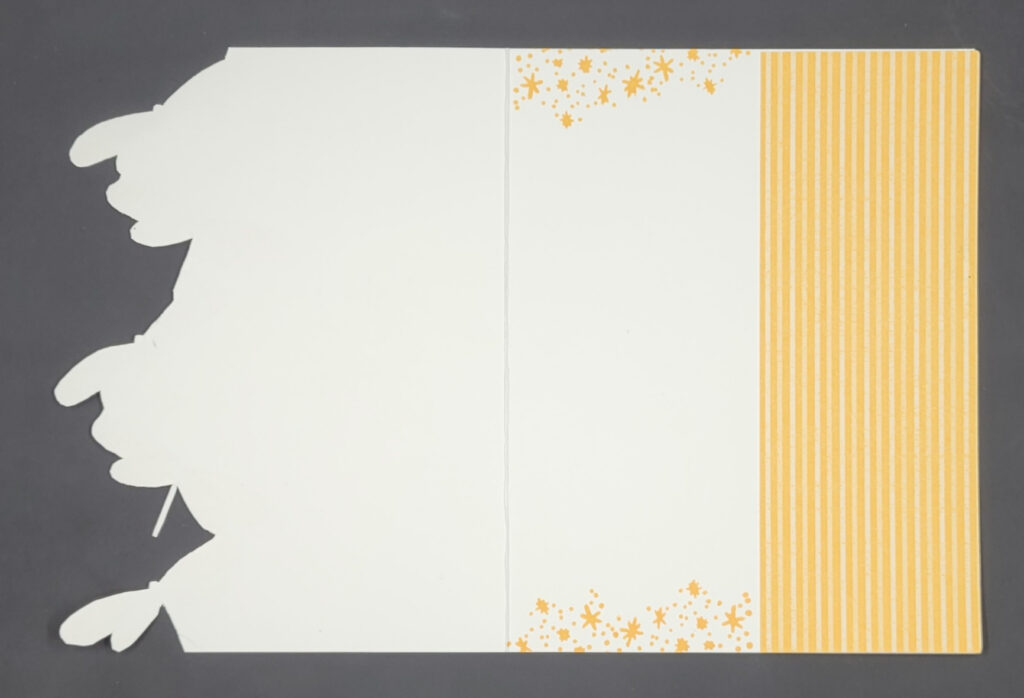
It’s Day 27 of my 40 Cards in 40 Days Challenge and I’m excited to share today’s card with you. I used the Layers of Beauty Bundle on this card. The bundle comes with the Layers of Beauty stamp set, the Layers of Beauty Dies and the Layers of Beauty Masks. The masks are so fun to use! (Do I have to admit that this card is my first attempt at using them?  )
)
The first thing I did to create this card was to stamp the image (yes, this is one large image) on a piece of 5 ½” x 4 ¼” Basic White cardstock. I then placed the stamped piece of cardstock on a large piece of scrap paper (or you can use grid paper).
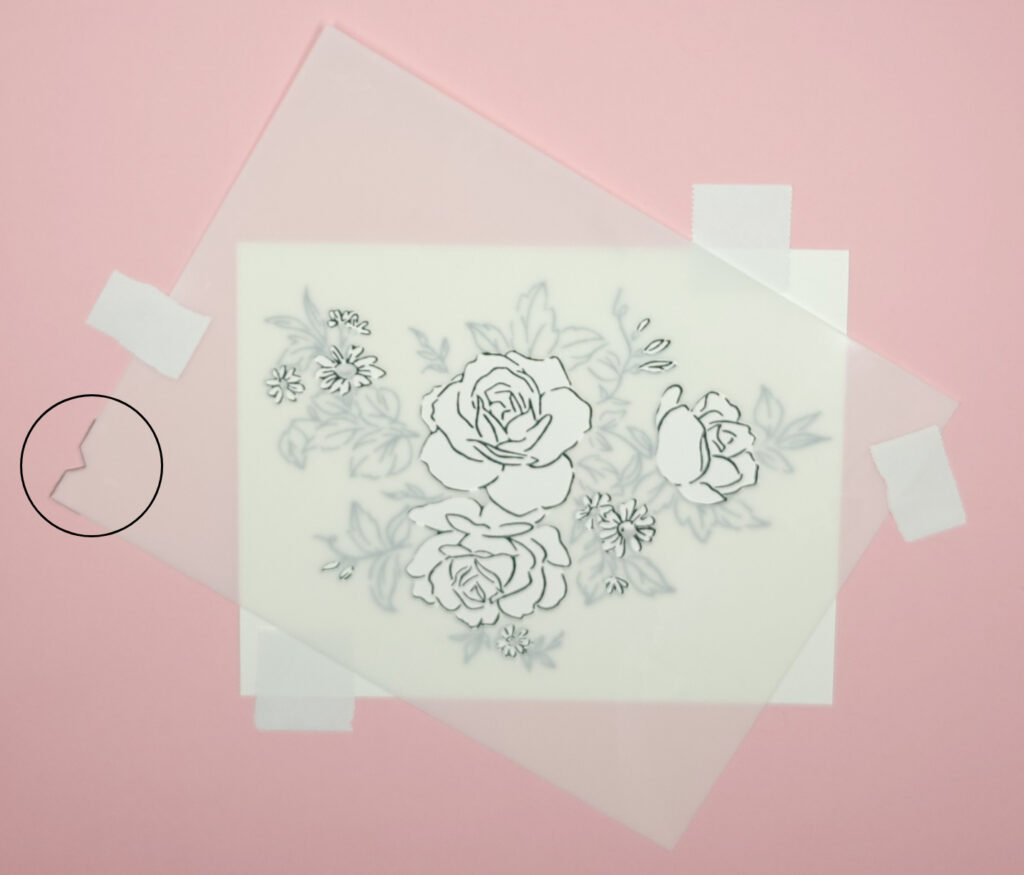
There are five masks in this bundle. They are all numbered, and they all have the same indentation in the same place on them. This will help you line them up. (see photo) You can’t really see the number in the photo but it’s just below the point of the indentation on the mask. When using the masks, you want to use them in numerical order.
In this third photo, you can see that I adhered the stamped image to the scrap paper (I used pink cardstock so you could the paper and the mask better). I used my favorite removable tapewhichI also use to hold my dies on the paper when die-cutting. I then lined up Mask #1 over the stamped image and used the removable tape to hold it in place. You could also use washi tape, painter’s tape or any type of removable adhesive. If you look closely, you can see that I used a pencil to outline the notched spot on the mask. This will help me line up the other masks.
To add color to my stamped images I used Blending Brushes and Sponge Daubers. To use the Blending Brushes, just lightly rub the brush over the ink pad and then rub the color over the open areas of the mask. Start light. You can always add more color. For smaller areas, like the yellow flowers, I used the Sponge Daubers. The Sponge Daubers pick up a little more ink, so I rubbed them on my scrap paper a little before rubbing and dabbing them over the areas I wanted covered. It’s so fun watching the image get more and more dimension with each mask.
After the image was completely colored, I die cut it and adhered it to an embossed piece of cardstock before adhering it to the card. I used the new, upcoming Strawberry Slush ink, Old Olive ink, Daffodil Delight ink and Pecan Pie ink to color the image. The embellishements are the Strawberry Slush & Pretty in Pink Gems which will be a new Online Exclusive coming in May. They’re pink and so pretty!
If you have tried using any of Stampin’ Up!’s bundles that have masks, you really should. They’re fun to work with and the results are amazing. Speaking of amazing….I think I did a pretty god job adding the jeweled embellishments to my card. Ha! I’m usually rather inept at it.
Have a great day! I hope you enjoyed my mini tutorial on using masks. Have a great day! Take care and Happy Stamping!