A Carrot Valentine? Really? Yep! I couldn’t resist! A few weeks ago I shared a card with you made with the Sale-a-bration stamp set Thanks A Bunch. After looking at it for a while, and noticing that there was a “love you” stamp included in the set, I knew I needed to make a carrot valentine. 🙂
I could have come up with a new card design, but why go to all of that work when I already had a design that works? You might think that’s being lazy but I like to think of it as working smarter. Ha!
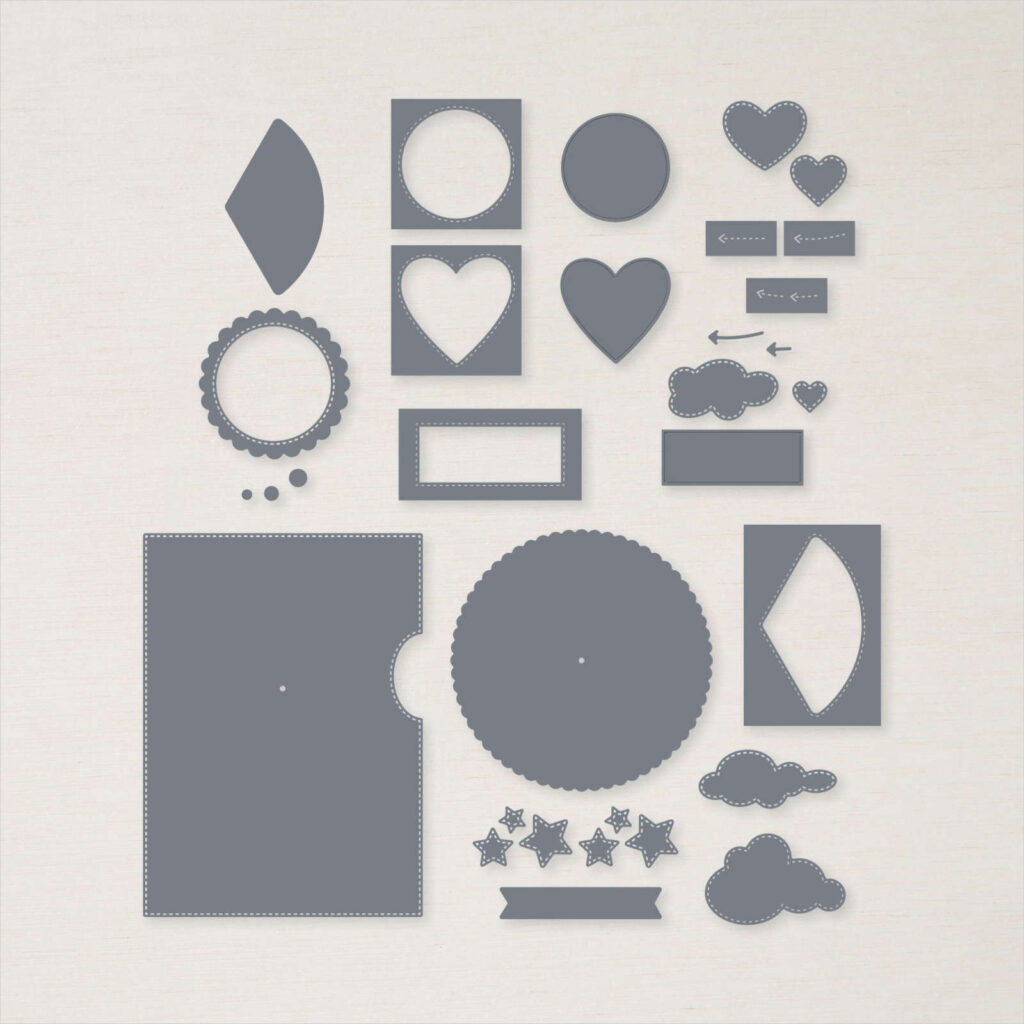
Give It A Whirl Dies
The Give It A Whirl die set had the perfect size heart die for my project. As you can see, I used it on both the inside of the card and the front. Don’t be afraid to search your stash for the right tool if you have a vision of what you want your project to look like.
I hope you like my green and orange valentine. 🙂 I wonder who I should send it to? Ha!
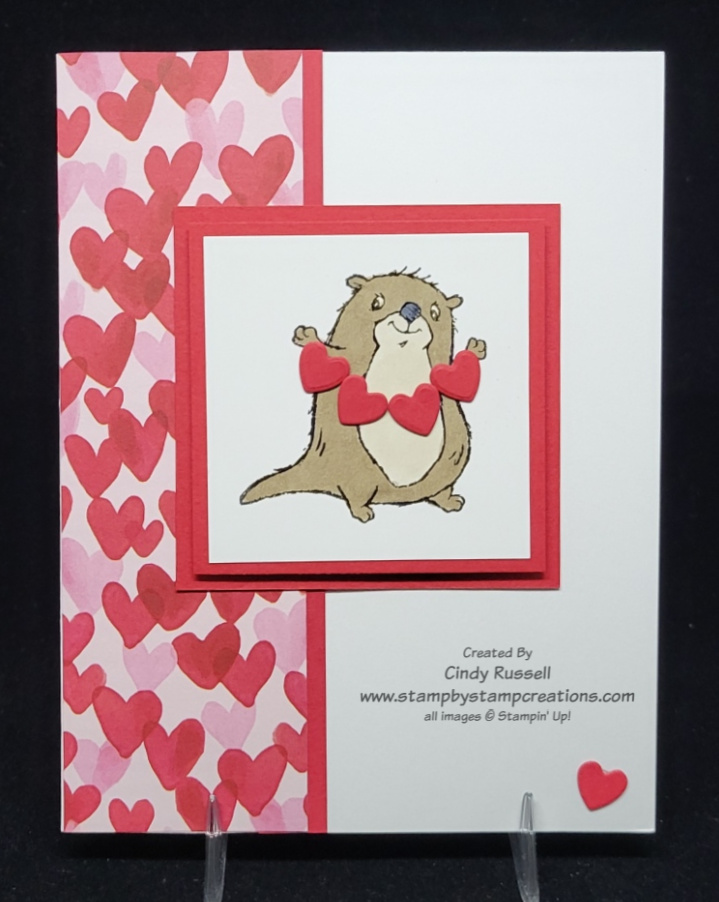
How can you not love a valentine made with this adorable Sale-a-bration otter? This little critter is TSC! Too Stinkin’ Cute! I think I’m in love. 🙂
This card is another one that I made for a swap and it’s one of my favorites. This little critter’s outstretched hands are just crying to hold a string of hearts (or any other small item you may want on your card). The fun heart-filled designer paper from the Sweet Talk pack is the perfect compliment to this little valentine otter.
The Awesome Otters stamp set is a Level 1 Sale-a-bration award. When you spend $50 during Sale-a-bration (now through February 28) this is one of the items that you can choose. This cute stamp set was actually the first Sale-a-bration item that I chose.
Awesome Otters Valentine
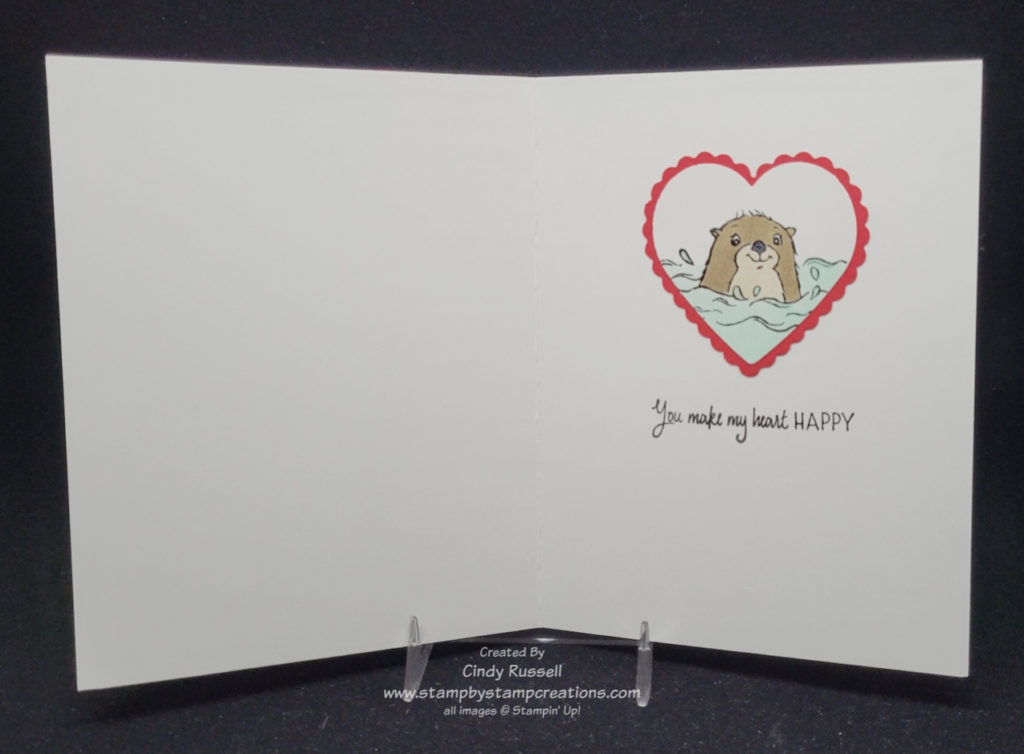
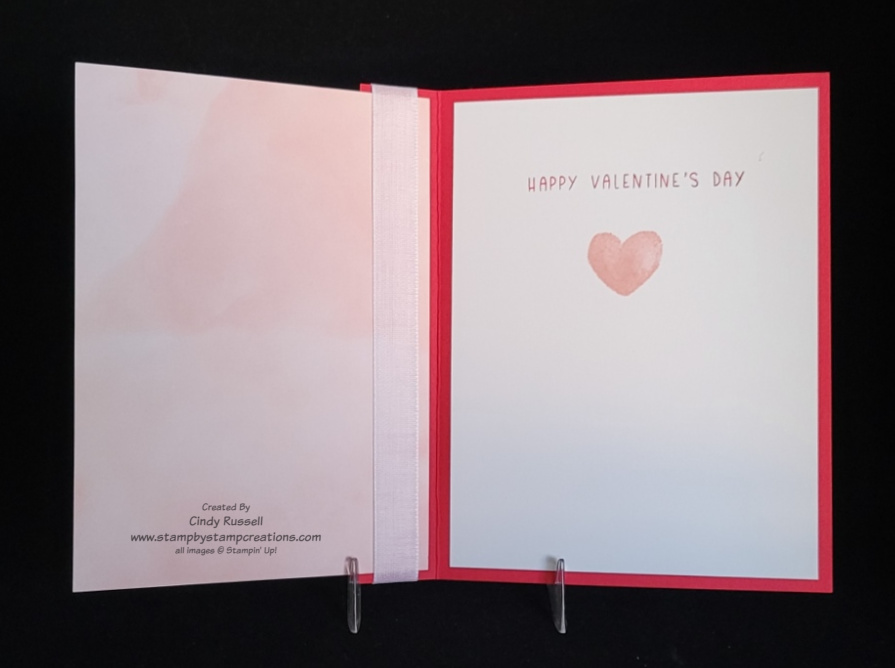
When you’re making any type of card you don’t want to forget the inside. On my card I found the perfect way to include another otter from the stamp set. Since it’s a valentine card I used the Heart Punch Pack to punch out my second otter for the inside of the card.
“You make my heart happy” is the perfect sentiment for these little otters and their valentine. It’s from the Catching Butterflies stamp set which is another Level 1 Sale-a-bration item. It’s so fun to mix and match products on your project.
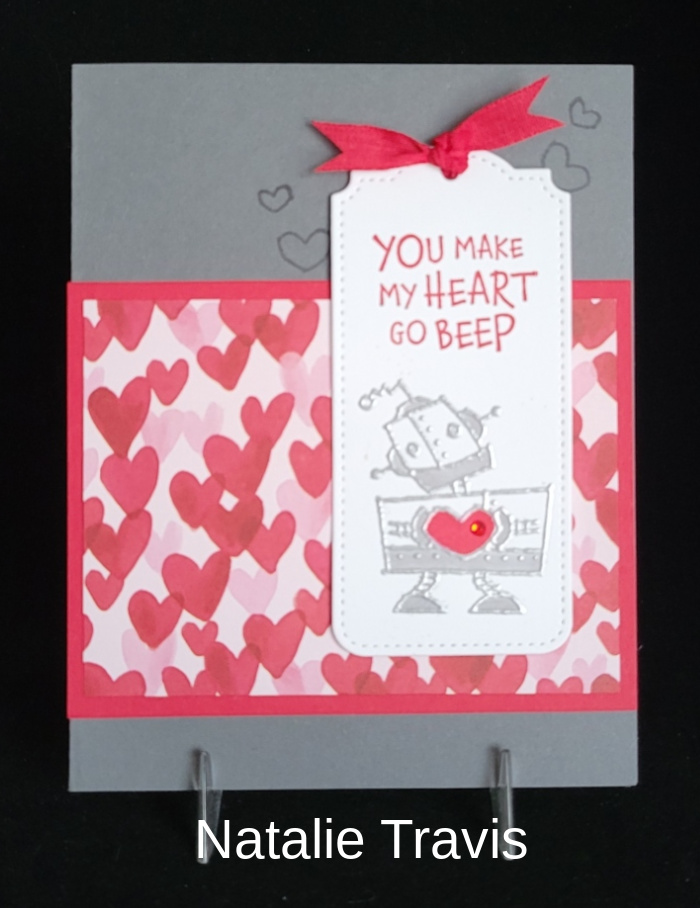
This post is about stinkin’ cute valentines and as I’ve mentioned in previous posts, I can’t get enough of the Nuts & Bolts robots! Like the otters, they’re adorable!
This cute valentine is a swap card I received and was made by Natalie Travis. She used the same Sweet Talk designer paper on her card. The fun little tag was die cut using the Tailor Made Tags dies. The sentiment and the robot fit on the tag perfectly! It’s hard to tell from the photo but the stamped robot is heat embossed with silver embossing powder before it was colored.
Have you started making valentines for your friends and family? I know I’ve given you some fun ideas recently. Have a great day! Take care and Happy Stamping!
It’s all about the candy, right? I’m talking about Valentines Day. Where would Valentine’s day be with out the heart shaped box of chocolates or the fun little pink and red treats?
Valentines Day may be all about candy but so is this sheet of Stampin’ Up!’s Sweet Talk Designer Series Paper. This sheet of paper is perfect for this easy-peasy Fun Fold!
This card isn’t so much a Fun Fold as it is a unique card design. The cardstock portion of the card isn’t the usual 5 1/2″ x 8 1/2″ scored at 4 1/4″. The cardstock portion of this card is 5 1/2″ x 5 1/4″ with the score mark at 1″ on the 5 1/4″ edge.
The designer paper is cut at 5 1/4″ x 4″ and adhered to the 1″ flap of the cardstock. In the second photo that I’ve posted here you can see that the designer paper is not butted up against the fold of the cardstock. To get the designer paper lined up properly, I opened the cardstock and centered the designer paper on the large section. I placed my adhesive on the 1″ flap (being careful not to get it too close to the center fold) and then closed the cardstock so the adhesive adhered to the designer paper.
There are a couple of things you want to remember when working with the white insert for your card. First of all want to cut it slightly smaller than 5 1/4″ x 4″. You do this to make sure that none of the white shows when the card is closed.
The second thing to note is that you’re not going to just place adhesive on the back of the white cardstock and adhere it to the inside of the card. You’re going to place the adhesive on the back of the white cardstock and then center the front of the white cardstock on the backside of the designer paper. Once you have the white cardstock centered, you will close the card and your white cardstock should be perfectly centered on the inside of the card.
This card design will work for any of your favorite patterned papers. I’ve written up step-by-step directions for this card which include dimensions and supplies. You can view them here. Have fun creating your own Designer Paper Card Front Fun Fold card! Have a great day! Take care and Happy Stamping!
If you read my blog post on Monday you are aware that I am changing things up a bit this week. Monday was a fabulous Easel Fun Fold. Today will be Make-It-Mine and tomorrow will be a Tools of the Trade post. I hope I don’t throw anyone off too much! Ha!
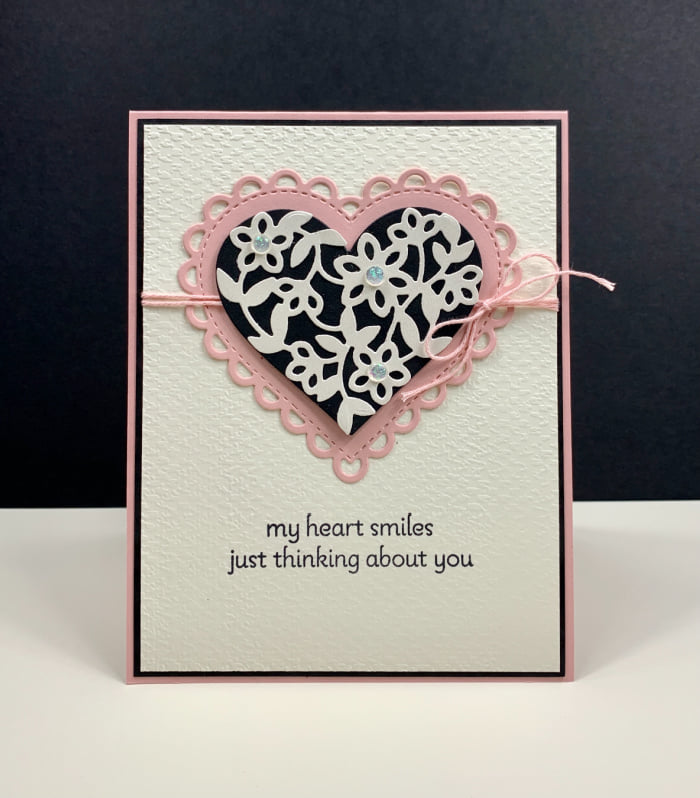
Lots of Heart in pink
I love the Lots of Heart bundle. Not only are the stamps in the bundle fabulous but the dies are great too! Check out this card I found on the internet. Isn’t the floral heart lovely? And the large pink scalloped heart is the perfect background. Even though the checked heart (my favorite from the stamp set) isn’t used on this card I couldn’t resist trying to copy it and Make-It-Mine.
Naturally I got carried away. The only things I really copied were the card design itself and the basic colors. I’m sure this doesn’t surprise you. If I’m going to make a card my own I like to go for it. 🙂
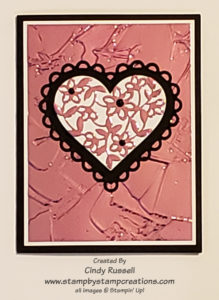
When I was getting started on my version my eye caught the Love You Always Foil Sheets in my craft room and I knew I had to give them a try. Not only did I use the Rococo Rose Foil Sheets for my floral heart but I decided to give them a try on the background. But I couldn’t just use the foil sheet plain, I wanted to see how it looked embossed with my new favorite embossing folder – The Painted Texture Embossing Folder!
I love it! My version turned out perfectly! The card I copied is soft and sweet but I think my version is shiny and bright. Fun! Don’t be afraid to experiment a little when making someone else’s card your own.
I need to tell you that it’s really difficult to photograph a card with with so much foil sheet on it. It’s so shiny! It not only reflects the light but a lot of time you get your own reflection in it. I hope you get at least an idea of how pretty this card really is.
Who remembers signing valentines for your entire class and decorating a shoebox with a slit in the lid for all the valentines that you would receive in class? Do they still do that anymore? I have no idea. It’s been ages since my kids were that age and I don’t have any grandchildren yet.
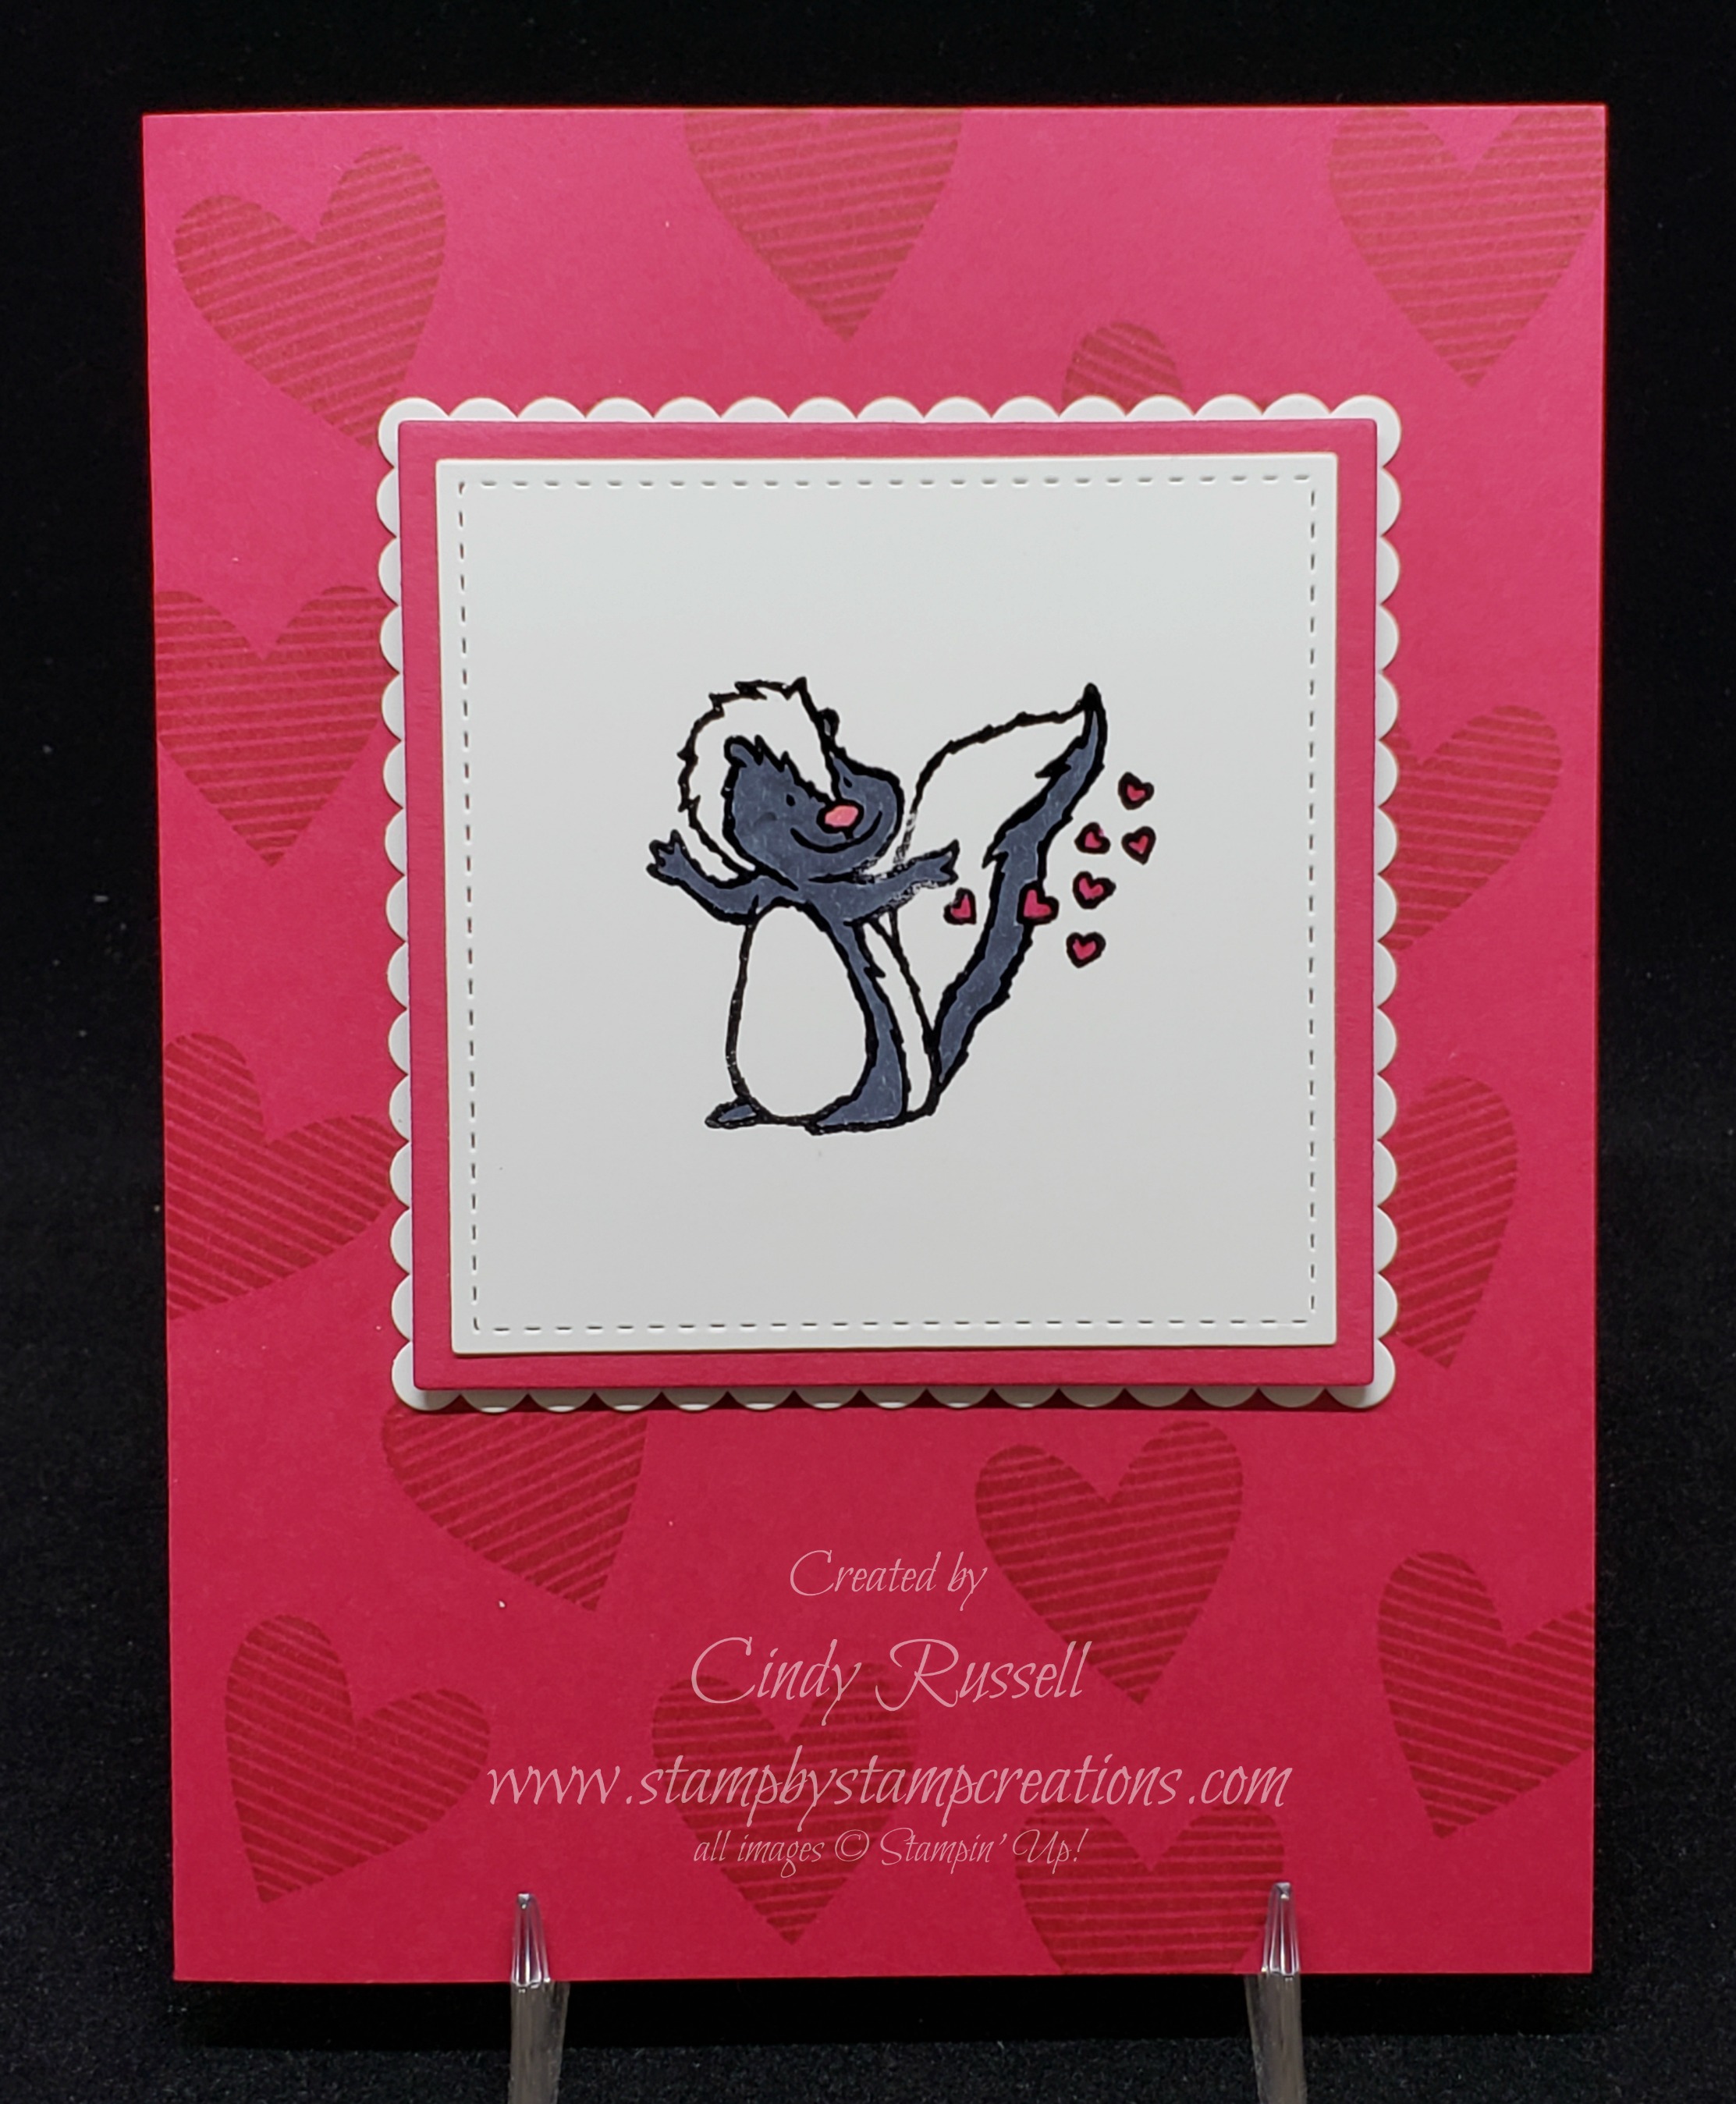
If they do still do that in the schools and you have younger kiddos around, Stampin’ Up! has the perfect stamp set for you (and said kiddos) to make some adorable valentines. The Hey Love stamp set is perfect for kiddos. It has 6 adorable little critters and 4 fun little sentiments.
Not only would this stamp set make cute valentines for kids to send/give but it makes perfect cards for you to make for said kiddos!
We made this fun card in class the other day. We stamped the little skunk the Memento Tuxedo Black ink and heat embossed him with Clear Embossing Powder. We then colored him with Stampin’ Blends. Too fun! We used the sentiment “Stinkin’ Sweet” on the inside of the card.
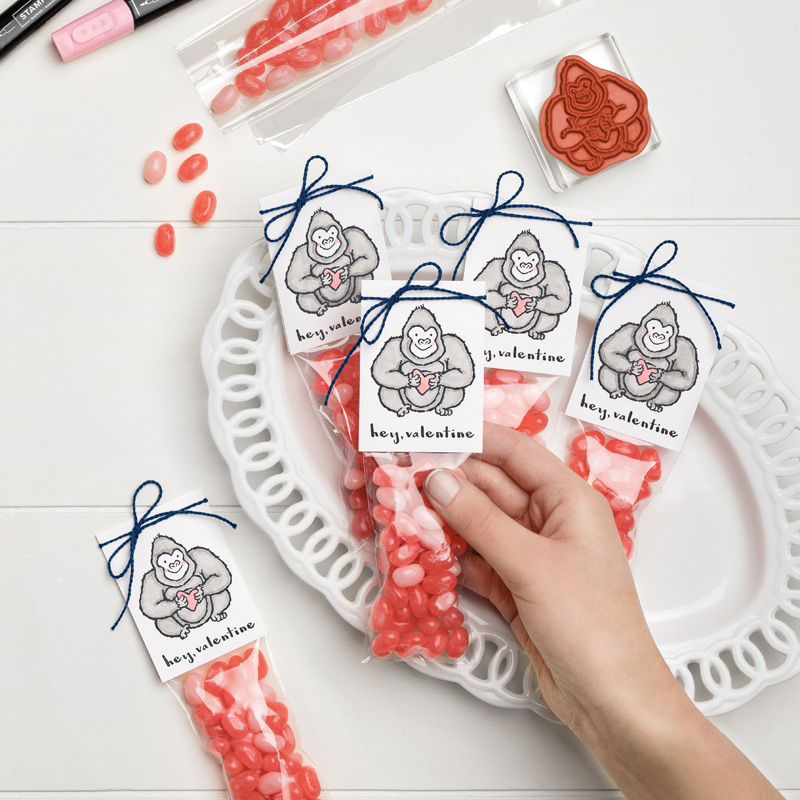
This stamp set is also perfect for decorating those Valentine’s Day treats. This picture is from the catalog. Too fun!
Valentine’s Day is sneaking up on us fast so get that order in so that you can make fun valentines and treats to share!
It’s also time to start thinking about Valentines. Yep, Valentines. These cute little 3 x 3 notes are my take on the ones we made at Stampin’ Up!’s November On Stage event. You can see the ones that Stampin’ Up! designed in the second picture.
The first thing I changed on my little cards was to get rid of the color green. I’m sorry….Valentines aren’t green. Save the green for St. Patrick’s Day! Ha!
Stampin’ Up! used the Sending Love Designer Series Paper for the bases of the cards but I used Thick Whisper White card stock on all of mine. On the first and third cards I just cut a 3 x 3 piece of designer paper and adhered it to the front of the card.
On the card in the upper right it’s hard to tell from the picture but I colored the wooden Sending Love embellishment red by rubbing the Real Red ink on it with a Sponge Dauber. Did you know that you could do that? Yep. Just make sure to heat set it so the ink dries before you handle it.
Don’t you love the little envelopes in the center cards? They’re made from the Sending Love Glassine Sheets and the Love Notes Framelits.
Can you see how easy it is to start with something and just change it up a bit to make it your own? I hope you’re enjoying my Make it Mine Mondays. Let me know what you think. Take care and Happy Stamping!
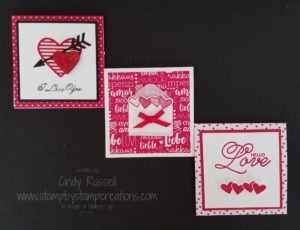
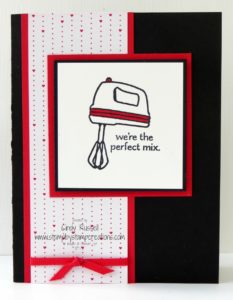
Valentines Day is less than a month away and it’s time to get busy! This week I’m holding my Love & Friendship Class. Here is one of the cards we’ll be making.
I love the Perfect Mix stamp set. It’s so clever! This little mixer is one of my favorite images from the stamp set. What’s your favorite?
This card is pretty simple but SO darn cute! The designer paper is from the Sending Love Designer Series Paper Stack. The nice thing about this stack of papers is that not all of the images have hearts on them for Valentines Day. There are a number of non-heart patterns which will make it perfect for the whole year.
I think this week after my classes are over I’m going to sit down and design more cards and projects with all of my Valentines products. It seems a shame to use them only once. Even if I won’t be using these projects in a class I can definitely share them with YOU! 🙂
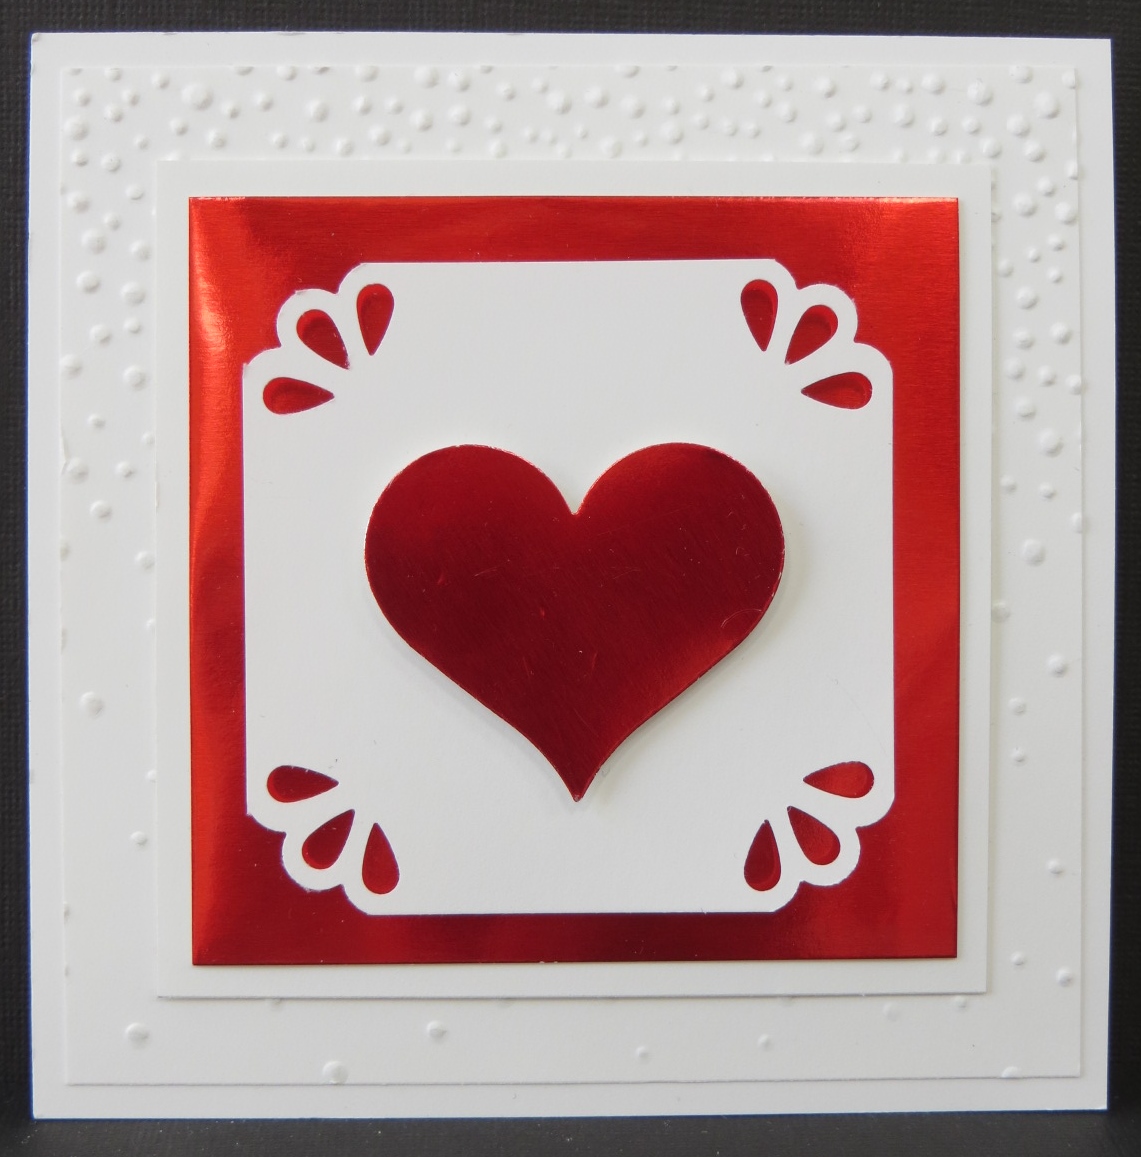
What? A valentine in November? What am I thinking?
Well, if you’ve been following my recent posts you know that I’m in Dallas for a Stampin’ Up! event. We demonstrators like to exchange ideas at these events by making cards that we share with each other. This is the card I’m swapping. Do you like it? 🙂
I was having a hard time deciding on what type of card to swap at this event. There’s still plenty of time until Christmas so I could have used any of the fun Christmas products in the Holiday Catalog but I wanted something a little different. I looked through the main catalog and at all of the stamp sets sitting on my shelves but nothing jumped out and grabbed me. Then I happened to see the Red Foil Sheets in my stamp room and inspiration hit! A Valentine! Not just any valentine. This valentine uses three products from the Holiday Catalog. Yep. Three! Can you spot them?
Well, the first is my new favorite embossing folder: Softly Falling. The next is one I’ve already mentioned: the Red Foil Sheets. The final one is the new Curvy Corner Trio Punch. If you haven’t played with this punch you need to give it a try. Three punches in one! All of this goodness in my favorite size card!
I’ll definitely share some of the fun I’ve had today over the next few days so stay tuned. Don’t forget that you can check my Facebook page also to see what I’ve been up to!


 It’s Monday! Make it Mine Monday! Woo Hoo!
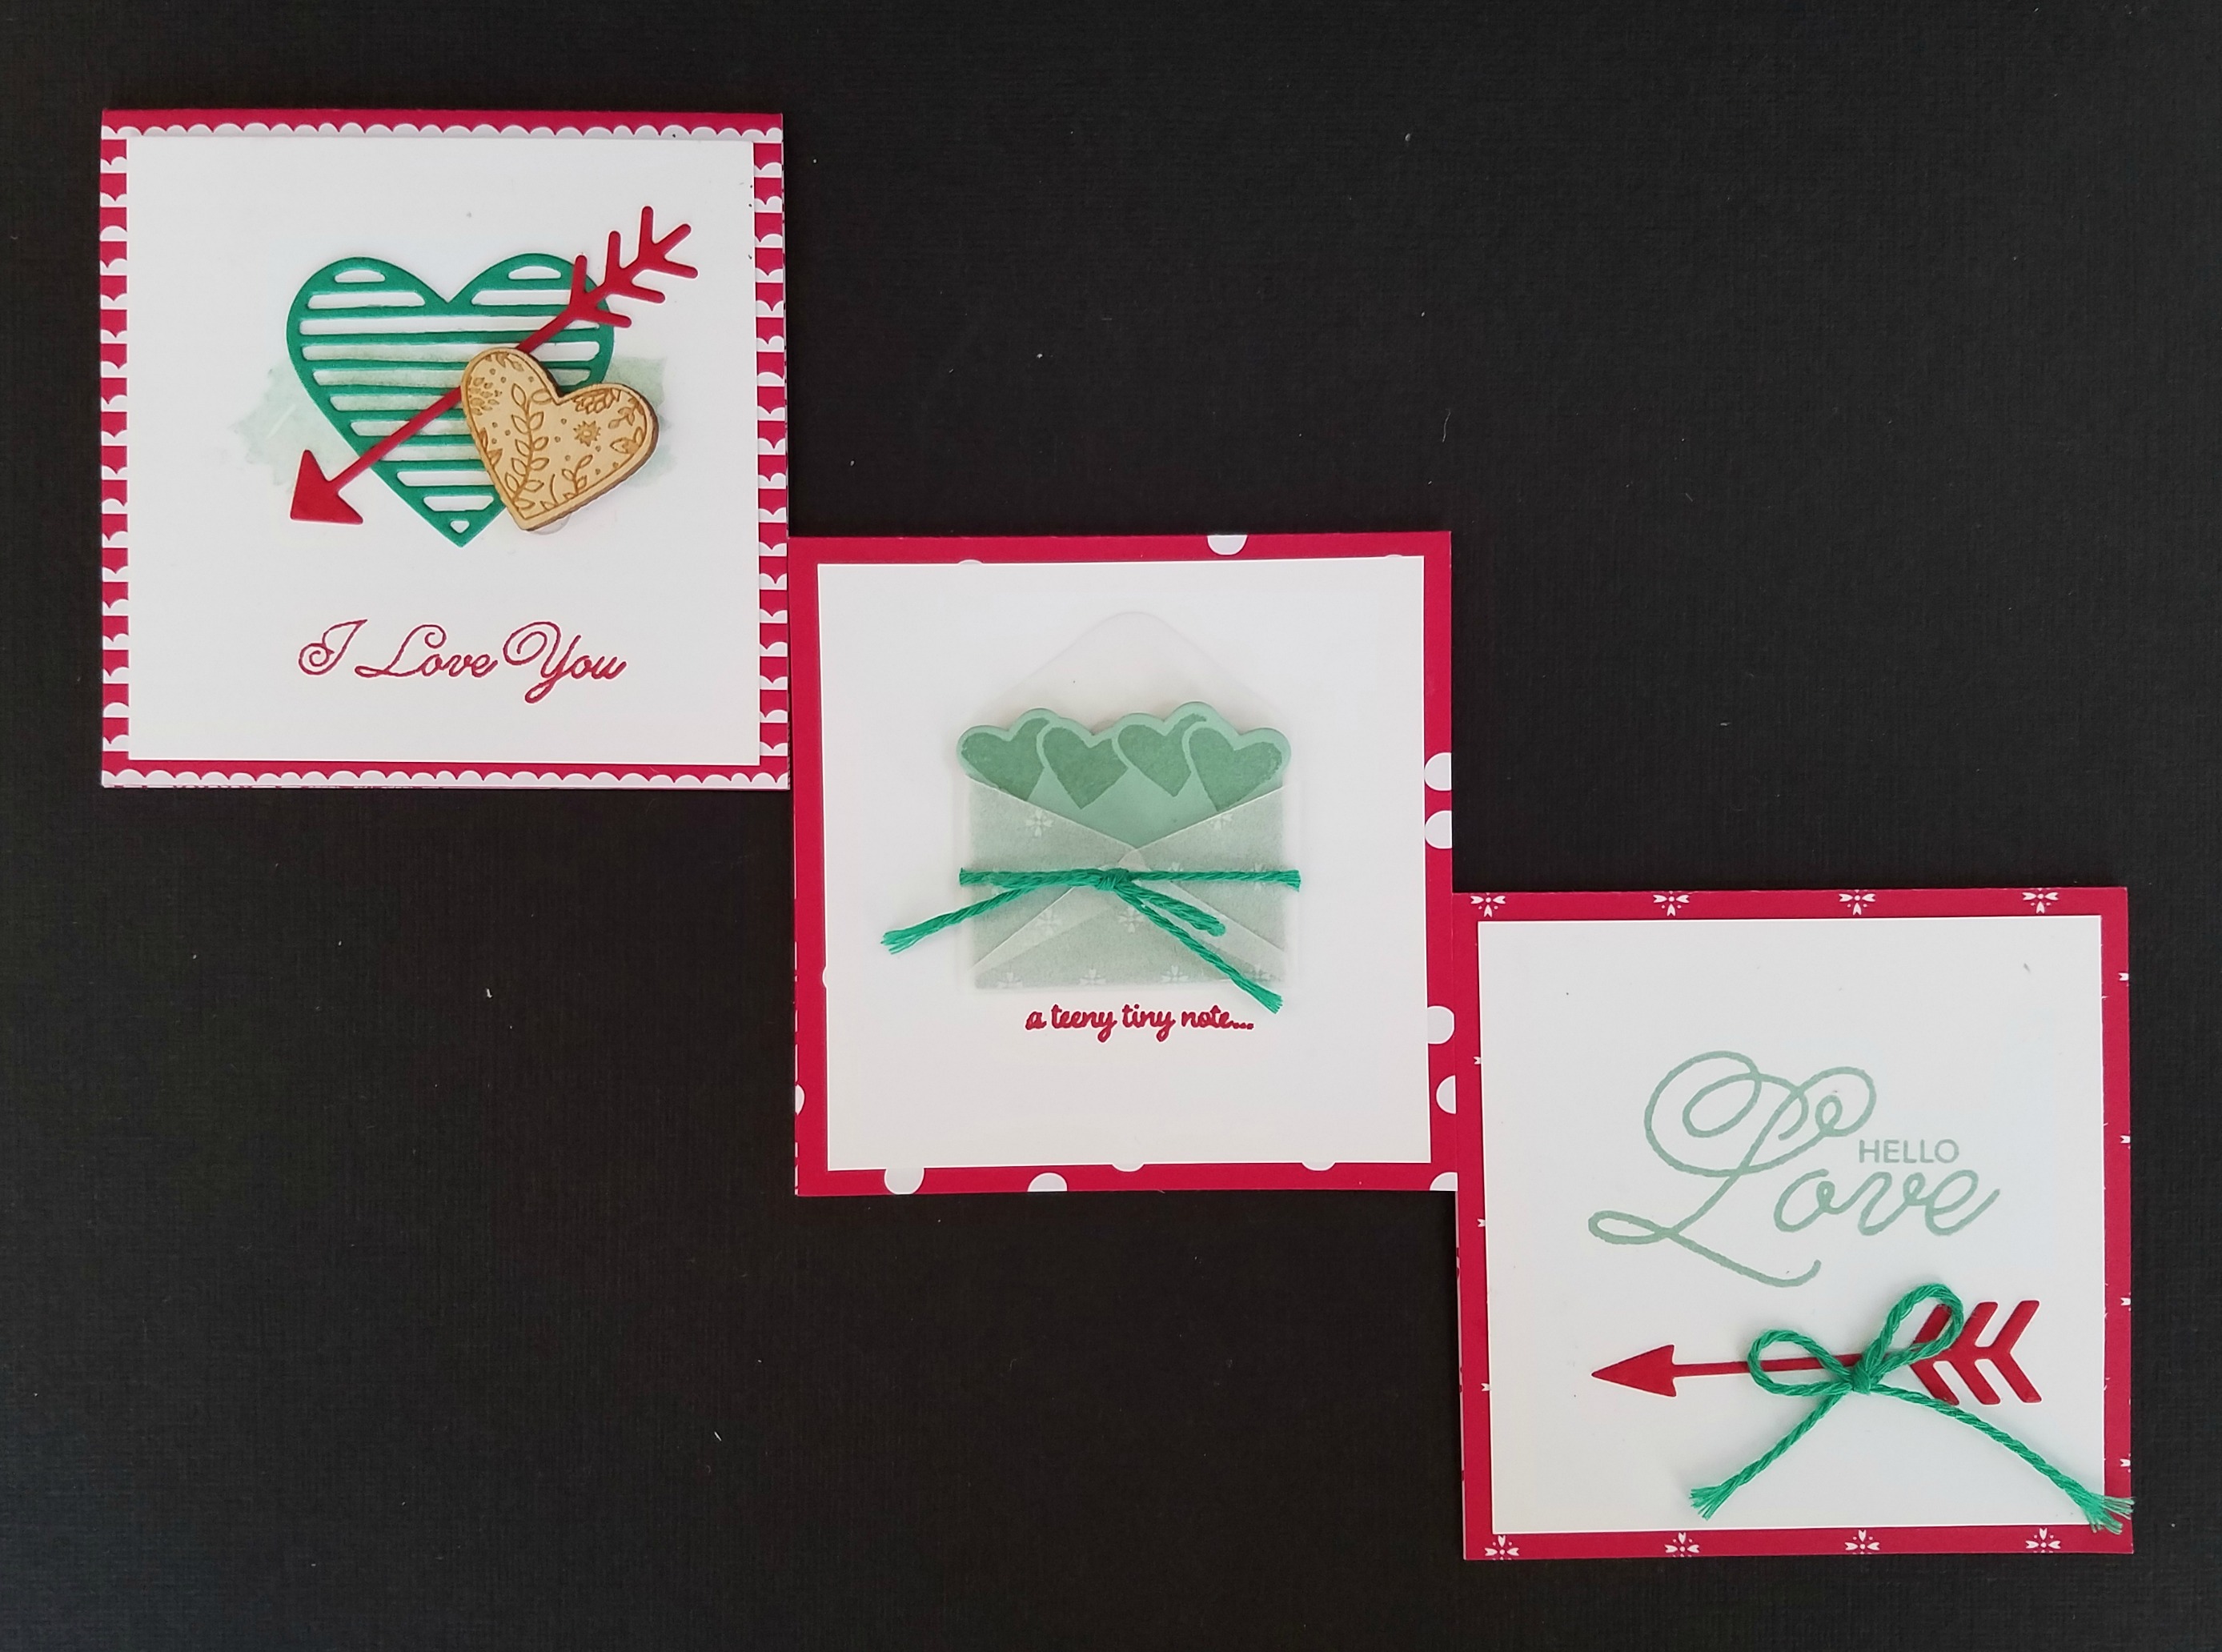
 Valentines Day is less than a month away and it’s time to get busy! This week I’m holding my Love & Friendship Class. Here is one of the cards we’ll be making.