 The other day I mentioned that my favorite product from the Toil & Trouble Suite in the Holiday Catalog is the Black 3/8″ Organdy Glittered Ribbon. I also mentioned that later in the week I would share a non-Halloween project with you using this fun ribbon. Well here it is. A VERY easy birthday card!
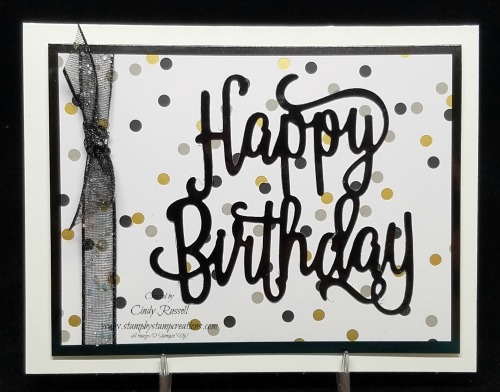
I used the Broadway Bound Specialty Designer Series Paper as the background. It may be hard to tell from the photo but the gold dots on the paper are gold foil. Since the gold dots were shiny and the ribbon is sparkly I decided to go with the Black Foil Sheets (not just for Halloween!) for the “Happy Birthday” and the layer behind the designer paper. Fun and simple!
Don’t these products coordinate perfectly? Have you added the glittery ribbon and the Black Foil Sheets to your order for this week? Halloween is coming soon so if you want to make some projects for this holiday you should probably order them SOON!
Yesterday I shared with you the tip of the week but as I was making this card I came up with a couple more little tips for you…
I cut out the “Happy Birthday” from a piece of Black Foil Sheet and I also used a piece for the layer behind the designer paper. If you like to conserve things, that’s a lot of foil sheets to use. What you can do though is simply die-cut the “Happy Birthday” from the center of the piece of foil that you’re using as your layer. The designer paper will cover the die-cut image and no one will know! 🙂
My second little tip has to do with die-cutting the Black Foil Sheet (or any color foil sheet). When I die cut the “Happy Birthday” I found that all of the little dots in the die made little impressions in my die-cut image. What I did then was to place the “Happy Birthday” a piece of cardstock and run it through the Big Shot again with clean and NEW clear cutting pad. This kind of flattened the dot impressions. Don’t use an old beat up cutting pad because all of those grooves and scratches will show up on your foil sheet.
Get that Halloween order together and get it placed! You can place it directly in my online store or contact me. If you order online don’t forget to use the October Hostess Code and don’t forget that online orders over $75 earn a free gift from me! One more thing not forget…..Stampin’ Up!’s World Card Making Day Sale! Only a few more days to take advantage of it. See…there are quite a few things to add to that order! 🙂
Have a great day! Take care and Happy Stamping!