A Popular Dragonfly Dreams

Dragonfly Dreams.0817Hello!  I hope your day is going well.  In the last few weeks I’ve had 3 stamping parties for people (woo hoo!) and 2 classes here in my home.  All this since I’ve returned from Thailand.  Needless to say things have been a bit busy around here.

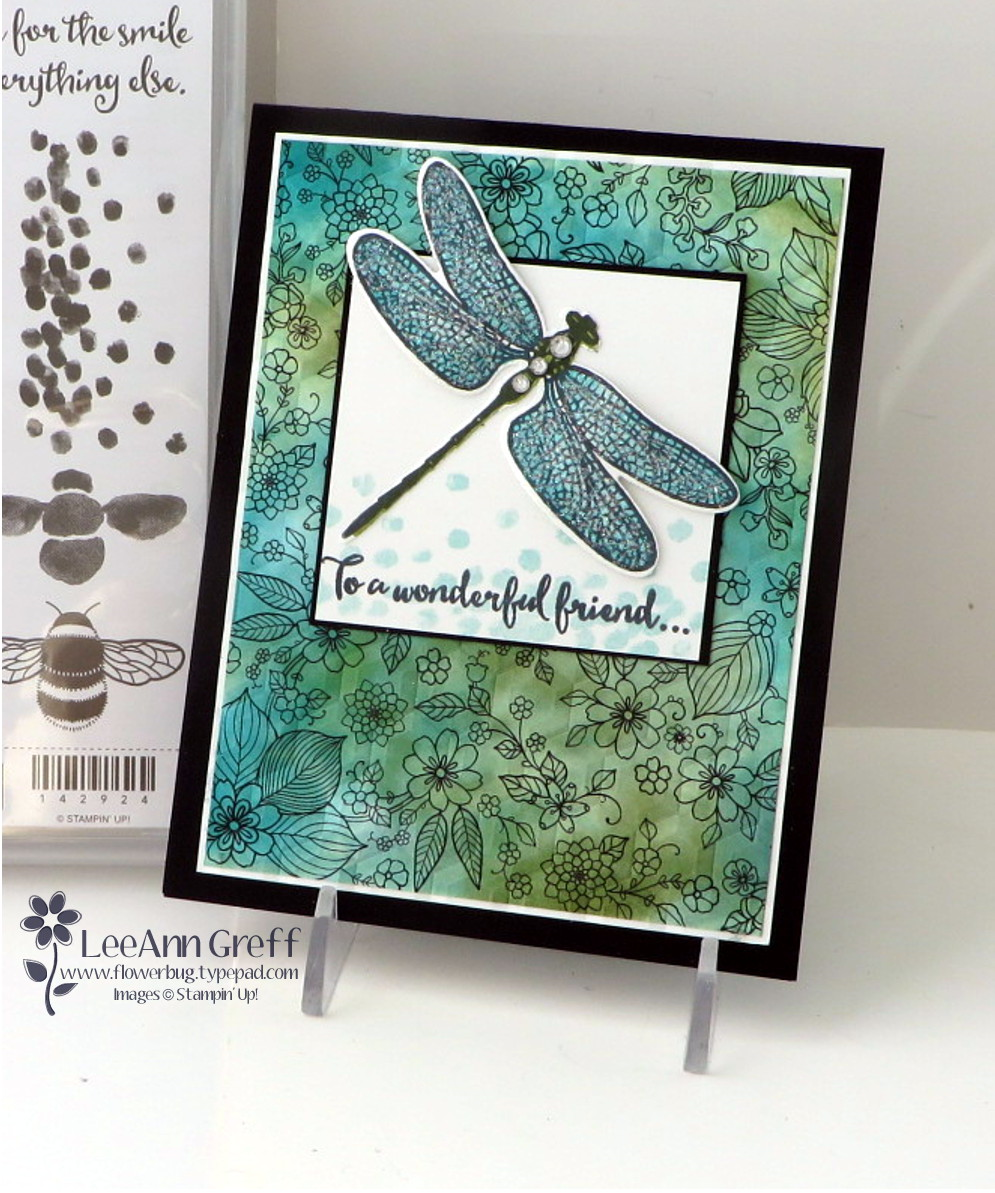
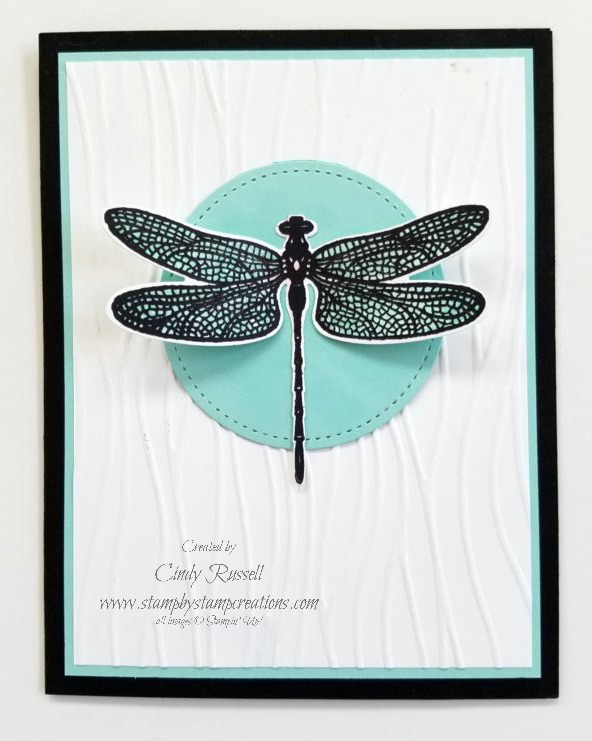
This cute little dragonfly card was one of the favorites at the stamping parties.  This card gives newcomers to stamping a chance to play with the Big Shot quite a bit.  They got to use an embossing folder as well as framelits.  They also got to see that a little glitter goes a long way.  We colored the wings of the dragonfly with the Wink of Stella Glitter Pen for the perfect finishing touch.

I really enjoyed these parties and I hope to do more in the future.  It’s a fun way to meet new people.  I love seeing how excited people get when they make their first card.  Do you remember when you made your first card?  I’m trying to remember making mine but I’m pretty sure it was almost 30 years ago!  I actually found a receipt from my very first Stampin’ Up! order and it was from shortly after my oldest son was born.  Yikes!  I really have been doing this for a long time!  I do love it though!  🙂

Well, I’m off to plan for future events and maybe do a little cleaning and organizing!  Have a great day!  Take care and Happy Stamping!

From the MN Homeland!

Hello!  I’ve been here in the MN Homeland for a few days visiting and just hanging out.  Today I pick up my CO friends Jan and Janet from the airport to begin our pre-On Stage festivities.  The Minneapolis is airport is right by the Mall of America so that’s where we’ll be headed this afternoon as neither of “the J’s” has been there before and I haven’t been there for years.  It should be fun.

We’re all pretty excited about Stampin’ Up!’s On-Stage event on Saturday.  We get to see the new catalog!  Woo Hoo!

Dragonfly Dreams Bee.0417You can’t have a Stampin’ Up! event with swapping.  Today’s card is my swap for the event.  I have a thing about this little bumble bee from the Dragonfly Dreams Bundle.  He’s so darn cute.  I really like the dragonfly too.  I’m so glad that this bundle will be in the new catalog!  Oops!  Did I give something away?  🙂

Are you curious as how I got the honeycomb background on the card?  Well, let me tell you!  I started with my Hexagons Dynamic Textured Impressions Embossing Folder, a sponge brayer and the Delightful Dijon ink pad.  I sponged the ink onto the raised side of the embossing folder, put my paper in, closed the embossing folder and then evenly pressed down on all areas of the folder.  You can use this technique with any of your embossing folders.  It’s great!

I colored one of the Lace Doilies with the Delightful Dijon ink pad and sponge brayer just like I did on this card.  I’m loving the lace doilies and this little technique! I sure hope they carry over into the new catalog!  I guess I’ll find out on Tuesday!  🙂

It’s hard to tell from the picture but after I die cut the little bee I glued him to a piece of vellum and cut out around the outside of the bee.  Then I took by Clear Wink of Stella Glitter Brush and the Gold Wink of Stella Glitter Brush and colored the back side of the vellum to add a little sparkle to my bee.  It turned out pretty cute!  At first I tried coloring in the little areas on the front side.  This worked but was pretty tedious and I kept getting glitter pen o the die cut bee.  I did figure out how to remove the excess glitter pen though!  I simply took the white eraser on the end of my mechanical pencil and “erased” the glitter!  It worked like a charm!

Have a great day!  Take care and Happy Stamping!

Make it Mine Monday: Dragonfly Dreams Bee

Dragonfly Dreams.0217Welcome to Make It Mine Monday!  What do you think of my bee?  I actually got the idea for this card way back in November at an On Stage event.  Stampin’ Up! Cofounder Shelli Gardner showed simple card made using the Hexagons Dynamic Textured Impressions Embossing Folder and the bee from the Dragonfly Dreams stamp set.

IMG_8959 (2)I decided to step my card up a little bit.  The second card shown here is the one I copied.  The picture isn’t very good because I took a picture of the big screen we were watching.  Shellie simply embossed the front of her card and added the label with the stamped bee.

Naturally I had to add a few more layers to my card.  My motto is: you can never have too many layers.  OK…that’s not quite true.  I do have a hard time though when there aren’t enough layers.  🙂

Check out my bee.  Did you notice that I colored the stripes?  Nope….I didn’t use ink.  I used my Gold Wink of Stella Glimmer Pen!  Pretty clever of me isn’t it?!  I also used the Clear Wink of Stella Glimmer Pen on the wings.  You can never have too much sparkle!

Have a great day!  Take care and Happy Stamping!

Make it Mine Monday: Dragonfly Dreams

Inside the Line.0117
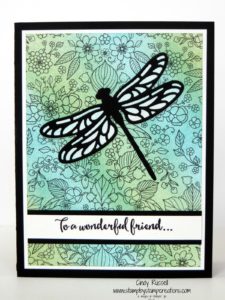
It’s another episode of Make it Mine Monday.  This week’s card features the fabulous Dragonfly Dreams Bundle.

Dragonflies might be right up there with flamingoes and whales as some of my favorite creatures.  I’m not sure what it is about them but I like them a lot.  How about you?  Do you like dragonflies?

If you’re new to my blog, Make it Mine Monday is a weekly feature where I show you how I took a card that I really liked and switched it up to make it my own design.  Sometimes there at big changes and sometimes not.

Check out the differences between this week’s cards.  The untitledtop card is mine and the bottom one is the one I CASEd.  (Thank you LeeAnn Greff!)  I kept the base of the card the same using the Sale-a-bration paper Inside the Lines as my background.  On my card I chose to use the intricate die cut for my dragonfly and added a strip of card stock on the front for my sentiment instead of the square.

To color my designer paper I used the new Sponge Brayers.  I rolled them on the ink pad and then lightly rolled them on the paper.  Definitely an easy way to add color to the paper.

To get the lighter colored wings on my dragonfly I die cut a second solid dragonfly and trimmed away the body.  Then I lightly rolled both of the colors on my wings and went over the whole thing before adhering them to the back of the intricate die cut wings.

As you can see, the cards are similar yet quite different.  It’s fun to take someone else’s beautiful card and put your own twist on it.  Have you tried this?  If so, share your “make-it-mine” card with me.  I’d love to see it!

Have a great day!  Take care and Happy Stamping!