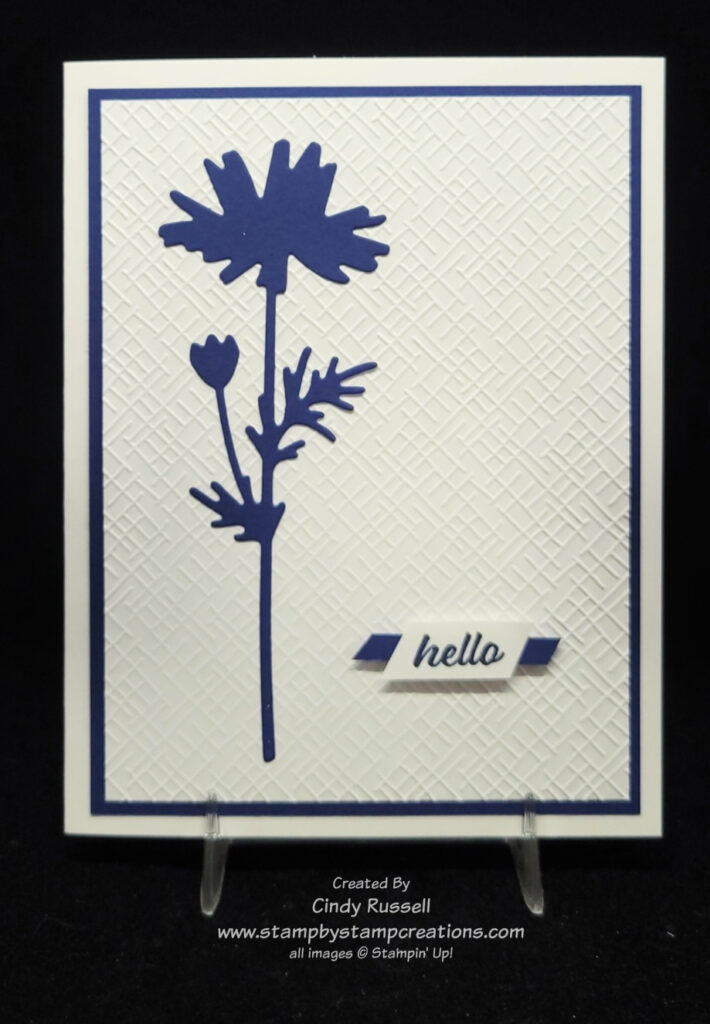
For Day 22 of my 40 Cards in 40 Days I couldn’t resist making another card with the Meadow Dies. They make such a striking card. This card is more casual than the one I shared earlier this week. Yes, I used my favorite embossing folder again. I really need to branch out a bit but this one works so well on so many different types of cards.
When I want to add a sentiment to my card front and the card front is white/light, I like to add a little strip of colored cardstock behind it to make it pop. This “hello” is from the Hello Ladybug stamp set. This turned out to be a pretty easy card for Simple Saturday.
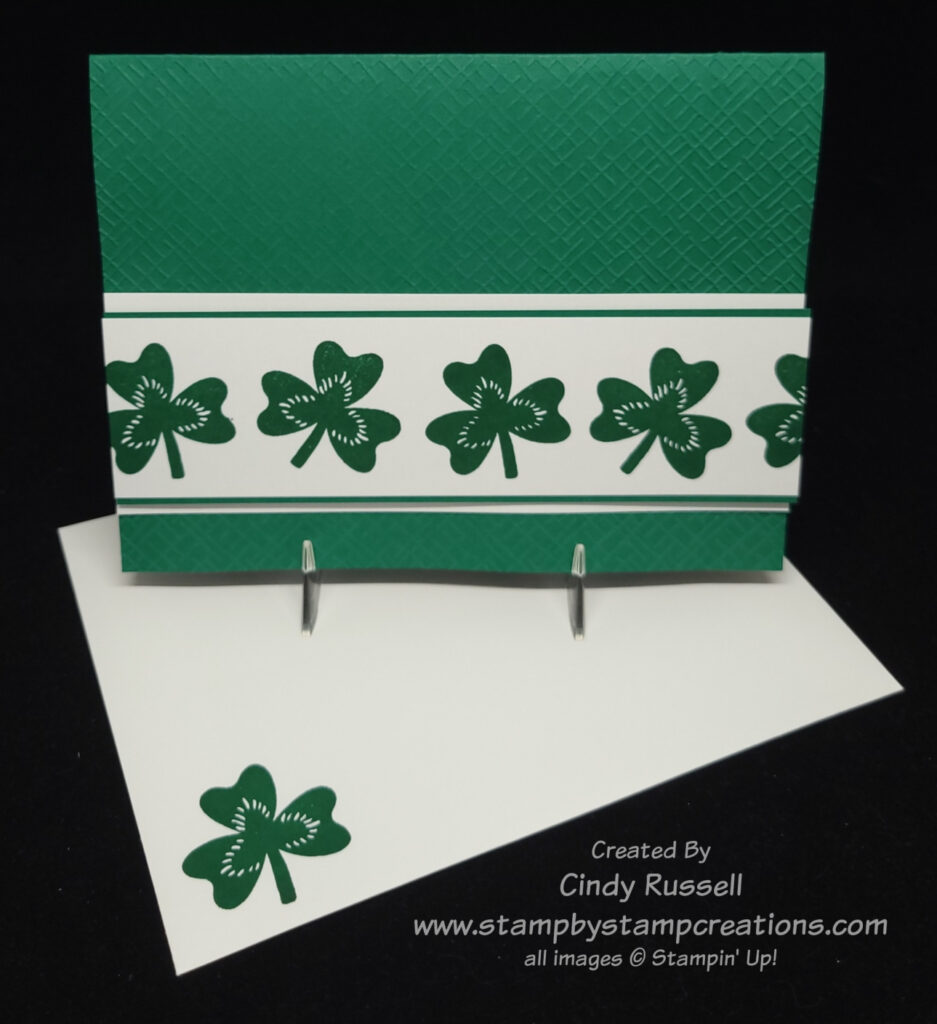
Happy St. Patrick’s Day. Happy Day 20 of my 40 Cards in 40 Days! It would have been wrong not to share a card made with the Lucky Clover Bundle with you today. Unfortunately, I can’t share a link with you because this bundle sold out way back in early February. It was quite popular.
But back to the card. I embossed the card front with my favorite cross-hatch embossing folder. (Did you notice that I actually used a different embossing folder on yesterday’s card?) 😊 If I made this card over, I would emboss a piece of cardstock that covers the front of the card instead of embossing the card front itself. When you emboss the card front, it breaks down the fibers of the paper and it’s not as sturdy and it warps a little. You can see this a bit if you look closely at the bottom edge of my card.
This was a simple card design with some stamped shamrocks and layers. Add that to the embossed card front and you have a fun card for St. Patty’s Day. Enjoy!
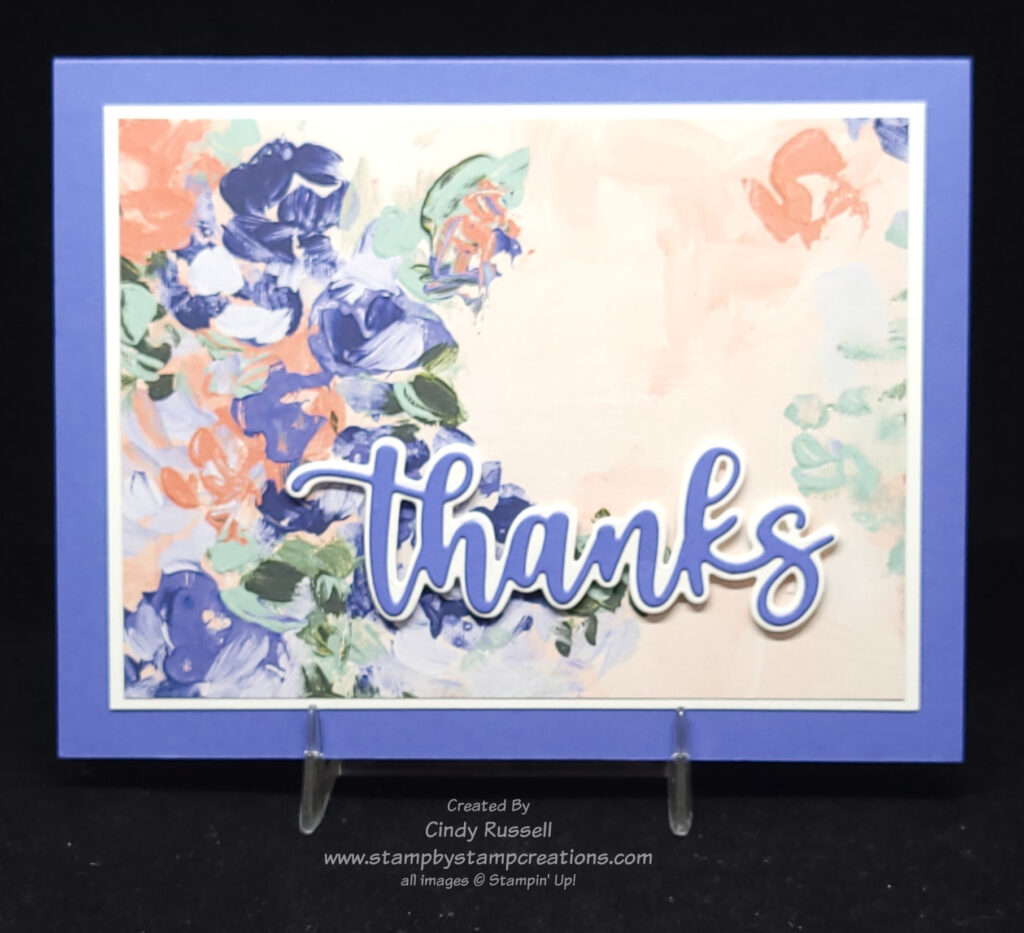
A lovely Spring card on Day 20 of my 40 Cards in 40. The focal point of this card is Stampin’ Up!’s beautiful Hues of Happiness Designer Series Paper. Click the link to see all of the gorgeous, colorful patterns in this pack of paper.
To make the card I adhered a strip of the designer paper directly to the Basic White card base. Then I embossed a piece of Basic White cardstock with the Painted Texture 3D Embossing Folder. After cutting a strip out of the middle of the embossed cardstock I adhered it to the card front with Stampin’ Dimensionals. Then it was time to decorate the card as it needed a little something more. I chose to use the Charming Sentiments stamp set and the Sentiment Silhouette Dies. Have you used this bundle yet? This was actually the first time I’ve used the bundle and I love it! No more fussy cutting around words! The dies do all the work. These two items are bundled in the current Annual Catalog, but that means you only have about 6 weeks to get the bundle price. 17 different sentiments in the stamp set and 30 dies! Wow!
An easy beautiful card perfect for that next birthday on your calendar! Thank you Lorri Heiling for the inspiration. Have a great day! Take care and Happy Stamping!
The geese in this stamp set are so cute and there are fun sentiments in it too. I die-cut the frame twice, once in Sweet Sorbet and once in Basic White. I used the cut-out from the white frame to stamp the goose on and colored the goose with my Stampin’ Blend Markers. Fun and easy! Who doesn’t need a birthday card with a fun goose on it?
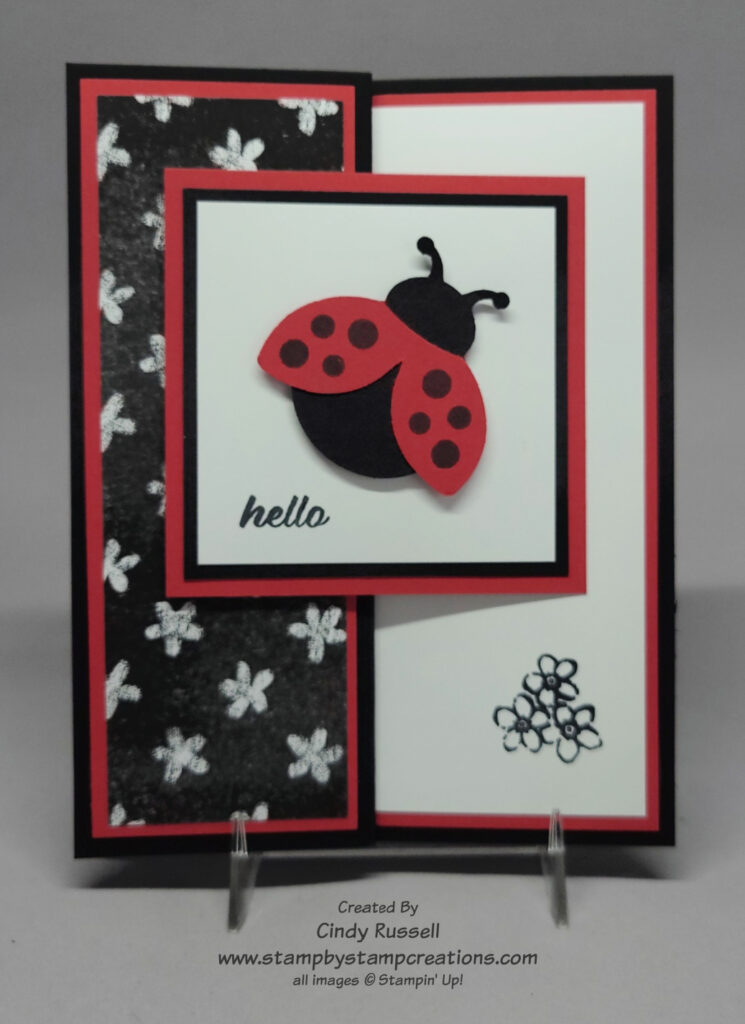
Are you anxiously awaiting Spring and Summer? I know I am! This card for Day 18 of my 40 Cards in 40 Days should at least lets you think about these warmer seasons. I’ve used the cute Hello Ladybug stamp set and the Ladybug Builder Punch for today’s card.
The designer paper used on the card is the Perfectly Penciled Designer Series Paper. You can’t go wrong with black and white paper. The little flowers in the lower right corner of the card are from the Petal Park stamp set. I love that they are so like the flowers on the designer paper.
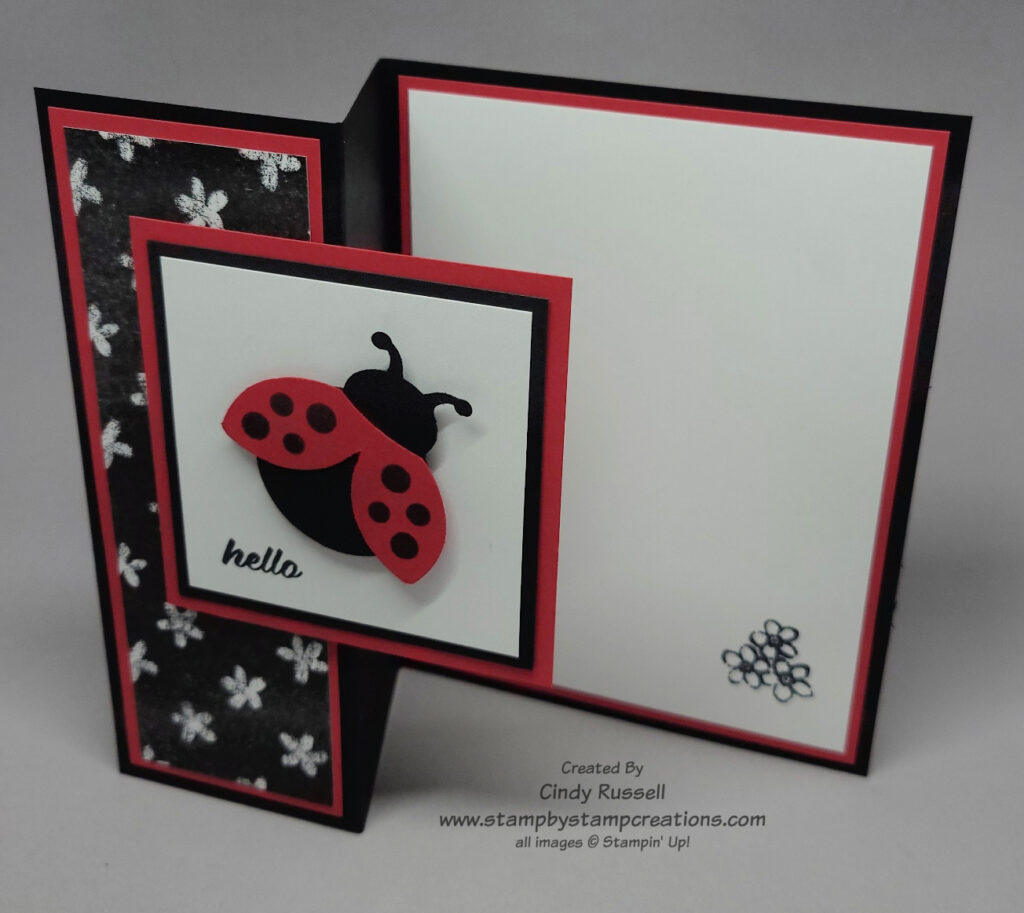
Today’s card is a fun fold card called the Z-Fold. You can see why it’s called that in the second photo below. A Z-Fold card is easy to make. Take a regular card base and then score the front of the card at the halfway mark (2 1/8” on this card). Fold back along the score mark and add your focal point. Just remember to only adhere the focal point (ladybug) to the front flap of the card.
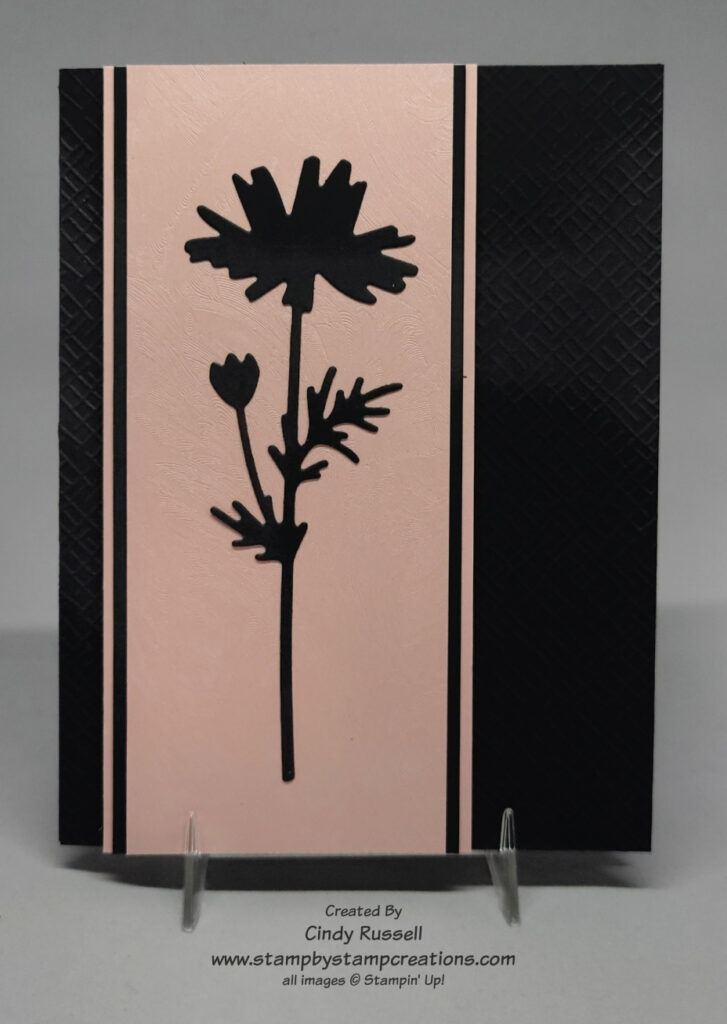
Stampin’ Up!’s Meadow Dies and Brushstroke Specialty Paper
I love the silhouettes that the Meadow Dies cut out. They make a very striking card. For Card 17 in my 40 Cards in 40 Days I’ve paired one of the silhouettes with the Brushstroke Specialty Paper that I shared with you in my project on Day 15. Today I used the Blushing Bride Brushstroke Paper. It really sets off the black silhouette. Unfortunately, my photo does not do the card justice. The Blushing Bride paper doesn’t want to photograph well. I also used my favorite new embossing folder, the crosshatch from the Basics 3D Embossing Folders which is one of the offering in Stampin’ Up!’s Online Exclusives.
This card would be perfect for almost any occasion. Have a great day! Take care and Happy Stamping!
The Hello, Irresistible Designer Paper is gorgeous and it’s perfect for a Simple Saturday project. You don’t have to work too hard to make a beautiful, simple card when your designer paper is the focal point. I cut down a piece of designer, added a layer and popped it up with Stampin’ Dimensionals on a card. Done!
This designer paper is one of the products just released in Stampin’ Up!’s new Online Exclusives. Be sure to check them out. There are some great products there. The Hello, Irresistible Designer Paper gives us a little sneak peek into Stampin’ Up!’s Fresh New Colors that are coming in the upcoming 2023-2024 Annual Catalog. This designer paper brings back favorite colors Pretty Peacock and Lost Lagoon. So fun!
Oh, my! I had overlooked this paper in the catalog until one of customers purchased some. My card and the photo in the catalog do not do it justice. Check out the link to it above because the photo in my online store does a pretty good job showing you just how beautiful it is.
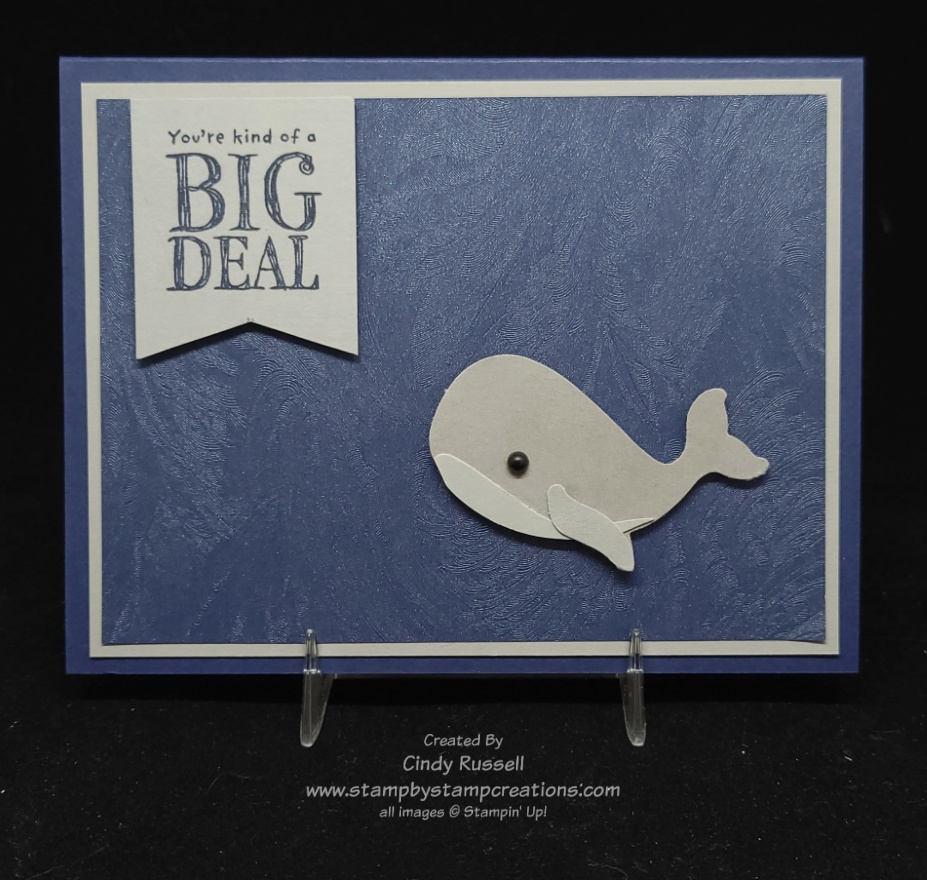
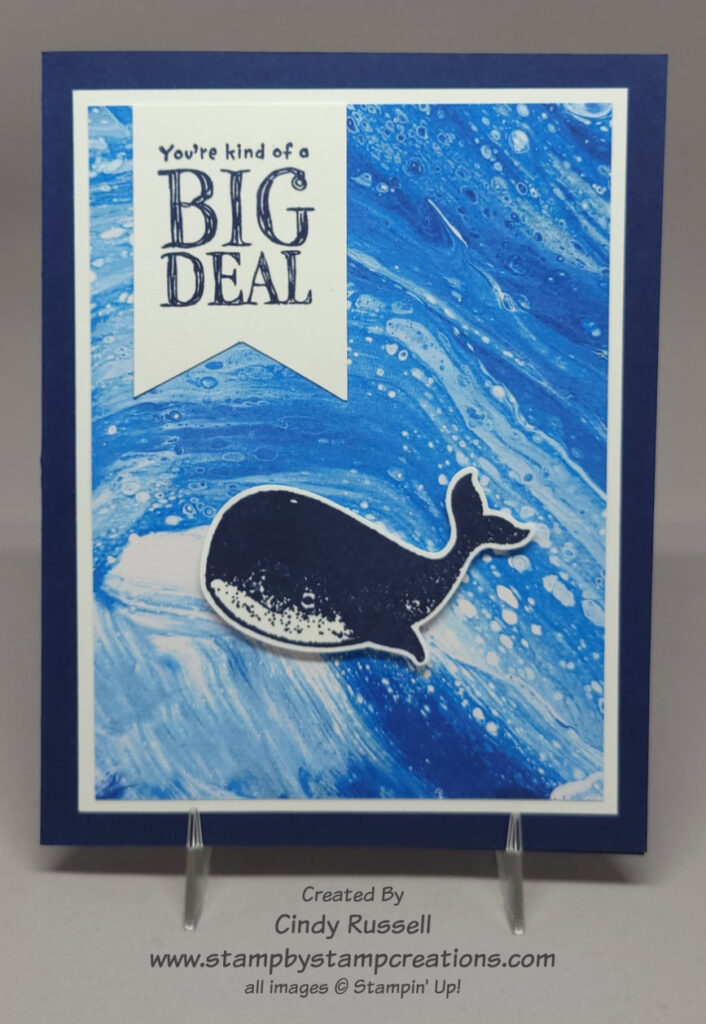
In the package of the Brushstroke Specialty Paper you get one sheet of 3 different colors. Night of Navy, Soft Succulent and Blushing Bride. When I first looked at the Night of Navy piece it reminded me of water which inspired me to dig out the Whale Done stamp set and the Whale Builder Punch.
I was having a difficult time coming up with an idea until I came across a card I made last year with this punch and stamp set. Different designer paper, different orientation and a different whale.
Last year I stamped the whale and punched it out. This year I die cut all the pieces of the whale and put it together. To get the two different tones of Smoky Slate for my pieced together whale I punched the pieces twice. The first time I punched it out of unaltered Smoky Slate and this is what I used for the belly piece. The second time that I punched out the whale I had used my Blender Brush and lightly added a bit of Smoky Slate ink to the Smoky Slate cardstock. I really like the way it turned out.
Such a fun stamp set and punch. Two more items that will stay in my craft room stash. 🙂
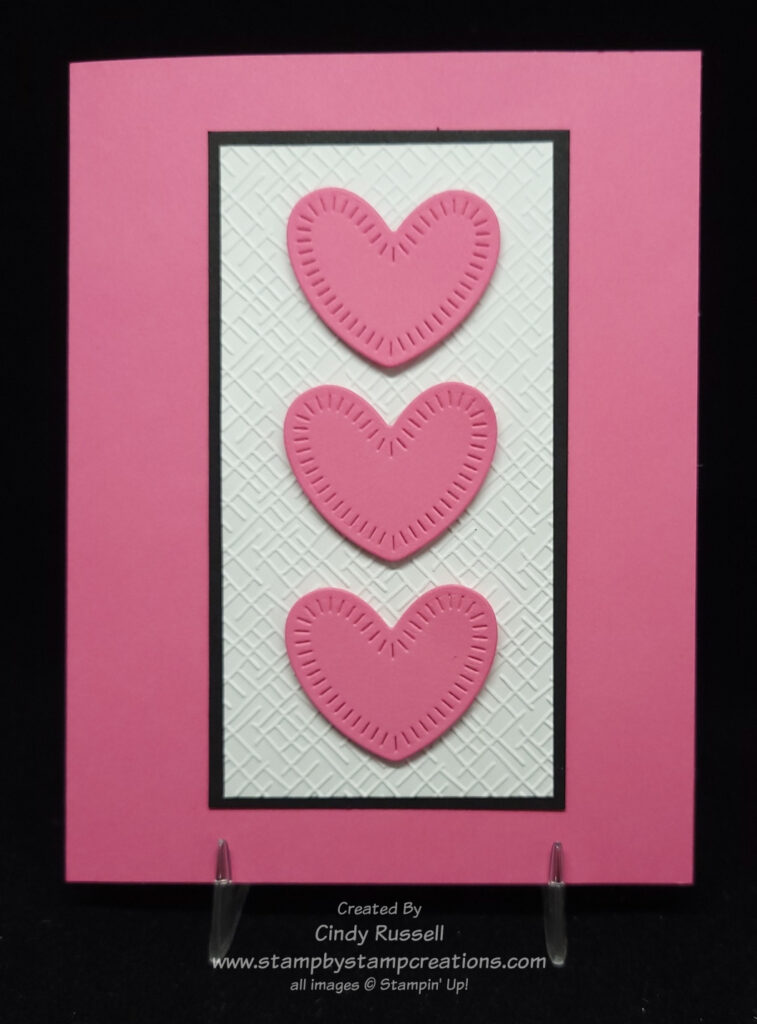
Card made with Stampin’ Up!’s Radiating Stitches Dies
For Day 14 of my 40 Cards in 40 Days I wanted to highlight the Radiating Stitches Dies that are a new item found in Stampin’ Up!’s Online Exclusives. There are six dies in the set that all have this fun stitching on them. There are three different sizes of rectangles, two different circles and the heart which I used on my card here. Be sure to click the link above and check out these dies online to see the stitching on the other dies.
This card was very easy to make. After die-cutting the three hearts from Polished Pink cardstock, I adhered them to a piece of Basic White cardstock that was embossed with my favorite cross-hatch design from the Basic 3D Embossing Folders. Add a layer of Basic Black and pop it on the front of the card. Easy Peasy.
One of the things I like about my challenge is that since I have to make so many cards, I’m forcing myself to make easier cards. Sometimes I can get carried away. I hope you’re challenging yourself a little bit and making at least a few cards yourself. Have a great day! Take care and Happy Stamping!
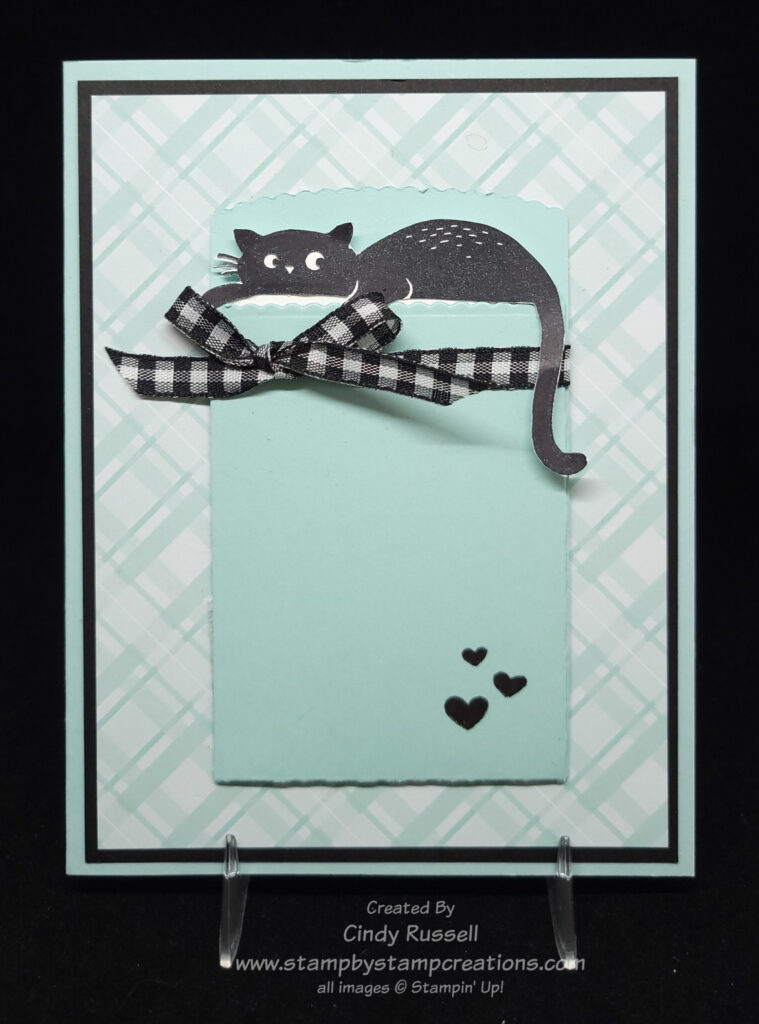
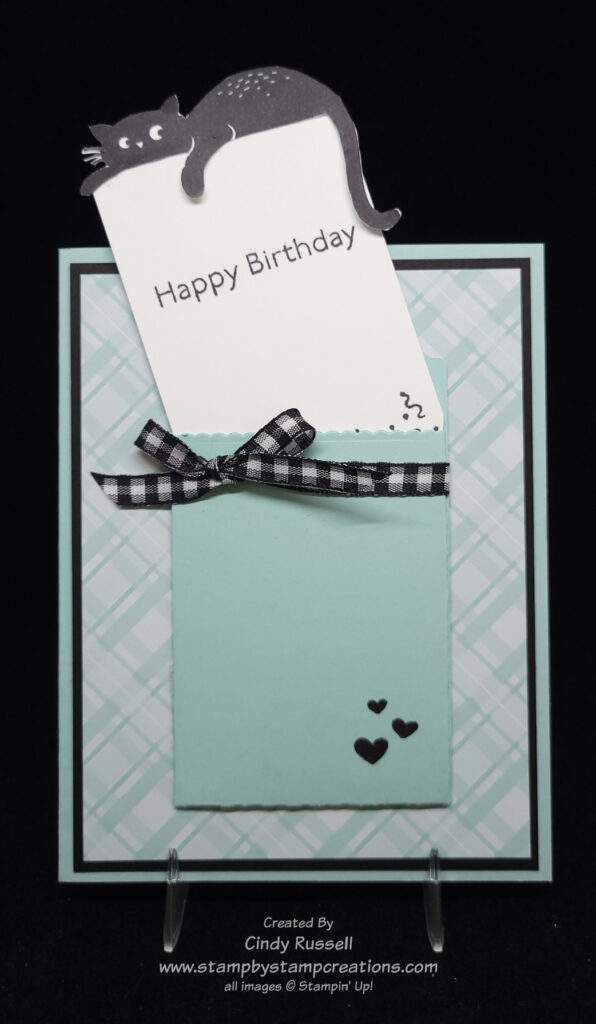
Such a fun card on Day 13! A pocket card! Before I start telling you about this card I do have a disclaimer. I made the card, but I didn’t design it. I saw it online and copied it. I can’t give them credit because I don’t remember where I found it and they didn’t have a watermark on the photo. ☹
This was a fun card to make. The little pocket was easily made with the Mini Pocket Envelope Dies. I stamped the cat, cut him out and glued him to the top of the insert. The Pool Party designer paper is from the Subtles 6” x 6” pack. Other than cutting the cat out by hand, this card was easy to make.
I wonder who I should send it to? Oh, I’ve got it! My younger son’s birthday is at the end of the month and he has a black cat! Perfect!
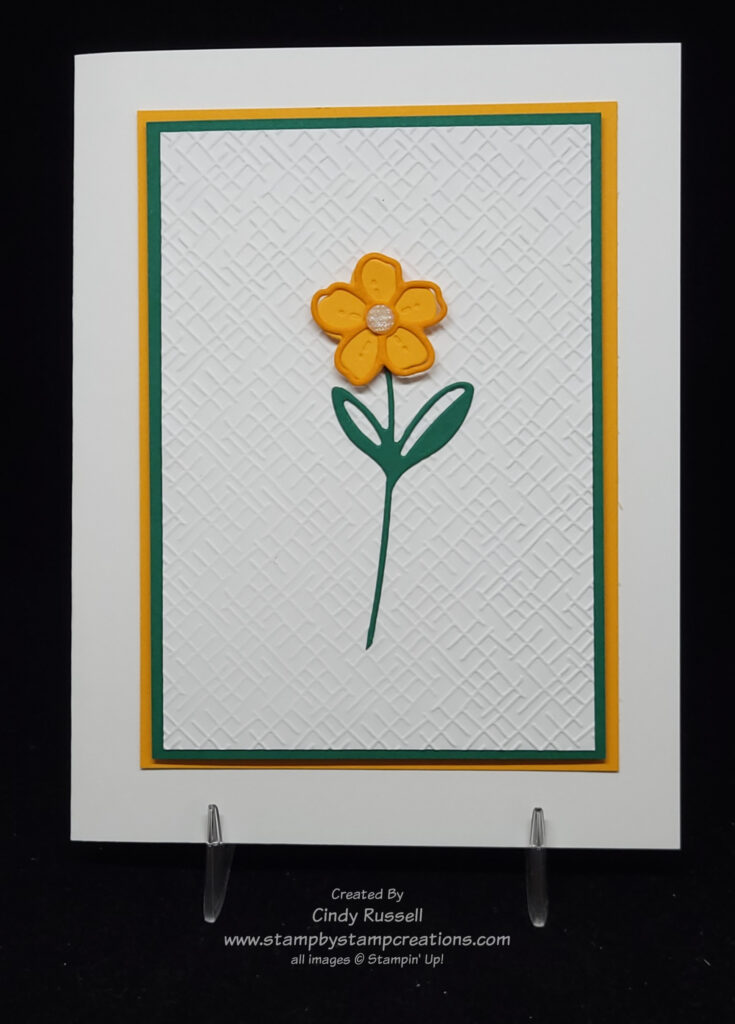
Today I have a simple design for you. On Day 12 of my 40 Cards in 40 Days I am highlighting the Sentimental Park Dies. The card itself isn’t simple as there is die-cutting and embossing to do, but the overall design is simple. One little flower on my favorite embossed background.
The Sentimental Park Die set has a lot to offer. Some of the dies will cut out images from the coordinating Sentimental Park stamp set. Others will die cut flowers and labels which will fit the sentiments in the stamp set. I used some of the “extra” dies. The flower stem was trimmed from the longer die-cut stem in the set. To get a two-tone look I my flower I first die cut the solid image from Mango Melody cardstock. To get the darker outline flower I first using my blending brush to brush some Mango Melody ink on the Mango Melody cardstock before die-cutting.
A fun and easy card for Day 12. I hope you enjoyed it. Have a great day! Take care and Happy Stamping!
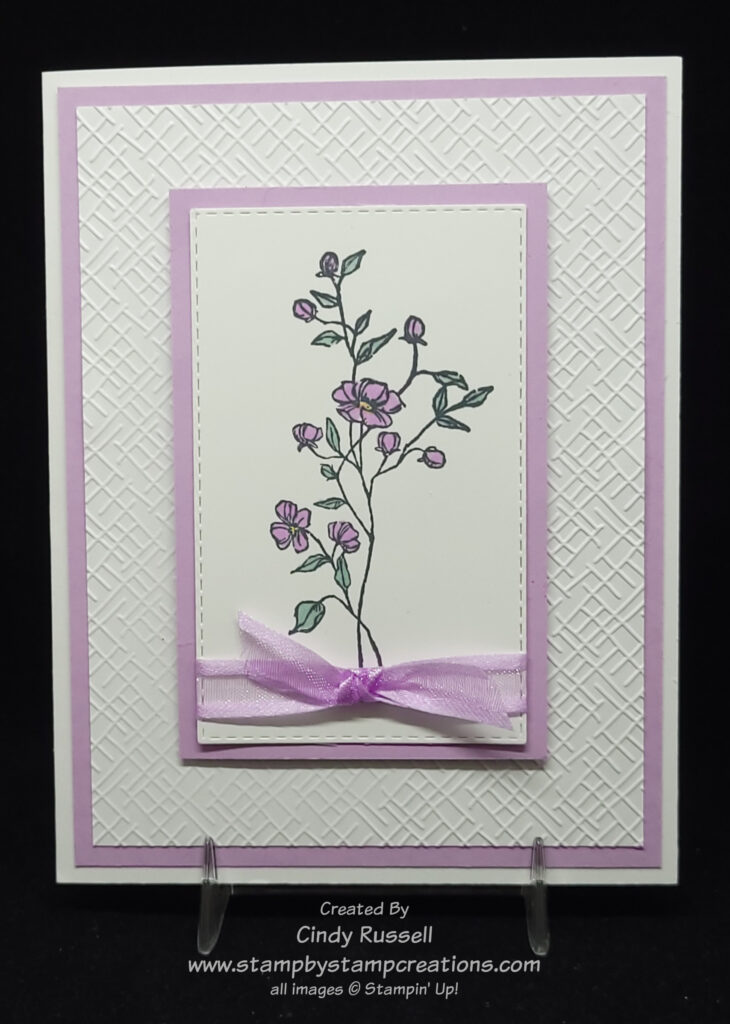
Day 11 of 40 Cards in 40 Days brings us another sweet card. This is the second card I’ve made during my challenge with Stampin’ Up!’s Dainty Delight stamp set. You can view the first one here. I like this stamp set because if has some nice sentiments in a pretty font and the floral images are small, sweet and easy to color. Ha! Yep, I like the look of colored images, but it’s not my favorite thing to do.
The colors used on the card are Fresh Freesia and Soft Succulent. So pretty together! The embossing folder used on the card is one of the Basic 3D Embossing Folders that you can find in the Online Exclusives in my Online Store.
I hope you’ve enjoyed Card 11. Have a great day! Take care and Happy Stamping!
Another day. Another card that makes me smile. This card that I made for Day 10 of my 40 Cards in 40 Days is an easy one and a beautiful one. I can’t call it a Simple Saturday card because there’s a little bit of die cutting involved.
The gorgeous Fancy Flora Designer Series Paper is the highlight of the card. I framed a piece of the paper with Basic White and adhered it to an Orchid Oasis card. This paper is so beautiful, I could have left it at that but I wanted to add a little something else to it without taking away from the paper. The Amazing Thanks Dies were the perfect choice. This die set die cuts both pieces which make it so easy to use. I used liquid glue to adhere the two pieces together but another option would be to use Adhesive Sheets for the top layer. The combined layers are adhered to the card with Stampin’ Dimensionals. Easy-peasy and oh, so lovely!
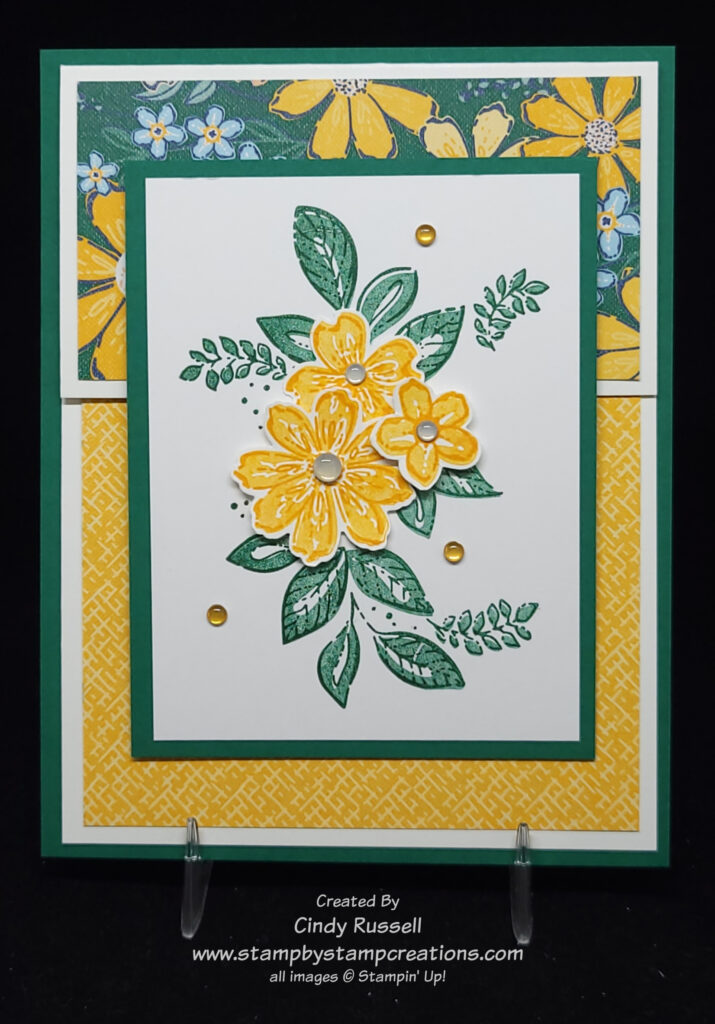
I love how this card turned out. It’s the best feeling when you finish making a card and you just have to smile. That’s what happened after I finished making this, the 9th card in my 40 Cards in 40 Days. I used Stampin’ Up!’s Petal Park stamp set, the Regency Park Designer Series Paper and the Adhesive-backed Milky Dots to make this stunning card.
One of the things I really like about this card are the colors: Shaded Spruce and Mango Melody. It’s been a while since I’ve used either of them., and I’m not sure I’ve ever used them together. With their designer papers, Stampin’ Up! provides us with color combinations we may not have chosen for ourselves.
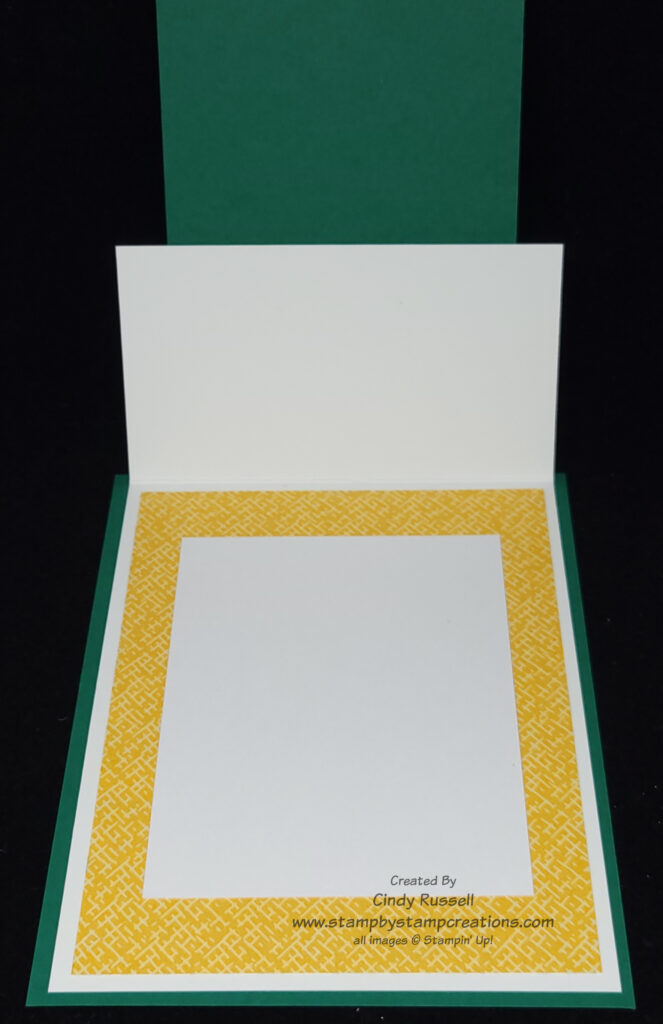
This card is actually a fun fold card as you can see in the second photo. The front of the card is cut short and then a focal point is added. The card base is Basic White but as usual, I thought the card needed another layer so I cut down the card base and adhered it a 5 ½” x 4 ¼” piece of Shaded Spruce cardstock.
To give the flowers some dimension I adhered them with different adhesives. The mid-size flower is adhered to the cardstock with Stampin’ Seal adhesive. On the large flower I used Mini Glue Dots which popped it up just a tiny bit and the I used a Stampin’ Dimensional on the small flower. I also bent up the petals of the flowers for dimension.
When putting this card together my tip to you is to put the Basic White piece on the inside first. Then you adhere the floral focal point of the card to front. This way you can be sure to cover the inside piece.
I’d love to hear your thoughts about today’s card. Please leave a comment and let me know. Have a great day. Take care and Happy Stamping!
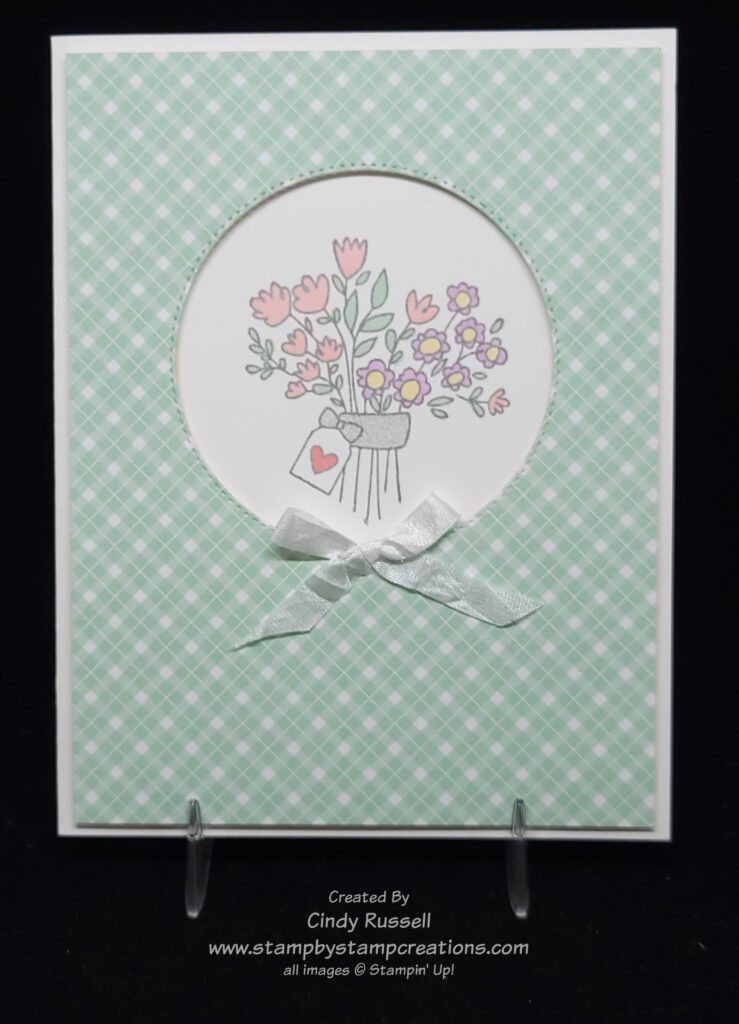
A soft and sweet card for Day 8 of my 40 Cards in 40 Days challenge. This card was made using Stampin’ Up!’s Speedy Recovery stamp set. This is the perfect get well stamp set. I wanted to use soft colors on my card so I stamped the image with Smoky Slate and then colored it in with my Stampin’ Blend Markers. The band and bow around the flowers are stamped with the bouquet.
The designer paper I used on my card is from the Country Gingham 6” x 6” Designer Paper pack. The color of gingham on my card is Mint Macaron which is what I used to color in the leaves. The designer paper layer of the card is popped up with Stampin’ Dimensionals. The White Crinkled Seam Binding bow finishes off the card. Soft and sweet.