
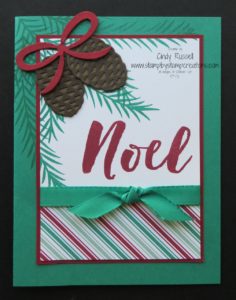
 Check out these pine cones? Aren’t they great? They’re so festive and dimensional with the two separate pieces. Of course that bow is pretty darn cute too!
Are you wondering how I lined up the pine boughs on the card front and the white card stock? It’s pretty easy. Using just a little bit of TEMPORARY adhesive, adhere the white card stock where you want it lined up on the card front. Now stamp your pine boughs. Part of the pine bough will be on the card front and part on the white card stock. There may be a little strip right around the edge of the white card stock that doesn’t get stamped but when you add your border of Cherry Cobbler it covers up the space! My border is a little narrow so it doesn’t cover quite as well as a wider border would but it still is a neat technique.
This was a very popular card in my classes and workshops. It’s funny because it’s not necessarily my favorite. It just goes to show that not everyone likes the same type of cards. I need to remember that when I design. Just because I don’t love it doesn’t mean that my customers won’t.
Right now I’m working on designing cards for my Love & Friendship class that I’m having in January. It’s pretty fun playing with new products. I can’t wait for you to see the new Occasions Catalog and the 2017 Sale-a-bration Brochure! Fun stuff!
Have a great day! Take care and Happy Stamping!