40 Cards in 40 Days: Radiating Stitches Dies

Card made with Stampin’ Up!’s Radiating Stitches Dies

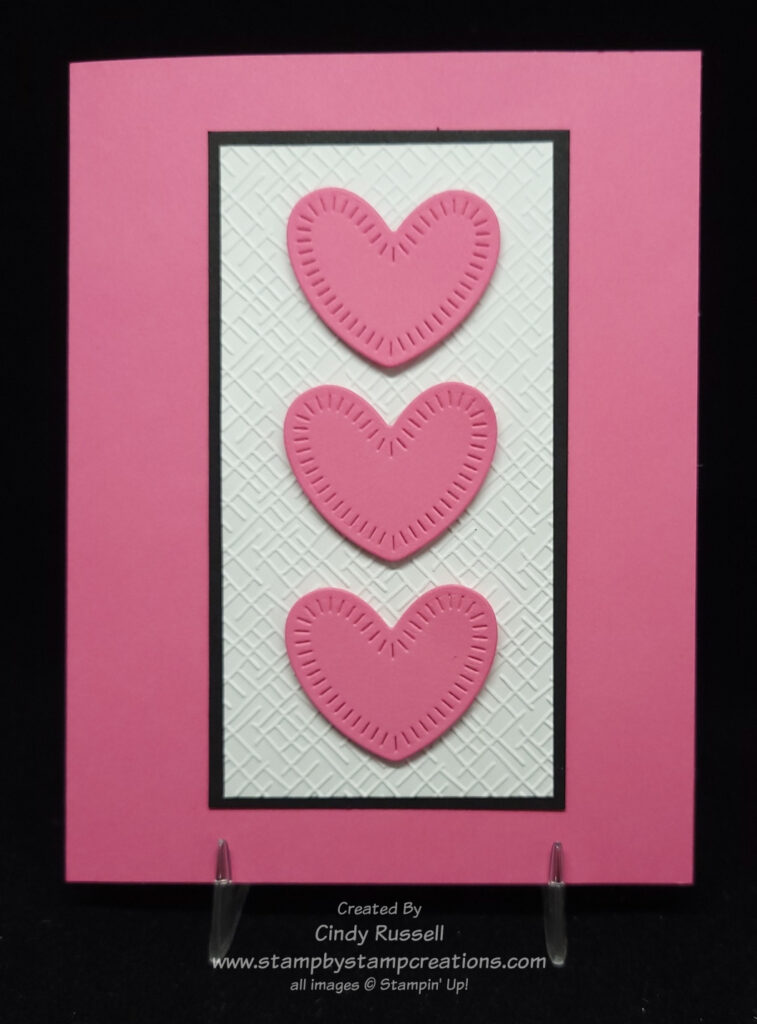
For Day 14 of my 40 Cards in 40 Days I wanted to highlight the Radiating Stitches Dies that are a new item found in Stampin’ Up!’s Online Exclusives.  There are six dies in the set that all have this fun stitching on them.  There are three different sizes of rectangles, two different circles and the heart which I used on my card here.  Be sure to click the link above and check out these dies online to see the stitching on the other dies.

This card was very easy to make.  After die-cutting the three hearts from Polished Pink cardstock, I adhered them to a piece of Basic White cardstock that was embossed with my favorite cross-hatch design from the Basic 3D Embossing Folders.  Add a layer of Basic Black and pop it on the front of the card.  Easy Peasy.

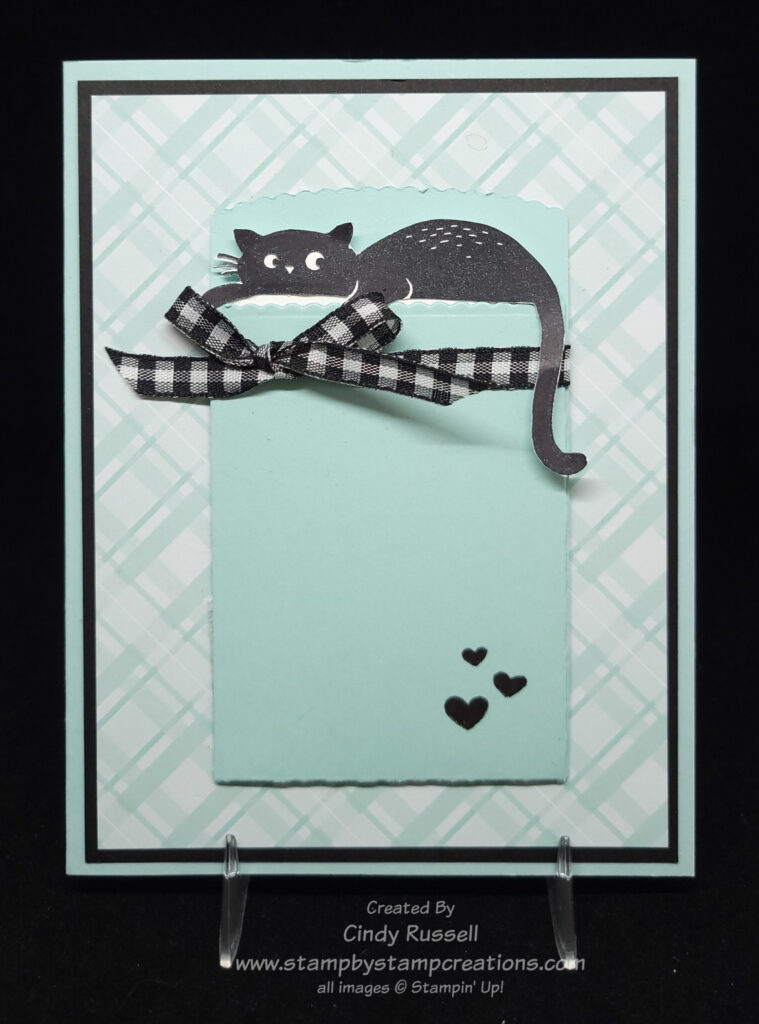
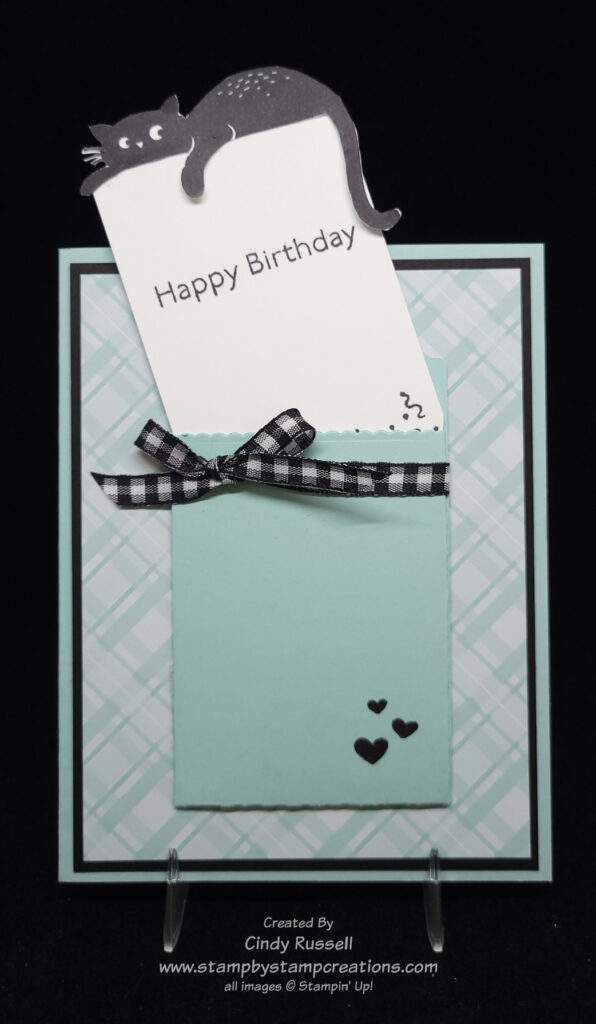
One of the things I like about my challenge is that since I have to make so many cards, I’m forcing myself to make easier cards.  Sometimes I can get carried away.  I hope you’re challenging yourself a little bit and making at least a few cards yourself.  Have a great day!  Take care and Happy Stamping!

40 Card in 40 Days: Love Cats Pocket Card

Love Cats Pocket Card

Such a fun card on Day 13!  A pocket card! Before I start telling you about this card I do have a disclaimer.  I made the card, but I didn’t design it.  I saw it online and copied it.  I can’t give them credit because I don’t remember where I found it and they didn’t have a watermark on the photo.  ☹

This was a fun card to make.  The little pocket was easily made with the Mini Pocket Envelope Dies.  I stamped the cat, cut him out and glued him to the top of the insert.  The Pool Party designer paper is from the Subtles 6” x 6” pack.   Other than cutting the cat out by hand, this card was easy to make. 

I wonder who I should send it to?  Oh, I’ve got it!  My younger son’s birthday is at the end of the month and he has a black cat!  Perfect!

Have a great day!  Take care and Happy Stamping!

40 Cards in 40 Days: Sentimental Park Dies

Today I have a simple design for you.  On Day 12 of my 40 Cards in 40 Days I am highlighting the Sentimental Park Dies.  The card itself isn’t simple as there is die-cutting and embossing to do, but the overall design is simple.  One little flower on my favorite embossed background.

The Sentimental Park Die set has a lot to offer.  Some of the dies will cut out images from the coordinating Sentimental Park stamp setOthers will die cut flowers and labels which will fit the sentiments in the stamp set.  I used some of the “extra” dies.  The flower stem was trimmed from the longer die-cut stem in the set.  To get a two-tone look I my flower I first die cut the solid image from Mango Melody cardstock.  To get the darker outline flower I first using my blending brush to brush some Mango Melody ink on the Mango Melody cardstock before die-cutting.

A fun and easy card for Day 12.  I hope you enjoyed it.  Have a great day!  Take care and Happy Stamping!

40 Card in 40 Days: Sweet Dainty Delight

Dainty Delight Card

Day 11 of 40 Cards in 40 Days brings us another sweet card.  This is the second card I’ve made during my challenge with Stampin’ Up!’s Dainty Delight stamp set.  You can view the first one here.  I like this stamp set because if has some nice sentiments in a pretty font and the floral images are small, sweet and easy to color.  Ha!  Yep, I like the look of colored images, but it’s not my favorite thing to do.

The colors used on the card are Fresh Freesia and Soft Succulent.  So pretty together!  The embossing folder used on the card is one of the Basic 3D Embossing Folders that you can find in the Online Exclusives in my Online Store.  

I hope you’ve enjoyed Card 11.  Have a great day!  Take care and Happy Stamping!

40 Card in 40 Days: Amazing Thanks Dies

Another day.  Another card that makes me smile.  This card that I made for Day 10 of my 40 Cards in 40 Days is an easy one and a beautiful one.  I can’t call it a Simple Saturday card because there’s a little bit of die cutting involved. 

The gorgeous Fancy Flora Designer Series Paper is the highlight of the card.  I framed a piece of the paper with Basic White and adhered it to an Orchid Oasis card.  This paper is so beautiful, I could have left it at that but I wanted to add a little something else to it without taking away from the paper.  The Amazing Thanks Dies were the perfect choice.  This die set die cuts both pieces which make it so easy to use.  I used liquid glue to adhere the two pieces together but another option would be to use Adhesive Sheets for the top layer.  The combined layers are adhered to the card with Stampin’ Dimensionals.  Easy-peasy and oh, so lovely! 

Have a great day!  Take care and Happy Stamping!

40 Cards in 40 Days: Petal Park Fun Fold

Stampin’ Up!’s Petal Park Card

I love how this card turned out.  It’s the best feeling when you finish making a card and you just have to smile.  That’s what happened after I finished making this, the 9th card in my 40 Cards in 40 Days.  I used Stampin’ Up!’s Petal Park stamp set, the Regency Park Designer Series Paper and the Adhesive-backed Milky Dots to make this stunning card.

One of the things I really like about this card are the colors:  Shaded Spruce and Mango Melody.  It’s been a while since I’ve used either of them., and I’m not sure I’ve ever used them together. With their designer papers, Stampin’ Up! provides us with color combinations we may not have chosen for ourselves. 

This card is actually a fun fold card as you can see in the second photo.  The front of the card is cut short and then a focal point is added.  The card base is Basic White but as usual, I thought the card needed another layer so I cut down the card base and adhered it a 5 ½” x 4 ¼” piece of Shaded Spruce cardstock.

To give the flowers some dimension I adhered them with different adhesives.  The mid-size flower is adhered to the cardstock with Stampin’ Seal adhesive.  On the large flower I used Mini Glue Dots which popped it up just a tiny bit and the I used a Stampin’ Dimensional on the small flower.  I also bent up the petals of the flowers for dimension.

When putting this card together my tip to you is to put the Basic White piece on the inside first.  Then you adhere the floral focal point of the card to front.  This way you can be sure to cover the inside piece.

I’d love to hear your thoughts about today’s card.  Please leave a comment and let me know.  Have a great day.  Take care and Happy Stamping!

40 Cards in 40 Days: Soft & Sweet Get Well

Stampin’ Up!’s Speedy Recovery Card

A soft and sweet card for Day 8 of my 40 Cards in 40 Days challenge.  This card was made using Stampin’ Up!’s Speedy Recovery stamp set.  This is the perfect get well stamp set.  I wanted to use soft colors on my card so I stamped the image with Smoky Slate and then colored it in with my Stampin’ Blend Markers.  The band and bow around the flowers are stamped with the bouquet.

The designer paper I used on my card is from the Country Gingham 6” x 6” Designer Paper pack.  The color of gingham on my card is Mint Macaron which is what I used to color in the leaves.  The designer paper layer of the card is popped up with Stampin’ Dimensionals.  The White Crinkled Seam Binding bow finishes off the card.  Soft and sweet.

Have a great day!  Take care and Happy Stamping!

Best Day Challenge Card

Best Day Card

Happy first day of March!  March is a big birthday month in the Russell family so it’s only fitting that I share a birthday card with you today.  This is Day 7 of 40 Cards in 40 Days.  Today I’m using the Best Day stamp set from Stampin’ Up!’s January – April 2023 Mini Catalog. 

I fell in love with this chubby little cupcake cat when I saw it.  TSC!  Too Stinkin’ Cute!  The designer paper is the Design A Dream Designer Paper.  This paper is a hostess item found on page 179 of Stampin’ Up!’s January – April Mini Catalog.  It can only be purchased with Stampin’ Rewards.  Contact me if you’d like more information on this. 

While planning my card, I chose the designer paper first.  This made it easier to figure out what colors to use on the cupcake cat.  😊  You may not have noticed, but the layout for this card is the same as the layout I used on Day 2 of challenge.  I changed up the shape of the focal point and added ribbon and a little stamping on the card front.

Have a great day!  Take care and Happy Stamping!

40 Cards in 40 Days: Naturally Gilded Designer Paper

Naturally Gilded Designer Paper Card

Wow!  This Naturally Gilded Specialty Designer Series Paper that I used on this card for Day 6 of my 40 Cards in 40 Days is gorgeous!  As you can see, I made the paper the focal point of the card.  The package of paper comes with 6 sheets of specialty paper.  2 sheets with a copper design on a white background like I used here, 2 sheets with a silver design on a white background and 2 sheets with a gold design on vanilla background.

I can’t share a link to the paper in my online store because it’s not there yet.  This paper is part of Stampin’ Up!’s Online Exclusives that start tomorrow.  As a demonstrator I was able to order it a head of time.  I can’t wait to see what else Stampin’ Up! has in store for us with their Online Exclusives!

The label and sentiment that I used on the card are from the Something Fancy Bundle that can be found in Stampin’ Up!’s January – April Mini Catalog.

I hope you’re enjoy my 40 Cards in 40 Days.  If you are, please leave a comment on my blog or Facebook page.  Have a great day!  Take care and Happy Stamping!

40 Card in 40 Days: Sunshine and Smiles

February Paper Pumpkin: Sunshine and Smiles

It’s Day 5 in my 40 Cards in 40 Days Challenge and I have a treat for you.  Three cards in one day!  I made today’s cards from February’s Paper Pumpkin Kit, Sunshine and Smiles!  For these cards I tried to follow the directions and make the cards as the kit suggested.  Me, follow directions?  I will admit that it was a bit difficult but I did it.  😊

Aren’t these critters adorable?  If you’re wishing that you had purchased the kit, I have a suggestion for you.  Check out the Rain or Shine Suite of products in Stampin’ Up!’s January – April Mini Catalog.  You’ll find some of these same critters and images!  I don’t have this suite (yet?), but I wish I did so I could make some alternative cards with the items in my Paper Pumpkin kit.  Oh, well.  I’ll just have to get creative.

It’s hard to tell from the photo above, but all three cards have a window in the front.  Check out the photo here.  This is the inside of the yellow/mango checked card. 

Did you know that March will be Paper Pumpkin’s 10th Anniversary?  Wow!  That’s a lot of kits!  For their anniversary, Paper Pumpkin is including a FREE gift in the kit.  They are including a second stamp set that will coordinate with the stamp set in the kit or stand on it’s own.  😊

Have you ever tried a Paper Pumpkin subscription?  If not, you should.  If you have in the past, and weren’t satisfied with them, give them another try.  The kits just keep getting better and better!  I had fun making these three cards and I’m looking forward to changing them up a little. Check out the Paper Pumpkin page in my online store.  If you do decide to purchase the month-to-month subscription, you can sign up here.

I hope you enjoyed these Paper Pumpkin cards for Day 5.  Have a great day.  Take care and Happy Stamping!

40 Cards in 40 Days: Simple Saturday

Stampin’ Up!’s Dainty Delight

Stampin’ Up!’s Dainty Delight stamp set has such sweet images.  It was the perfect choice for Day 4 of my 40 Cards in 40 Days Challenge.  Not only is it Day 4 of my challenge but it’s Saturday.  What’s better on Saturday than a simple card?

Today’s card is one we made in classes this past week.  This simple card only uses stamps, ink and paper….ok…and one little bow.  😊  To give the card a little dimension and not be so boring, I used designer paper to stamp my image on and for the blue layer.  I did try the card using cardstock instead of the designer paper but it was way to boring.  The subtle patterns of the designer paper give the card just enough “wow” to make it interesting. Both of the designer paper patterns that I used are from the Dainty Flowers Designer Paper pack which was a Sale-a-bration item.  I say “was” because it sold out a few weeks ago.  This card would be pretty with any subtle patterns and color combinations.

Simple Saturday with stamps, ink and paper.  I really need to try that more often! Have a great day! Take care and Happy Stamping!

40 Cards In 40Days: Graduation Owls

Stampin’ Up!’s Adorable Owls Stamp Set

The third day of my 40 Cards in 40 days features Stampin’ Up!’s Adorable Owls stamp set.  These owls are so stinkin’ cute!  Today you get a two-for-one because I couldn’t decide which owl to use on my card.  😊

Adorable Owls is a Sale-a-bration item which means you can choose it for FREE with a $50 purchase!  Sweet!  If you like these little owls as much as I do, don’t wait!  Sale-a-bration ends on Tuesday, February 28th and that is the last day you will see these cuties.

I came up with the idea for these cards after working with the stamp set and then seeing a graduation sentiment in the Sentimental Park stamp set (which I didn’t use on the card).  Both of these owls have a little wing sticking out which can “hold” something in so I thought a little diploma would look adorable.  The diplomas are simple a piece of computer paper cut 1 ¾” x ¾”, rolled up, and tied with a piece of baker’s twine (black) or embroidery floss (red).  They are attached to the card with Mini Glue Dots.  The “congratulations” stamp is from the Something Fancy stamp set.  You can purchase this stamp set in a bundle with the Something Fancy Dies.  The die set has tags and labels that fit the sentiments perfectly .

Once I had the diplomas on the owls I felt that they needed a graduation cap so I had to do some thinking.  Aha!  I remembered that the Beautiful Shapes Dies had many different shaped dies and wouldn’t you know, it had the perfect shape and sized die that I needed!  It’s hard to see in the photos but there is a small 1/8” circle attached to the top of the caps.

You may have noticed that I used my new favorite embossing folder on the background of both cards.  It’s one of three in the Basics 3D Embossing Folders pack which will be part of Stampin’ Up!’s Online Exclusives starting on March 1st.

I hope you enjoyed these fun graduation cards.  Please leave a comment and let me know what you think of them.  Have a great day!  Take care and Happy Stamping!

40 Cards in 40 Days: Beautifully Happy

Beautifully Happy – Sale-a-bration

It’s Day 2 of 40 Cards in 40 Days and I’m sharing a card made with the Beautifully Happy stamp set! It’s gorgeous!  Not only is it beautiful, it’s easy to work with.  You can “color” this large floral stamped image with stamps!  This stamp set is one of Stampin’ Up!’s DistInktive stamp sets which means the stamp creates different opacities (shading) with a single stamped image.  So realistic looking!

The Beautifully Happy stamp set is a Sale-a-bration item that you can choose for free with an order of $100.  Sale-a-bration is almost over so don’t miss out on this gorgeous stamp set!  The last day of Sale-a-bration is February 28th.

I paired this stamp set with the equally gorgeous Fancy Flora Designer Paper from Stampin’ Up!’s January – April Mini Catalog.  The colors of cardstock used on the card are Fresh Freesia, which retires at the end of April, and Orchid Oasis.  Soft Succulent was used for the stamped leaves.  I inked up the stamp and then stamped it off on scrap paper before stamping it over the image.  This gave is a softer look.  Full strength was a little too dark.  Some Adhesive-Backed Milky Dots finished off the card.

This card definitely says Spring and is the perfect choice for Day 2 of my challenge as the temperature is rather cold here in Colorado.  I’d love for you to leave a comment.  Stay warm!  Have a great day!  Take care and Happy Stamping! 

40 Cards In 40 Days: Ombre Floral

Two Tone Floral Dies Card

It’s Day 1 of 40 Cards in 40 Days 2023!  During the 40 days of Lent I have challenged myself to make 40 cards! (I probably should send some of them too…) Do you want to take the challenge with me? Let’s do it! 40 cards is a lot. If you want to cut that down you could make 1 card a week during the six weeks of Lent and that would only 6 cards. Quite doable. No matter how many you choose to make let’s just create some cards and send some cards!

Today’s card is one I made for my niece earlier this month.  It is made with the Two Tone Floral Dies, the Fancy Flora Designer Paper and the Night of Navy 3/8” Border Ribbon.  All three of these items can be found in Stampn’ Up!’s January – April Mini Catalog.

The large die-cut piece is my favorite die from the die set.  It’s an odd shape.  It isn’t perfectly sized to fit on a 5 ½” x 4 ¼” card front.  I trmimmed about 1/8” from each side so that the “frame” around the the die-cut flowers would be even and so it would fit the card front better.  The “normal” size card in Europe is slightly different than those here in the United States so the die fits U.S. cards top to bottom and in Europe it fits side to side.  I thought that fact was quite interesting.

This die looks beautiful over any type of ombre coloring.  Ombre means “having a pattern in which colors or tones fade into one another”. This piece of designer paper from the Fancy Flora package works perfectly.  Once I trimmed down the die-cut cardstock I cut the designer paper the same size and adhered them together with liquid glue.  I then added the ribbon before adhere the designer paper/die-cut image to the front of the card.  And yes, I tied an actual bow on my card.  😊 Most of you know that it’s not something I do a lot.

To make my sentiment (from the Happiness Abounds stamp set) pop, I added a strip of Night of Navy cardstock behind it.  I also colored a couple of Rhinestone Basic Jewels with my Night of Navy Stampin’ Blends Marker to add to the label.

This card was easy to make as the only thing stamped was the sentiment.  Leave a comment and let me know what you think about today’s card.  Have a great day!  Take care and Happy Stamping!

A Friendly Gnome Valentine

Stampin’ Up!’s Friendly Gnome

I have a thing for gnomes. They’re just so dang cute! Since it’s already February, I need to be sharing valentines with you so here is a cute gnome valentine just for you!

The Friendly Gnome stamp set is pretty darn cute. Not only does it include three adorable gnomes, it also has some fun sentiments for love, birthday and spring!

Guess what? This gnome stamp set coordinates with the Gnome Dies that were featured in the July – December 2022 Mini Catalog and that are still available online! Ah, coordination! 🙂

This card was easy to make. The hardest part was choosing the colors for the gnome! The colors I used were Starry Sky and Real Red for both the paper and the Stampin’ Blend markers. The designer paper is from the 2022-2024 In-Color package.

I heat embossed the stamped gnome with clear embossing powder after stamping the image. I do this often because sometimes the lighter colors of Stampin’ Blend Markers bleed a bit when the image is just stamped with the Memento Black ink. This also makes it a little easier to color in the lines if you’re coloring challenged like me. Ha!

This is a cute valentine to send to just about anyone. I think I might send it to my dad. Who would you send it to? Leave a comment and let me know!

Have a great day! Take care and Happy Stamping!