Get Well Soup

IMG_7387Well, it’s that time of year.  The time of colds, flue and all around yuck.  Luckily (knock on wood) no one in my family has gotten sick yet.

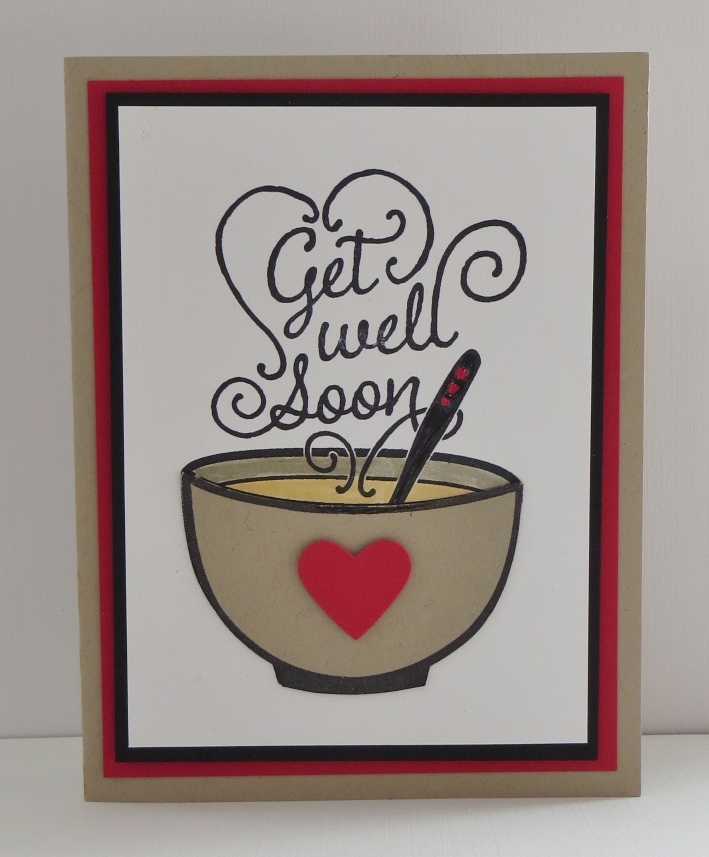
Since it’s “that time of year” it’s always good to have a few get well cards on hand.  This Get Well Soup stamp is perfect!  Isn’t it cute?  The hardest part of the card was figuring out the design.  I got this idea from my favorite source….Pinterest!

I didn’t want to color in the entire bowl so I stamped the image a second time on Crumb Cake card stock, cut out the front portion of the bowl and adhered it the image I had stamped on the Whisper White card stock.  Quite a creative idea if I do say so myself.  🙂

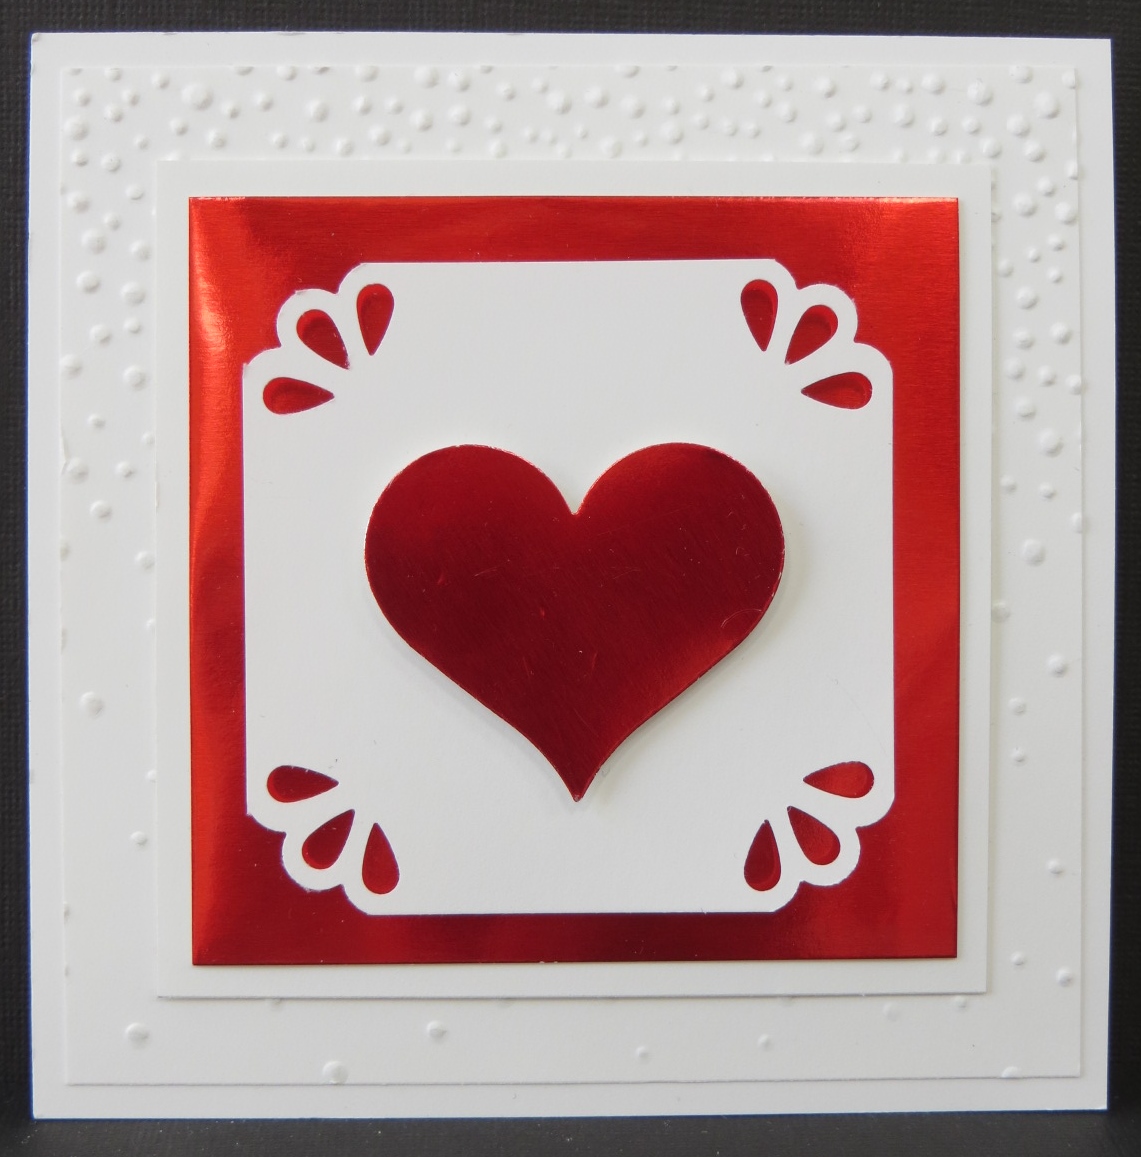
Unfortunately I had to use a retired product for the red heart.  Stampin’ Up! no longer has heart framelits but that’s what I used.  Oh, well….there’s a reason I don’t get rid of retired product!  Ha!

I’m hoping that I don’t have to use this card too soon.  Stay healthy, have a great weekend, take care and Happy Stamping!

Joyful Season

IMG_7384A beautiful and simple card.  This is a great card because it can be a Christmas card or a card for almost any occasion.  We actually made it this week in class.

I was suppose to have three classes this week, two on Tuesday and one on Wednesday.  Unfortunately the weather didn’t cooperate.  I knew I’d wake up to snow on Tuesday but I didn’t quite realize how much.  I got up early to shovel a little but the further along I got the more I realized no one would want to come out in this mess.  At 7:30 am we probably had 8″-10″ of snow already and it was still snowing.  We ended up with close to a foot of snow.  I did cancel both classes on Tuesday and had only 3 people show up on Wednesday.  That’s ok.  It really is a bit close to Christmas.

Christmas….YIKES!  It’s only a week away!  I’m not ready!!!!!

Back to the card…..I fell in love with this cardinal when I first saw it in the catalog but I wasn’t sure what to do with it.  I didn’t use it on any Christmas projects but I wanted to use it before it goes away on January 4th so I came up with this card.  I wanted something pretty easy.  I’ve figured out that my favorite 4 1/4″ x 4 1/4″ size works perfectly for easy!  🙂

A few fancy punches on the corners and this card goes from easy to WOW!  Did you notice that I used two of the punches on the Curvy Corner Trio Punch?  One on the Early Espresso piece and one on the white piece.  It’s becoming one of my favorite punches.

I think this card will be perfect for winter birthdays, thank you notes or almost any occasion.  OK…I have to ask….did anyone notice that I forgot to stamp the beak?  Yikes!  I did remedy that before class but never got another picture taken.  Oh, well….

Have a great day!  Take care and Happy Stamping!

Built for Free Using: My Stampin Blog

Flurry of Wishes Gift Card Holder

IMG_7373Some people like giving gift cards, some people don’t.  Some people like receiving gift cards, some people don’t.

I kind of like giving and receiving gift cards.  At least with a gift card you can’t buy the wrong thing or get the gift in the wrong size or color.  The recipient can get exactly what they want.  As the recipient of a gift card I can get exactly what I want.  I especially love gift cards for e-books!

If you like to give gift cards then you really must have an attractive gift card holder, right?  I got the idea for this gift card holder online from another talented demonstrator.  I love when those talented stampers share their ideas!  🙂

IMG_7374This gift card holder starts with a Sketched Dot Tag a Bag.  Simple!  Just score and fold and you have two pockets.  One pocket for the gift card and one pocket for a little card to put your sentiment on.

To begin with, score your bag at 3″.  With the bag in front of you fold the bottom edge up along the score line.  You don’t need to use adhesive to adhere the bottom portion of the bag to the top to form your front pocket.  Your decorated belly band holds the bag together.

The sentiment card for the back pocket is 3 3/4″ x 4 1/4″.  I decorated the top corners of mine with the new Curvy Corner Trio Punch.  The other piece of card stock for the front pocket is 5 3/4″ x 4 1/4″.  Score at 3 3/8″ to from the pocket.  You will need to use adhesive on the edges of this to form the pocket.

This gift card holder is pretty quick and easy to make depending on how fancy you get with your belly band.  I’ll probably be making a few more before Christmas arrives!

Have a great day!  Take care and Happy Stamping!

Built for Free Using: My Stampin Blog

Sneak Peek: It’s My Party

IMG_7408At Stampin’ Up!’s recent On Stage events we got introduced to many of the new products in the upcoming Occasions Catalog.  Not only did we get to see them, we got to play with them.  We didn’t actually make full projects, we just made parts that we could use on our own projects.

On today’s project I made everything but the Melon Mambo card.  The rest of the design is with all new products from the It’s My Party Suite.  This suite of course includes all sorts of fun products for birthdays!

The It’s My Party designer paper is bright and fun!  The best thing about it is that it comes in a pack of 48 sheets.  4 sheets each of 12 different designs.  This is especially great for us demonstrators that hold classes and need lots of designer paper!  🙂

Did you notice the three fun new punches?  It’s a new little punch pack that of course COORDINATES with the Party Wishes stamp set!  You know me, I LOVE coordination.  One of the great things about these new little punches and the stamp set is that the stamped image is slighty larger than the punch so you won’t end up with the white edge around your punched image.  BRILLIANT!

I know you’re going to love the new Occasions Catalog.  If you’d like a copy of it be sure to contact me.  You’re not going to want to miss out!

Have a great day!  Take care and Happy Stamping!

Adorable Punch Art Santa Tag

IMG_7381My bank has a branch in one of the local grocery stores so I had stopped the other evening on the way to choir rehearsal to make a deposit.  After making my deposit I had walked by the bank again and Santa was there!  He was right there at the bank!  There weren’t any little kiddos around but all of the adults in the area were smiling.  It was quite a fun sight.  You just have to smile when you’re around Santa, right?  🙂

Well, this little Santa tag makes me smile too.  I received one as a swap while I was at the event in Dallas last month.  It uses about a gazillion punches but it’s pretty easy to make.  The fun part is making his beard and moustache out of the Bow Builder Punch.  Another creative person on the loose again.  I would never have made anything but a bow with Bow Builder Punch.  You?

You’ll definitely want a package of Mini Glue Dots around when you put this little tag together.  You use a ton of them!

Here’s a run-down of the uses for the different punches you’ll use on this card:

Bow Builder Punch: Moustache and Beard
Tree Punch: Hat
Word Window Punch: Hat Brim
Note Tag Punch: Tag, Face
Owl Builder Punch: Nose
¼” Handheld Punch: Eyes
Tree Builder Punch: Pom Pom on Hat

Have a great day!  Take care and Happy Stamping!

Built for Free Using: My Stampin Blog

Home for Christmas Designer Paper Card

IMG_7321This is a swap I received in Dallas.  The images are all from the Home for Christmas Designer Series Paper.  I’m going to admit this….I do not like this paper.  It’s a bit old fashioned for me.  I do however like this card which is why I’m sharing it with you.

This card must have been a lot of work.  All of the images had to be cut out by hand….fussy cutting at it’s best (worst).  The little reindeer is pretty cute but definitely not my style.

I like how the designer used the starburst from the Kinda Eclectic stamp set underneath the focal point to add a little more pizzazz to the card and then of course the Red Foil Sheet “merry” makes everything pop.

Today’s the last day of the Online Extravaganza.  Get your shopping done here!  It’s also the last day of November which means I really need to start thinking about Christmas.  I did get all of my Thanksgiving items put away but now I need to start the Christmas decorating.  I know a number of people who already have their trees up and decorated.  Are you one of them?  🙂

Have a great day!  Take care and Happy Stamping!

Sparkly Flurry of Wishes

IMG_7319It’s a chilly and overcast day here in CO so I thought some sparkly snowflakes would cheer us up!  🙂

This card was designed by my friend Glenda who joined Jan and I in Dallas for Stampin’ Up!’s On Stage event earlier this month.  Isn’t it pretty?  All of the snowflakes are embossed.  The silver foil sheet and the jewels add that sparkle I am in need of today.

I’m still recovering for food overload.  We had a little over 20 people for Thanksgiving dinner the other day and then 12 of them returned last night for our annual “Leftover Night”.  Yep….in our neighborhood we kind of have two Thanksgiving dinners.  It’s a tradition we started when we first started celebrating Thanksgiving together almost 20 years ago.  Next year will be 20 years exactly so we may have to think of something special to help us celebrate.

What do you all do for Thanksgiving?  Family?  Friends?  Both?  My mom and dad joined us from the MN Homeland this year.  That was pretty nice.  I tell you though…I’m still exhausted….my mom doesn’t stop.  She’s kind of like the Energizer Bunny.  She keeps going and going and going.  We did get a chance to play a couple of games together though so that was nice.  She even joined my church choir for the service Tuesday night and sang with us.  Mom and Dad haven’t been out here to CO since my son got married 2 years ago.  They were do and they’re lucky to be healthy enough to do it.

I hope you all had a wonderful Thanksgiving however you celebrated.  Take care and Happy First Day of Advent……Christmas is coming!

P.S.  Don’t forget that tomorrow is the last day of Stampin’ Up!’s Online Extravaganza!  Get those deals while you can!

To You & Yours Shaker Card Kit

IMG_7314I was finally able to hold my Shaker Card Kit classes this week.  This kit has been so popular that it’s been on backorder forever!  They’re finally in stock!  Woo Hoo!

With this kit you make 6 each of these three different designs.  They’re really fun to make and shaker cards just make a person smile!  🙂

You do need the coordinating stamp set and three different ink pads along with liquid glue and mini glue dots to complete the kit.   Everything else needed for the cards is included.

Everyone in class had a fun time making them.  I would definitely make them again.  Hmmm….maybe I should order another kit…

Have a great day!  Take care and Happy Stamping!

Built for Free Using: My Stampin Blog

Perfect Pines Framelit Swap Card

IMG_7331One of the fun parts of Stampin’ Up! events is the swapping.  This is where you make a bunch of cards (or just the front) and then trade or swap them with other demonstrators for their cards.  It’s a fun and easy way to get new ideas.

This card is my friend Jan’s swap card.  She’s the one I traveled with and hung out with last week.  Jan used the Perfect Pines Framelits on this card.  The great thing about this framelit set is that it COORDINATES with the Peaceful Pines stamp set!  I love when Stampin’ Up! makes my life easier!  🙂

Don’t you love the way that the tree on the left looks 3D?  The “pine boughs” were made with a framelit!  You die cut the tree from your card stock and then you run the die cut tree through the Big Shot again with another die that makes the “boughs”.  Amazing!  🙂

Jan and I left for Dallas last Wednesday even though the event wasn’t until Saturday.  We wanted to do a little site-seeing as well as just relax.  Since we knew we’d have plenty of down time we decided to work on our swap cards in Dallas.  We did all of the stamping and cutting and home but put our cards together in Dallas.  A nice and relaxing time.

Have a great day!  Take care and Happy Stamping!

Built for Free Using: My Stampin Blog

November Valentine!

IMG_7013What?  A valentine in November?  What am I thinking?

Well, if you’ve been following my recent posts you know that I’m in Dallas for a Stampin’ Up! event.  We demonstrators like to exchange ideas at these events by making cards that we share with each other.  This is the card I’m swapping.  Do you like it?  🙂

I was having a hard time deciding on what type of card to swap at this event.  There’s still plenty of time until Christmas so I could have used any of the fun Christmas products in the Holiday Catalog but I wanted something a little different.  I looked through the main catalog and at all of the stamp sets sitting on my shelves but nothing jumped out and grabbed me.  Then I happened to see the Red Foil Sheets in my stamp room and inspiration hit!  A Valentine!  Not just any valentine.  This valentine uses three products from the Holiday Catalog.  Yep.  Three!  Can you spot them?

Well, the first is my new favorite embossing folder:  Softly Falling.  The next is one I’ve already mentioned:  the Red Foil Sheets.  The final one is the new Curvy Corner Trio Punch.  If you haven’t played with this punch you need to give it a try.  Three punches in one!  All of this goodness in my favorite size card!

I’ll definitely share some of the fun I’ve had today over the next few days so stay tuned.  Don’t forget that you can check my Facebook page also to see what I’ve been up to!

Have a great day!  Take care and Happy Stamping!

Built for Free Using: My Stampin Blog

Lighthearted Leaves Squared

IMG_7009I’ve been showing you Christmas cards for over a week straight and then I go and throw another fall card at you!  Ha!  I just want to keep you on your toes!  🙂

I just can’t seem to get enough of these square cards.  4 1/4″ x 4 1/4″.  Definitely my new favorite size card.

This card is one that I was going to make for my swap at the Stampin’ Up! event in Dallas until I made the valentine that I’ll share with you tomorrow.  I had made little 3″ x 3″ thank you notes for my customers using this little colored leaf.  I liked it so much I thought I should try it on a larger card.  I first tried it on a regular size card but it just didn’t look right.  Then the light bulb went off above my head (don’t you love when that happens?!) and I put the leaf on my favorite size card!  Ta-da!  A swap-worthy card!

Of course, after all that thinking and designing I decided not to use it for my swap.  I won’t even mention that I had actually cut all the card stock and THEN decided not to use it.  Yikes!  I really like the card I’ll show you tomorrow though.  Definitely worth putting this one aside.

I love the when the leaves in this stamp set are colored in.  They turn out so nice.  When I was working on this card I couldn’t decide how to color it in.  When I used markers for both colors it was just too overwhelming and if I used a blender pen and ink it looked too washed out.  So I compromised!  I used the Cajun Craze marker and the Delightful Dijon ink with a Blender Pen.  Perfect!

Have a great day!  Take care and Happy Stamping!

Built for Free Using: My Stampin Blog

Joyful Season

IMG_6997Here’s a Christmas card that you can easily change the sentiment to make it a card for any occasion.  Yes, the red berries do kind of make you think Christmas but you could have a “thinking of you” or something on the card.

I saw a card similar to this on Pinterest and thought it would make a good card for class.  It’s fairly easy (after I did the embossing and die cutting for everyone!) and just a nice card for the holidays.  This is another one of the Stamp-a-Stack cards that needed embossing.  I couldn’t stand the look of plain white card stock so I got out my Woodland Embossing Folder.  Don’t you love how the embossed trees COORDINATE with the stamped tree branch?  Ha!  Sometimes I scare myself when I notice these things!  🙂

I do want to get this stamp set out again soon and play with it.  The cute cardinal in it is just screaming to be stamped!  Unfortunately I haven’t had a lot of time to play this fall.  Hopefully I can play a little with my stamps when I return from Dallas.  Of course by then I’ll be all excited by the new Occasions Catalog that I’ll have a peek at……

Have a great day!  Take care and Happy Stamping!

Built for Free Using: My Stampin Blog

Among the Branches Christmas

IMG_6996Today I’m off to Dallas for one of Stampin’ Up!’s On Stage Local events.  It’s their first event of this kind so it will be fun to see what they have in store for us.  The event is on Saturday but my friend Jan and I are going on Wednesday to hang out and do a little site-seeing.  Be sure to follow me on Facebook to see what I’m up to and what Stampin’ Up! has in store for us.

Today’s card is the first of the cards I designed for my Stamp-a-stack class.  Those gals that came to the class made 15 cards (3 each of 5 different designs).  The cards are fairly easy so they can get them all done.  In a Stamp-a-stack I usually don’t have any Big Shot work on the card.  However….some of the cards, like this one, just screamed to have the Softly Falling embossing folder used on them.  So…I did all the embossing for everyone.  Yes, it was a lot of cranking on the old Big Shot but it wasn’t too bad because I did it last week on Halloween while I was waiting for the munchkins to show up.

Are you getting tired of hearing me say how much I like my cards?  Well, here’s another one.  This card is just plain pretty.  I especially like the little “bow”.  Yes, I saw it on Pinterest!  Where else would I get an idea?  🙂

Have a wonderful day!  Take care and Happy Stamping!

Built for Free Using: My Stampin Blog

Shiny Embellished Ornaments

IMG_6977Yesterday’s card was sparkly, today’s is shiny.

I’m loving the Red Foil Sheets.  Gorgeous!  I’ve used the silver and gold foil sheets in the past and liked them but there’s something about the red.  Love it!  I’ve actually designed a valentine card using the red foil that I’ll share with you later this week.  I know….it’s not even Thanksgiving and I’m talking about valentines!  Well, on Wednesday I’m heading to Dallas for a Stampin’ Up! event and the valentine is my swap card.  I could have designed a swap using one of the stamp sets in the Holiday Catalog but I just wanted to do something a bit different.

So, I love this card too, just not as much as yesterday’s card.  I’ll be making some of these for my Christmas cards too.  Isn’t this detailed ornament beautiful?  So intricate.  This card really wasn’t difficult.  I die cut the ornament directly out of the piece of Whisper White that has the sentiment on it.  That sheet is adhered to the red foil with Stampin’ Dimensionals.  Then I adhered the ornament directly to the foil so it looks set it in.

So, how do you die cut the ornament without having to poke out all of those little bitty pieces?  Here’s my secret….dryer sheets.  Yep.  Dryer sheets.  Regular old dryer sheets.  Here’s the order of all the pieces and parts:  1.  magnetic platform  2.  cutting pad  3.  dryer sheet  4.  card stock  5.  wax paper  6.  die  7.  cutting pad.

This technique is great.  Most of the little bitty pieces stick to the dryer sheet and the wax paper prevents the ornament itself from sticking in the die.  You really need to try this.  It works great!

Have you started your Christmas cards yet?  What stamp set are you using?

Have a great day!  Take care and Happy Stamping!

Built for Free Using: My Stampin Blog

Sparkly Wonderland

IMG_6971I.  LOVE.  THIS.  CARD!

Yep, this is one of my Christmas cards this year.  As soon as I finished the sample I knew it was “THE” card.  In fact, I’ve already made over 20 of them.

The title of this post says sparkly and I’m sure you’re wondering where the sparkles are.  First of all I started with Shimmery White card stock.  Then I used my Dazzling Details again to add sparkle to the edge of “snow bank”.  I also used it lightly on the trees.  Of course the Gold Foil Sheet and the gold ribbon add a little  shimmer too.  If I do say so myself, this card is gorgeous!  You do have to see it in person to catch all the shimmer and shine.

I am going to admit that I got the general idea for this card from my favorite source…Pinterest!  I did have to add a few more layers and such though….you know me!  🙂

Where do you get the ideas for your projects (other than my blog of course!)?  Let me know.  I’d love to hear from you.

Have a great day!  Take care and Happy Stamping!

Built for Free Using: My Stampin Blog