Color, Color Everywhere!

Add title

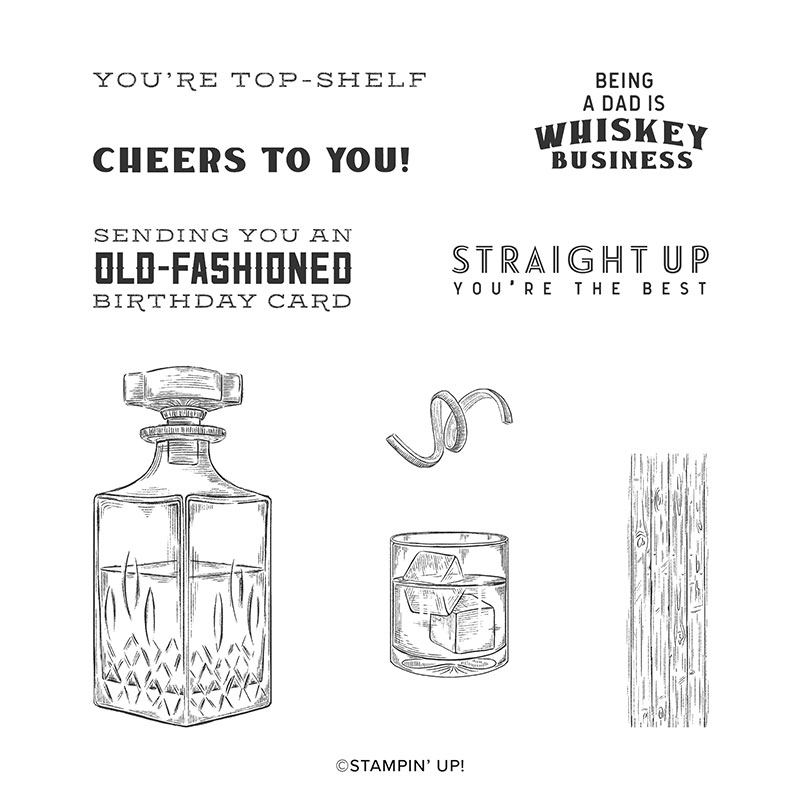
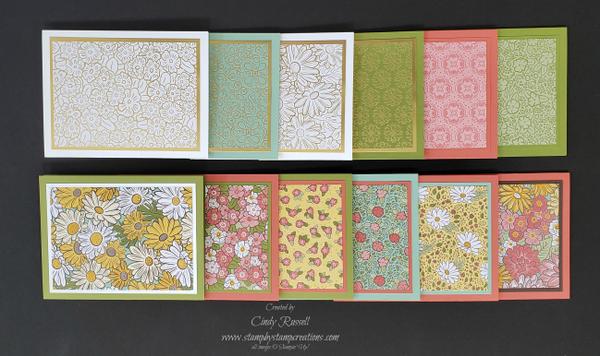
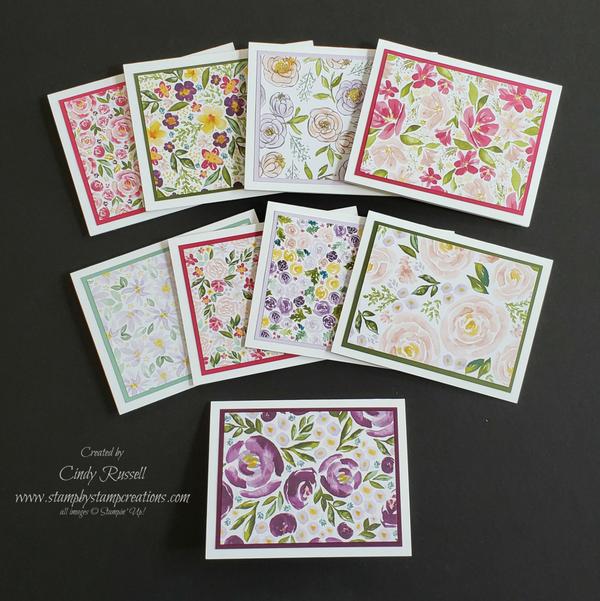
Stampin’ Up! is all about color. They’ve got their core colors that work so well together and they also have the In-Colors that they change up every year to stay current.

How many colors does Stampin’ Up! have in any one year, including the In-Colors? If you said 50 you are correct. There are 4 color families with 10 colors in each family and then there are 10 In-Colors. This does not include Basic Black and Whisper White.

With so many Stampin’ Up! colors to choose from at any one time do you have a favorite? I do! But I’m not going to tell you what it is until the end of them month!

I’m not going to tell you because July is my birthday month and throughout the month we’re playing “How Well Do You Know the Birthday Gal?” On my blog here and on my Facebook Page I’ll randomly be posting questions about me! If you know the answer or would like to make a guess just leave a comment with your answer/guess. A points will given for leaving a comment and 3 points will be given for the correct answer! Of course there will be a prize at the end of the game!

My question today is actually 2-part…

  1. What is my favorite color? (generically)
  2. What is my favorite current Stampin’ Up! color?

And yes, points will be given for both questions. 😀

Leave a comment now and answer the questions for you chance at a prize I think you’ll enjoy. Have a great day! Take care and Happy Stamping!

Golden Birthday Card

It’s Throwback Thursday AND it’s my birthday month so I definitely had to find an old birthday card to share with you!

This fun card is from 2 1/2 years ago! January 2018! Can you believe it? I love all of the gold on the card from the designer paper and gold foil sheet to the embossed image and edging on the ribbon. Too fun!

You can check out the original post here to find out how I made this card and where I got the original inspiration. The stamp set used on the card was called Celebration time and of course had coordinating dies. I should have hung on to this bundle I’m really short on birthday stamp sets for some reason. I guess I’ll need grab my catalog and do a little shopping. 😀

What birthday stamp sets do you have on your stamp shelf? I’d love to hear so please leave a comment.

Have a great day! Take care and Happy Stamping!

Step Up Your Projects!

It’s time for another Cruise the Catalog tip! With the “Step It Up” features in Stampin’ Up!’s new annual catalog you can see how to “step up” your projects. You will find a number of these features throughout the catalog showing you how to make a lovely basic card. Add a little more detail on the second card and go for the WOW factor on the third card.

Step It Up

As you can see in the photo above, all three cards have the same design. Different elements were just added to the second and third cards to take them to the next level.

This is a great feature to help you step outside your box and maybe try a little something different on your next card. I do this a lot when I’m designing. I will make a perfectly lovely card but want to add just a little something-something to it as it’s not quite what I envisioned originally. In the first card below you can see the first card I had designed for my dad’s birthday. Nice card and it would have worked fine. It just wasn’t quite what I was going for.

Mountain Air 1

I liked the basic layout of the card with the Birch background and the oval of mountains. I guess I was looking for a little more color so I switched a few things around a came up with this second card.

Mountain Air 2

As you can see, the second card isn’t all that much different from the first card. I kept the exact same layout with the Birch background and the oval of mountains. I just switched the card base color and added the same green to the oval of mountains. I then moved the sentiment to the inside of the card. Same card…just a little stepped up with a little more pop.

Give this a try next time you’re making a card….unless of course that first card is exactly what you envisioned. 🙂

Check out the Step It Up features in Stampin’ Up!’s catalog and see how just a few little additions can change up the card. The Step It Up feature that I showed you at the beginning of this post can be found on page 75 in the catalog. Leave a comment and let me know how many others you find.

Make It Mine Monday: Whiskey Business

Whiskey Business

My husband is a whiskey fan so when I saw the Whiskey Business stamp set in Stampin’ Up!’s new annual catalog I just knew I had to get it! It was the perfect card for a Father’s Day card!

My Whiskey Business

It’s Make It Mine Monday and that means that I got my inspiration for this card from somewhere else. I knew this stamp set would make the perfect Father’s Day card for my husband but I didn’t know where to start. It was time to head to Pinterest and the Demonstrator Planning Place Facebook Page (yes, there’s a whole FB page where we demonstrators share ideas….it’s great!). However, I didn’t find any inspiration. Then I headed to the place I should have started with….Stampin’ Up!’s Annual Catalog! Duh! The catalog is filled with ideas and inspiration and all I had to do was look up the stamp set name in the back of the catalog and head to page 33. There it was. The inspiration I was looking for.

Whiskey Business – Stampin’ Up!

I liked how the artist of Stampin’ Up!’s card placed the decanter and glasses. I did try out the designer paper but decided I wanted a cleaner look. Then of course I didn’t use the label for the sentiment because I didn’t have that die set (Tasteful Labels #152886 $31). Of course now I’m thinking I need this die set because there are so many interesting label shapes in it! Ha! I used the “straight up you’re the best” sentiment on the inside of my card along with a glass.

The images were stamped on the Fluid 100 Watercolor Paper with StazOn ink and then I watercolored the whiskey. I used a combination of Cinnamon Cider and Bumble Bee ink refills for my whiskey. I think it lighted a little more than I thought it would so I could probably have used a little more of the Cinnamon Cider ink on it.

The decanter was stamped directly on my focal point. The glasses were stamped and colored on scrap pieces of the watercolor paper and then cut out. I adhered one of them with Stampin’ Dimensionals to make it pop a little and the other with Mini Glue Dots. I used the new Brass Foil Sheets on my border layer. It’s a real nice color between the Copper and the Gold.

This was a pretty easy card once I had it designed. The hardest part was figuring out how to watercolor the whiskey.

Have a great day! Take care and Happy Stamping!

How Sweet It Is!

Stampin’ Up!’s Simply Citrus All-Inclusive Card Kit is SWEET! The images are fun and the kit is so easy to make! In this kit you get everything you need to make the 15 cards (3 each of 5 different designs) except for scissors and a ruler. I enjoyed making the cards in this kit so much that I want to share it with you. Yes….there’s that whole Covid thing and social distancing so we’re going to have a virtual card class! An on-line class on Zoom!

I am so excited about this class!  If you’ve not heard of Zoom or aren’t sure how it works just let me know and I can fill you in.  It’s quite easy to participate and the best things about it is that there is no limit to the number of participants and you can join the class even if you’re not local! 

Here’s how it all will work: 
* we will all purchase our own Simply Citrus Card Kit
* we will all meet on Zoom 
* we will all make are own cards 

During the class we will make one of each of the five cards and I will supply tips and tricks for each card along the way as well as sharing alternatives for the cards. Once you are registered for the class and have purchased your Simply Citrus Card Kit I will be emailing you a document with step by step directions with photos for each card as sometimes the directions provided with the kit aren’t quite clear. 

There is no fee for the class itself.  You just need to purchase the kit.  You are welcome to purchase the kit and receive the step-by-step instructions even if you don’t want to (or can’t) attend the virtual class. The class will be recorded so if you can’t make the class or would rather not participate at the time you will have access to the recording. 

Details: 
Simply Citrus Virtual Zoom Card Kit Class Tuesday June 30th  6:30 pm 

Registering for the class: 
Please contact me by email if you would like to sign up for the Simply Citrus Card Kit Class.  The deadline to sign up is Sunday, June 21st. 

Purchasing the Card Kit:    
You are welcome to place your own order from my online store to purchase the card kit along with whatever other items you want to purchase.  If you do place the order yourself please place your order within the next few days as shipping from Stampin’ Up! is taking a lot longer than usual.  If you place your own order I can’t guarantee that you will receive your kit prior to the class.    

If you are local, I will be placing an expedited order on Monday, June 22nd.  I should have this order on Wednesday.  I can deliver the kits or you can pick them up from me.  If I am ordering the kit for you I must have payment from you by June 21st.  The cost for kits ordered by me will be $32 + shipping and handling. 

The Simply Citrus Card Kit is fun and easy to make.  Be sure to contact me prior to June 21st if you’d like to participate!  Have a great day!  Take care and Happy Stamping!

So Sentimental Get Well Card

I love the So Sentimental stamp set and the coordinating Stitched So Sweetly dies. This is one of my favorite bundles from the most recent Occasions Catalog. Guess what? You can still get these items as a bundle in the new Annual Catalog! You should really check it out.

So Sentimenal

I really like this sentiment. It’s hard to find a sentiment for healing instead of get well. To me, “get well” is for a sickness, not healing. This saying as well as the other ones in the stamp set fit perfectly in the label dies from the die set. Then, there are the fabulous stitched, scalloped, rectangle dies in the set. Wow! This set of dies is amazing….a definite must have!

This bundle pairs really well with Stampin’ Up!’s gorgeous designer series papers. I made this lovely card for my cousin who just had knee surgery. So easy! Designer paper, a layer and a double label! That’s it! Of course don’t forget the designer paper on the inside of the card!

Don’t you love this designer series paper? This design is from the Forever Greenery Designer Series Paper in Stampin’ Up!’s Annual Catalog. Aren’t the colors great? Of course I love it because one of my favorite Stampin’ Up! colors is Pretty Peacock which I used on this card.

The little jewels definitely finish off the card. They are the Elegant Faceted Gems. In the package you get this pearlescent white, petal pink and clear faceted gems. They’re very pretty. They are part of the Peony Garden Suite (which I can’t wait to share with you!).

I hope you enjoy this fun and simple card. You can make it with any designer series paper. Have a great day! Take care and Happy Stamping!

Shop The Project

One of the new little tidbits from Stampin’ Up!’s new annual catalog that I want to share with you is “Shop the Project”. This is a little blurb next to some of the projects in the catalog that tells you a few of the items that are used on the project.

Shop the Project

In the image above (which you’ll find on page 13 in the catalog) you can see a beautiful project . Below the project it lists the embossing folders that were used on the project. It also gives you the page number where you can find each embossing folder as well as the item number and price for each folder.

You can also see the outline with the words “Shop the Project” around the products and right near the project. You’ll find this little outline with “Shop the Project” throughout the catalog. It’s a great way to find out a little more about the products used on certain projects.

The many samples in Stampin’ Up!’s new 2020-2021 Annual Catalog are amazing! Did you know that I have access to the “recipes” for these projects? If there is a certain project that you’d love to recreate and would like to know what items were used on it as well as tips on creating it just let me know. I’m happy to share. This access is one of the many perks of being a Stampin’ Up! Demonstrator.

Did you know that during the month of June new demonstrators can pick a FREE Bundle from the catalog to add to their Starter Kit? Not only do you get to choose $125 in merchandise for only $99 but you can add on ANY Bundle found in the catalog! That’s a pretty good deal. On average, that would be an additional $50 in merchandise! Contact me if you’d like more information on this fabulous deal and opportunity!

Have a great day! Take care and don’t forget to check out the “Shop the Product” feature in the new catalog!

Celebrate Sunflowers

One of the first stamp sets in Stampin’ Up!’s new Annual Catalog that caught my attention was Celebrate Sunflowers from the Flowers For Every Season Suite (pages 10-13). Sunflowers make me smile so I knew I needed this stamp set bundle in my life.

Today is Monday and I had intended to do a Make It Mine Monday post where I take someone else’s card and switch it up a bit and call it my own. I started with really good intentions after viewing Mary Fish’s beautiful card below.

I love the way she die cut the Early Espresso for the center and outline of the flower and layered it over the Bumblebee cardstock to make her flower. Don’t get me wrong, I love her entire card but when I finished my rendition that was about the only similarities that our cards have.

I like my card and I’m very pleased with the way it turned out but other than the sunflower itself and maybe the Whisper White layered on Early Espresso, our cards are not that similar. I was definitely inspired by Mary’s card but the card I created is definitely my own. And that’s okay.

Celebrate Sunflowers

As you can see from the picture, I didn’t adhere the entire outline die to the solid sunflower. I just used adhesive on the center of the outline piece. The outline is very fine so you’d have a hard time even using a glue pen to add glue. I could have used an adhesive sheet when I die cut the image but I wanted mine to pop up a little on the edges.

Are you wondering about that fun background on the Whisper White cardstock? I used the Old World Paper 3D Embossing Folder on it. It’s from the Old World Suite in the catalog and you can find it on pages 24 and 185. I can see myself using this new folder a lot.

The ribbon is the 1/4″ Faux Suede Trim from that same suite. You can find it on page 24 also as well as page 161. It’s really soft. Even though the ribbon and the embossing folder aren’t in the same suite of products as the Sunflower they sure do work well together!

Did you notice that I decorated the inside of my card as well as the envelope with the sunflower stamp? No naked envelopes! It’s always fun to try to add an image or some decoration to your envelope.

Be sure to contact me if you’d like the dimensions and/or directions for this card.

Have a great day! Take care and Happy Stamping! Smile!

Searching the Stampin’ Up! Catalog

Cruise the Catalog
Cruise the Catalog

Here’s the first episode of Cruise the Catalog! Today I want to share with you how easy it is to find things in Stampin’ Up!’s new 2020-2021 Annual Catalog. Here’s a quick video highlighting the different ways you can find things in the catalog:

Finding things in the new catalog

To quickly summarize the video:

  • Table of Contents that correspond to colored tabs
  • Alphabetical Stamp Index on page 189
  • Alphabetical Accessory Index on page 192
  • Search by category (animal, flower, masculine, etc.) in the search box in my online store

That’s it! Be sure to contact me with any questions you may have on finding things in Stampin’ Up!’s new annual catalog.

Today’s The Day!

Today’s the day! Stampin’ Up!’s 2020-2021 Annual Catalog is here! Not only can you view it online now but you can order from it now too! Woo Hoo!

There are a few things you should be aware of as you are scrolling through the online catalog and preparing your order:

  • The first thing to note is that the exciting new Stampin’ Cut & Emboss Machine and the Mini Stampin’ Cut & Emboss Machine that you may view throughout the catalog and on page 170 are not yet available for purchase.  The accessories for these machines found on page 172 aren’t available yet either.  These items will hopefully be available sometime within the next few months.
  • You can still purchase dies and embossing folders found on pages 173-185 as they will work with other die-cutting machines.
  • Due to the Covid-19 virus, social distancing and other health precautions Stampin’ Up! shipping is delayed.  You won’t be receiving your orders as quickly as you used to.  If you are in a hurry to receive your order consider using one of the expedited shipping options.
  • Some products may not be available when the catalog goes live or they may go on back-order or non-orderable status quickly.  This is because Stampin’ Up! may have issues in receiving products from suppliers.  You can find a list of some of these products here. There also may be quantity restrictions on some items like the ink refills for the new 2020-2022 In-Colors.

Stampin’ Up! appreciates your patience during these uncertain times as do I.  Please contact me if you have any questions on the new catalog, it’s products or shipping.  Have a fun time scrolling through the catalog!

Welcome to Cruise the Catalog!

Cruise The Catalog

During June’s Cruise The Catalog event I will be sharing Stampin’ Up!’s new 2020-2021 Annual Catalog with you.  I will be sharing with you in emails, Facebook Posts and Blog Posts things that I don’t want you to miss while looking at the new catalog.  I will be sharing videos, posts, and projects highlighting the catalog itself as well as the new products in it.

I won’t be sharing the same information on all platforms so you’ll want to check out all of them throughout the month.  I also won’t be sharing on all platforms every day.

  • You’re reading this on my blog so you’ve got that covered.
  • You can make sure that you’re on my mailing list by either emailing me (cindy@stampbystampcreations.com) with a request to add you or you can sign up right here on my blog. Just look for the sign-up box to the right of this post.
  • You can find my Stamp By Stamp Facebook page here.  Head on over and like the page so you don’t miss anything there.

I’m pretty excited about this cruise and I hope you are too!  Thanks for joining me!  Here’s to smooth sailing!  😀

If You Give a Mouse a Cookie…

I will admit it. I am like the little mouse in the children’s book “If You Give a Mouse a Cookie”. I get easily distracted on move on from one thing to the next. As I was making up the Simple Card Classes To Go kits for customer that ordered them I decided that I needed more. So, instead of finishing putting the kits together I got out my designer series paper and started creating again. I couldn’t stop!

Simple Card Classes To Go – Round 2

In the photo above you can see the variety of the new Simple Card Classes To Go that I came up with. There are kits for kids, guys and of course we have to have flowers! You can check out all of the new designs (and the previous ones I offered) right here. You can also find out the details on how to order the Classes To Go on this page.

I’ve had a lot of fun designing these classes. I hope you’ll have a lot of fun putting them together!

Have a great day! Happy Stamping! Stay Healthy!

Birthday Bonanza Treat Container

Yesterday I shared with you a fun birthday card made with Stampin’ Up!’s adorable Birthday Bonanza Suite. Today I want to share a treat container made with the same suite. My friend Jan designed this container for our March Stamp Camp that we had to cancel.

A fun treat container made using Stampin' Up!'s Birthday Bonanza Suite and a Starbuck's  frappuccino bottle.
Birthday Bonanza Treat Container

Isn’t this treat container fun? Jan outdid herself with this design. She loves creating treat containers with the Starbuck’s frappuccino bottles. Jan used the Bonanza Buddies stamp set, the coordinating Bonanza Dies, and the fun Birthday Bonanza Designer Series Paper from the Birthday Bonanza Suite. She also used my new favorite Stitched So Sweetly Dies. So many fun products on one little treat container!

Today is Tuesday so not only do I have this fun project to share with you but I have a Tuesday’s Tip for you! When stamping the fun little lion or koala bear from the Bonanza Buddies stamp set you want to stamp the face image with the eyes, nose and mouth FIRST. Since the stamps are so tiny, it’s easier to line up the head around the eyes, nose and mouth than it is to fit the eyes, nose and mouth into the little areas for these images.

In the photos above I first stamped the body and then tried to line up the face. As you can see, I was a little off. Now check out the photos below. Here I first stamped the eyes, nose and mouth and then lined up the body around those stamped images. So much easier!

That is Tuesday’s Tip! When stamping these cute little critters, stamp the eyes, nose and mouth first!

Have a great day! Take care, happy stamping, and stay healthy!

Birthday Bonanza: Make It Mine Monday

It’s Make It Mine Monday! Today I want to share a fun birthday card with you using the adorable Birthday Bonanza Suite. The products in this suite are perfect for kids of any age and it’s all about birthdays.

The colors in this suite just make you smile. Bermuda Bay, Mango Melody, Daffodil Delight and Terracotta Tile are the main colors. The suite consists of a stamp set, coordinating dies, ribbon, little pom poms and printed gusseted cellophane bags.

Birthday Bonanza Suite
Bonanza Buddies

The above card is mine but I completely CASEd it from Anne Marie Hile. If you look at Anne’s card below you can see that I really didn’t change much on my card. I skipped the sequins, used a different color of Baker’s Twine, simplied the left border on the designer paper and put the sentiment on the inside of the card.

I used most of the products in the suite on my card. The only two items that I didn’t use were the bags and the pom poms. Don’t these products just shout “let’s have some birthday fun!”. I definitely smile when I see these products. The critters are ADORABLE!

I hope this suite makes you smile as much as it makes me smile. Have a great day! Happy stamping and stay healthy!

New! Simple Card Classes To Go

Have you been looking for a simple craft project during this time of social distancing?  Do you want to send a handmade card to someone but don’t want to take the time to design one yourself? 

If you answered yes to either of these questions, I have a solution for you….my new Simple Card Classes To Go! The cards in these classes are full size note cards highlighting Stampin’ Up!’s gorgeous designer series papers.  No stamping involved!  All you need is adhesive!  All paper is cut and scored and ready for you to make your cards.  Envelopes and directions are included. Currently I have two different class kits designed and available for purchase: 

Image
Ornate Garden Simple Card Class to Go

The Ornate Garden Simple Card Class To Go

This class is designed using all 12 different designs found in the new Ornate Garden Specialty Designer Series Paper Pack.  The cost for this class-to-go is $20 for 12 cards.  

Image
Best Dressed Florals Simple Card Class To Go

Best Dressed Florals Simple Card Class To Go

This class is designed using the 9 floral designs found in the Best Dressed Designer Series Paper Pack.  The cost for this class-to-go is $15 for 9 cards. 

The deadline to order these two kits is Tuesday, April 14th.  This gives me time to order the supplies, cut the projects, and package everything so the kits can be available sometime the week of April 20th. Kits can be picked up from my porch, delivered locally or shipped via USPS priority shipping. 

f you’re looking for a stamp set to go with your kit that has a variety of sentiments my new favorite is the Peaceful Moments stamp set.  You can order it yourself in my online store or I can add it to your Class To Go order.  The stamp set would be an additional $24 with tax and shipping if ordering with your kit.

To order Simple Card Classes to Go please contact me via email, text, or phone (email address and phone number can be found below) and let me know the following information:

  • Name
  • What Kit(s) you would like to order
  • If you would like to add the Peaceful Moments stamp set to your order
  • Whether or not order will be shipped (USPS Flat Rate Priority shipping is $7)
  • Email address for electronic invoice via Paypal or Square

I am excited about these new kits.  I hope you are too.  It’s an easy way to stay creating with you since we won’t be having in-person classes in the near future. 

Don’t forget that the deadline to order either of these classes is Tuesday, April 14th.  Please contact me with any questions you may have on my Simple Card Classes To Go. Take care, happy stamping, stay healthy! 

Cindy Russell
Stampin’ Up! Demonstrator
(303)903-2228
cindy@stampbystampcreations.com